Late level 1 plan

Resource logo
Level One
Integrated
Units of Work
This unit provides you with a range of opportunities to assess the entry level of achievement of your students.
  • Use groupings to efficiently count the number of objects in a set.
  • Create picture graphs about category data and discuss patterns in the data.
  • Create and follow instructions to make a model made with shapes.
  • Order a set of objects by mass (weight).
  • Create a sequential pattern and predict further members...
Resource logo
Level One
Number and Algebra
Units of Work
The purpose of this unit of sequenced lessons is to develop knowledge and understanding of combinations to ten.
  • Explore the numerals to ten.
  • Instantly recognise patterns within and for ten.
  • Make and record groupings within and for ten.
  • Recall and apply groupings to ten using te reo Māori.
  • Recognise the usefulness of just knowing combinations to ten.
  • Use an ‘if I know ___, then I know___’ approach to solving number...
Resource logo
Level One
Geometry and Measurement
Units of Work
In this unit we compare the lengths of ākonga soft toys directly, and then indirectly using non-standard measurement units.
  • Compare a group of 3 or more objects by length.
  • Measure length with non-standard units.
Resource logo
Level One
Geometry and Measurement
Units of Work
In this unit students compare the duration of events and learn to read time to the hour and half-hour.
  • Directly compare the duration of two events.
  • Use non-standard units to compare the duration of two or more events.
  • Tell time to the hour and half hour using analogue clocks.
Resource logo
Level One
Geometry and Measurement
Units of Work
This unit introduces some of the key concepts of position and direction in the context of a series of activities around mazes.
  • Use the language of direction to describe the route through a maze.
  • Use the language of direction to guide a partner through a maze.
  • Rotate their body and other objects through 1/4 and 1/2 turns.
  • Follow a sequence of directions.
Resource logo
Level One
Statistics
Units of Work
In this unit we explore ways to pose and answer investigative questions about our favourites by gathering and analysing data and discussing the results.
  • Pose investigative questions with support from the teacher.
  • With the teacher decide on how to collect the data to answer the investigative question.
  • Sort objects into categories for display.
  • Make a display of the data collected (pictograph).
  • Make statements about data displays.
Resource logo
Level One
Number and Algebra
Units of Work
In this unit of work we link the development of skip-counting patterns to bars on a relationship graph. We also plot our skip-counting patterns on a hundreds board.
  • Continue a skip-counting pattern.
  • Describe skip-counting patterns.
  • Use graphs to illustrate skip-counting patterns.
Resource logo
Level One
Number and Algebra
Units of Work
The purpose of this unit of five sessions is to develop the algebraic understanding that the equals symbol, = , indicates a relationship of equivalence between two amounts.
  • Review number expressions involving the operations of addition and subtraction.
  • Make and recognise combined amounts that have the same value.
  • Write statements of equivalence in words.
  • Read and write addition and subtraction equations.
  • Solve addition and subtraction balance problems and explain the...
Resource logo
Level One
Geometry and Measurement
Units of Work
In this unit students explore patterns involving transformations of shapes. Students make and identify patterns that involve translation, reflection, and rotation. They make their own patterns and pictures to show the transformations, and discuss with others how they included the different...
  • Make patterns that involve translations, reflections, and rotations.
  • Identify translations, reflections, or rotations in patterns.
Resource logo
Level One
Integrated
Units of Work
This unit consists of mathematical learning, at Level 1 of the New Zealand Curriculum, focused around celebrations of Matariki, the Māori New Year. The sessions provide meaningful contexts that highlight Māori culture and provide powerful learning opportunities that connect different strands of...
  • Assemble parts of a shape to form the whole.
  • Create symmetrical figures (reflection and rotation).
  • Calculate the number of direct ancestors they have.
  • Use fractions to create rhythmic percussion patterns.
  • Order events.
  • Describe the likelihood of outcomes using the language of chance.
  • Measures quantities...
Resource logo
Level One
Geometry and Measurement
Units of Work
In this unit ākonga participate in a variety of art based activities to develop their knowledge of 2-dimensional shapes. They use their own language to describe their works and the shapes they have used.
  • Name 2-dimensional shapes: triangle, square, oblong (non-square rectangle), circle, oval and diamond.
  • Describe shape attributes (sides, corners, curved and straight lines, edges, pointed) in their own language.
Resource logo
Level One
Number and Algebra
Units of Work
The purpose of this unit of sequenced lessons is to develop knowledge and understanding of the place value structure of numbers from ten to twenty.
  • Instantly recognise patterns for teen numbers.
  • Make groups of ten and represent teen numbers with materials.
  • Recognise and record words and symbols for teen numbers.
  • Understand that in a teen number the 1 represents one group of ten.
  • Expand teen number notation and understand simple place value.
  • Understa...
Resource logo
Level One
Geometry and Measurement
Units of Work
This unit involves the students directly comparing the weight (mass) of two or more objects.
  • Compare two objects by weight.
  • Order three or more objects by weight.
  • Describe the weight of objects using comparative language, for example, heavier, lighter.
Resource logo
Level One
Number and Algebra
Units of Work
This unit explores early multiplication where ākonga are encouraged to skip count to solve story problems, rather than counting all.
  • Skip count in twos and fives.
  • Skip count to solve simple multiplication problems with a sum of up to 20.
  • Solve simple multiplication problems in various ways and talk about how they found the answer.
Resource logo
Level One
Number and Algebra
Units of Work
In this unit we explore linear patterns using snakes as the context. We examine, construct and record snakes of different patterns. We also put scarves on our snakes and predict what is hidden.
  • Record patterns on grid paper.
  • Make predictions about ‘missing’ sections of a pattern.
  • Use words to describe linear patterns.
Resource logo
Level One
Statistics
Units of Work
In this unit we have a first look at uncertainty and chance. We begin to develop an intuitive sense of what chance and possibilities are about through games that involve following rules, making predictions and seeing what happens.
  • Use everyday language to talk about chance.
  • List outcomes of simple events.
Resource logo
Level One
Number and Algebra
Units of Work
This unit supports students to equally partition objects and sets into fractional parts.
  • Partition a length, area or volume into equal parts.
  • Partition a set into equal parts and anticipate the result.
  • Recognise that the numerator of a fraction is a count.
  • Recognise that the bottom number of a fraction gives the size of the parts being counted.
Resource logo
Level One
Number and Algebra
Units of Work
In this unit students explore different ways to communicate and explain adding numbers within ten and beyond. The representations included are number lines, set diagrams, animal strips and tens frames.
  • Draw representations to show simple addition equations.
  • Write an equation/number sentence to match their representation.
Resource logo
Level One
Geometry and Measurement
Units of Work
This unit encourages students to use measurement language and counting to compare the attributes of length, width or height of objects in a variety of game situations. The transition from counting all to advanced counting is also supported.
  • Use measuring language to compare length, width, and height.
Resource logo
Level One
Number and Algebra
Units of Work
The purpose of this unit of three session is to develop understanding of how to recognise and record relationships of (equality and) inequality in mathematical situations.
  • Understand the equals symbol as an expression of a relationship of equivalence, and explain this.
  • Recognise situations of inequality and use the inequality (‘is not equal to’) symbol, ≠.
  • Understand that < and > symbols can make equivalent statements.
  • Use relationship symbols =, <, > in equations and...
Source URL: https://nzmaths.co.nz/user/75803/planning-space/late-level-1-plan

All about us

Purpose

This unit provides you with a range of opportunities to assess the entry level of achievement of your students.

Specific Learning Outcomes
  • Use groupings to efficiently count the number of objects in a set.
  • Create picture graphs about category data and discuss patterns in the data.
  • Create and follow instructions to make a model made with shapes.
  • Order a set of objects by mass (weight).
  • Create a sequential pattern and predict further members of the pattern.
Opportunities for Adaptation and Differentiation

The learning opportunities in this unit can be differentiated by providing or removing support to students and by varying the task requirements. Ways to support students include:

  • having a range of different sized objects in containers for session 1.  Use larger objects for students who are beginning to count one-to-one and smaller objects for those who are more confident
  • reducing the number of activities covered in a session so that more time can be spent on the earlier ideas.  For example in session 5, ensure students are confident about identifying the next element in the pattern before connecting the pattern to ordinal positions
  • using a class recording book instead of the individual records that are suggested as part of each session.

The context for this unit can be adapted to suit the interests and experiences of your students. For example:

  • In session 1 use counting objects that can be found locally (shells, pebbles, acorns, leaves).
  • In session 2 use activities/sports that students in your class engage in. 
  • In session 3, te reo Māori vocabulary terms such as porowhita (circle), tapawhā rite (square), and tapatoru (triangle) could be introduced and used in this unit and used throughout other mathematical learning.
  • In session 5 create patterns using pictures of native birds such as Tuī and Kererū or natural materials found locally (shells, pebbles, acorns, leaves). 
Required Resource Materials
  • camera to record students’ work.
  • Session One – Countable objects, e.g. counters, cubes, toy animals, natural resources (shells, pebbles, leaves, acrons), post it notes or small pieces of paper. 
  • Session Two – Scissors, glue sticks, plastic containers (2L icecream if possible), large sheets of paper, copies of Copymaster 1 and Copymaster 2.
  • Session Three – sets of geometric shapes (pattern or logic blocks), pieces of card for labels.
  • Session Four – balance scales (if available) or make balances from coathangers, string and pegs (to hold items), kitchen scales, preferably that are sensitive to about 500g (optional).
  • Session Five – images and objects to form patterns, (images of native birds, natural resources (shells, pebbles, leaves, acorns), copies of Copymaster 3 to make pattern strips.
Activity

Prior Experience

It is expected that students will present a range of prior experience of working with numbers, geometric shapes, measurement, and data. Students are expected to be able to count a small set of objects by ones, at least.

Session One

In this first session students explore an activity called ‘Handfuls' which was first developed by Ann Gervasoni from Monash University, Melbourne. Handfuls could become a regular part of lessons during the year.

  1. Ignite the students' prior knowledge by asking them what they already know about mathematics. Discuss the purpose of the unit, which is to find out some information about the class and use it to help them with their maths learning.
     
  2. Begin the 'Handfuls' activity by modeling taking a handful of objects from a container. Place the collection on the mat in a disorganised arrangement.
     
  3. Estimate how many things you got in your handful (You may need to explain that an estimate is an educated guess).
     
  4. Ask your students to write the number on a small piece of paper and show it to you. This is a way to see who can write numbers, avoids calling out, and buys time for students to think.
    How can we check how many things there are?
     
  5. An obvious first approach is to count by ones. Organising the objects in a line then touching each one as it is counted is a supportive approach.
    A handful of acorns, with an arrow pointing to the same acorns organised into a line.
     
  6. Look for students to suggest other ways, such as counting in twos or fives.  Students can find skip counting difficult in several ways; not realising that counting in composites gives the same result as counting in ones, not knowing the skip counting sequence, and dealing with the ‘leftovers’. What to do with leftovers is an interesting discussion topic.
    Diagram showing acorns organised into pairs or groups of 5, with some left overs.
     
  7. Tell the students that you want them next to take their own handfuls.  Ask the students to record on paper how they counted their collection, particularly what groupings they used. Tell them to count their handfuls in at least two different ways. Try to take photographs of the handfuls for use in the group discussion.
     
  8. Observe as you wander around to see if students can:
    • Reliably organise their collections and count in ones
    • Use composites like twos, fives and tens to skip count collections
    • Use tens and ones groupings to count the collections, using place value.
       
  9. After all the students have taken handfuls and recorded their counting methods, use one of these two methods to extend the task:
    • Let students travel to the handful collections of other students, estimate or count how many things are in the collection, then compare their methods with that of the original student. The recording of the original student can be turned over then revealed after the visitor has estimated and counted.
    • Share the recording strategies students created as a class. Use photographs to drive discussion about the best counting strategies for given collections.
       
  10. Apply the counting strategies to two questions:
    • Can you get more in a handful with your preferred hand than your other hand?
    • Can you get more in a handful when the things are bigger or smaller?
       
  11. Discuss what their ‘preferred hand’ is, that is, are they right or left handed? You might act out taking a handful with your other hand and comparing the number of objects you got with your preferred hand. You might also demonstrate getting a handful or small things, then a handful of larger things. Ask students to predict what will happen, then go off to explore the two questions. Suggest recording on the same pieces of paper so they can compare other handfuls to the original attempt.
     
  12. After a suitable time, ask the students to re-gather as a class with their recording sheets. Discuss possible answers to the questions. Interesting questions might be:
    • What side are our preferred hands?
    • Do we always get the same number in a handful if we use the same hand?
    • How big are objects that are too hard to gather in a handful?
       
  13. You might make a display of the recording sheets for other students to look at. Other variations of the handfuls task might be:
    • Students try different ways to increase the number of objects they can gather in one handful.
    • Exploring one more or less than a given handful.
    • Using tens frames or dice patterns to support counting the objects in a handful.
    • Gather multiple handfuls and counting.
    • Sharing a handful into equal groups 

Session Two

In this session, called “Our Favourites” students explore category data and how it might be displayed. The data comes from their responses, so the displays provide useful information about the class. You may wish to replace the images provided in Copymaster 1 with images of sports that you know are popular with your students.

  1. Begin by asking the students to choose which of the sports shown on Copymaster 1 they like to play the most. Provide the students with copies of the strips to cut out the square of their choice. It is important that each student makes a single choice, cuts out the square and not the picture, and places it in the container in the centre.
     
  2. Once all of the data is in, tip the contents of the container on the mat.
    If we want to find out the favourite sport, what could we do?
     
  3. Students usually suggest sorting the squares into category piles. A set display like that is a legitimate way to present the data.
    Could we arrange the squares, so it is easier to see which sport has the most and the least squares?
     
  4. Students might suggest putting the squares in line with a common baseline (starting point). They might suggest a ‘ruler’ alongside, so it is not necessary to count the squares in each category. They might suggest arranging the categories in ascending or descending order of frequency and adding a title and axis labels.
    Graph showing the favourite sports of the students in Room 1.
     
  5. Create the picture graph on a large piece of paper by gluing the squares in place. Display the graph in a prominent place.

    The students will now choose other ‘favourites’ to use as data. Copymaster 2 provides some strips of favourites including favourite fruit, fast food, pet, vegetable, way to travel to school, and after school pastime. You may wish to create your own strips using ‘favourites’ that are relevant to your group of students.
     
  6. If using prepare copies of Copymaster 2, cut the copies into strips and put each set of strips with a container and several pairs of scissors. Spread the containers out throughout the room. The students visit each ‘station’ and make a choice by cutting out a square and putting the square into the container. You may need to discuss what each strip is about before students do this.
     
  7. Once the data gathering is complete put the students into small groups with a set of data to work on. Remind them to create a display that tells someone else about which category is the most and least favourite. Watch to see if your students can:
    • sort the data into categories
    • display the data using a common baseline and possibly a scale
    • label each category and provide a title for the graph
       
  8. After a suitable period, bring the class together to discuss what the data displays show. Can your students make statements about…?
    • highest and lowest frequencies
    • equal frequencies
    • patterns in the distribution, such as the way it is shaped
    • inferences about why the patterns might be, e.g. It is summer so people might like vegetables like tomatoes.

Session Three

In this session your students use the language of two-dimensional shapes to provide instructions to other students. The use of te reo Māori vocabulary for shapes could also be introduced and used within this session.

You need multiple sets of shapes. Ideally there is a set of shapes for each pair or trio of students. Attribute blocks are used below to illustrate the activity but other shape-based materials such as those below are equally effective.

“Make Me” is an activity that can be used throughout the year with different materials to develop your students’ fluency in using geometric language for shape and movement.

Pattern blocks.Logic (attribute) blocks.Geometric solids.
Pattern BlocksLogic (Attribute) BlocksGeometric Solids


  1. Begin by discussing the shapes in a set. Ask questions like:
    • What shape is this? How do you know?
    • What is the te reo Māori name for this shape?
    • What features does the shape have to have to be called a …?
       
  2. Draw students’ attention to features like sides and corners. You might also venture into symmetry if you have a mirror available.
    Where could I put the mirror, but it still looks like the whole shape?
     
  3. Use two shapes positioned together to draw out the language of position. For example:

    Diagram of a circle below a square.Diagram of a circle in front of a square.Diagram of a circle on the right side of a square.
    The porowhita/circle is below the tapawhā rite/square.The porowhita is in front of the tapawhā rite.The circle is on the
    right side of the square.
  4. Show students how to play the “Make Me” game. Create an arrangement of four shapes. Here is an example:
    Picture of an arrangement of four shapes.
     
  5. Ask students to give you instructions so you can make this arrangement using your set of shapes. Respond to what students tell you very literally. For example, if they say “The circle is on top of the square” you might put the circle in front of the square. An important point is that the person giving instructions cannot point or touch the blocks. Encourage the students to use the te reo Māori words for the shapes.
     
  6. Next, ask a student to arrange three or four blocks in a place that nobody else can see. Send a different student to look at the arrangement and come back to tell you how to make it. The instruction giver may need to make return trips to the arrangement to remember exactly how it looks. At the end, check to see that what you make matches the original arrangement.
     
  7. Students then work in pairs or threes, each with a set of shapes. You go to a place they cannot see and arrange a set of shapes. Be mindful of drawing out the need for students to use language about features of shapes (side, corner) and position (right, left, above, below, etc.). One student from each team is the instruction giver, the other students are the makers. The instruction giver views the arrangement and returns to the group as many times as they need. The makers act on the instructions. When they feel the arrangement is correct the whole team can check with the original. Make sure each student has an opportunity to be the instruction giver.
    Look to see whether your students:
    • give precise instructions using correct names for shapes, features and position
    • act appropriately to instructions for action with shapes.
       
  8. Students can independently make their own arrangements of shapes. Take photographs of the arrangements. Use one or two images to help students to reflect on the intentions of the session. Create a list of important words for display including the te reo Māori words (not all may be relevant to your set of shapes):
    List of important words to do with shapes and positions.
  9. Students could write a set of instructions to build an arrangement from a photograph. This might also be done as a class if the literacy demands are too high.

Session Four

In this session students compare items by mass (weight).

  1. Begin by asking students what the words light and heavy mean. Ask a couple of students to find a light object in the classroom and identify a heavy object. Young students frequently identify heavy as immovable so expect them to point out bookshelves and other objects they cannot personally move. 
     
  2. Get two objects from around the room that are similar but not equal in mass.
    How could we find out which thing is heavier?
    Students usually suggest that the objects can be compared by hefting, that is holding one object in each hand.
     
  3. You might have several students heft the objects to see if there is a consistent judgment.
    What can we say about the weight of these two objects?
    Look for statements like, “The book is heavier than the stapler,” or “The stapler is lighter than the book.”
     
  4. Create two cards with the words “lighter” and “heavier” and set them a distance apart on the mat.
     
  5. Next, get a collection of five objects of different weights and appearances.
    Let’s put these objects in order of weight. Who thinks they could do that?
     
  6. Let students come up and heft the objects and place them somewhere on the lighter to heavier continuum. Be aware of these issues:
    • Students may have trouble controlling the order relations. Ordering five objects by twos involves complex logic.
    • Objects of equal weight (or indiscernible difference in weight) occupy the same spot on the continuum.
    • Size, as in volume, is not a good indicator of weight. Small objects, such as rocks, can be heavier than big objects, such as empty plastic containers.
       
  7. After the five objects are placed on a continuum, give the students a personal task.
    I want you to find five things from around the classroom and put them in order of weight. You can use hefting if you want but we have other balances you can use. You will need to record for us, so we know the order of the objects.
     
  8. Let the students order their five chosen items and record their findings. 
    Look to see if your students can:
    • Recognise which of two items is heavier by hefting or using a balance.
    • Co-ordinate the pairs of objects to get all five objects in order.
       
  9. After a suitable time, gather the class to compare their findings and discuss issues that arose. Frequently, students are surprised that similar looking items do not have the same weight. Crayons, glue sticks and books are good items to illustrate the point that the same kind of objects does not mean equal weight.

Session Five

In this session students look for repeating patterns and connect elements in the pattern with ordinal numbers.

  1. Demonstrate creating four different repeating patterns using geometric shapes, images of native birds, natural materials, etc. At the end of each pattern progression ask questions like:
    • What do you notice about the pattern? (You are looking for students to see the element of repeat)
    • What comes next?
    • What object will be at … number 10? … number 15?... etc. (You are looking for students to apply generalisation about the element of repeat, e.g. All even numbers have a red square.)
       
  2. Ensure that patterns 3 and 4 have two variables and the sequence is different for those variables. For example, in pattern 3 geometric shapes could be used to show shape and colour variable (e.g. a yellow, red, yellow, red… colour sequence while shape could have a circle, hexagon, rectangle, circle, hexagon, rectangle, … sequence) and in pattern 4 images of native birds could be used to show animal and orientation variables (e.g. Kiwi, Tuī, Kererū, Takahe, … sequence while orientation could be a right, left, right, left, … sequence). 
     
  3. Provide students with a range of materials to form sequential patterns with. The items might include milk lids, blocks, toy plastic animals, locally sourced natural resources, images of native birds, geometric shapes, etc. Give them a copy of the strip that can be made from Copymaster 3 after it is enlarged onto A3 size (x 1.41).
     
  4. Let students create their own patterns. Look for students to:
    • create and extend an element of repeat
    • use one or more variables in their pattern
    • predict ahead what objects will be for given ordinal numbers, e.g. The 16th object.
       
  5. Take photographs of the patterns to create a book, and ask students to pose problems about their patterns.  Students can record the answers to their problem on the back of the page.
     
  6. Discuss as a class how to predict further members of a pattern. Strategies might include:
    • Create a word sequence for each variable, e.g. blue, yellow, red, blue, yellow, red... 
    • Use skip counting sequences to predict further members, e.g. If the colour sequence is blue, yellow, blue, yellow,… then every block in the ordinal sequence 2, 4, 6, … etc. is yellow.
Attachments

Making ten

Purpose

The purpose of this unit of sequenced lessons is to develop knowledge and understanding of combinations to ten. 

Achievement Objectives
NA1-1: Use a range of counting, grouping, and equal-sharing strategies with whole numbers and fractions.
NA1-3: Know groupings with five, within ten, and with ten.
NA1-4: Communicate and explain counting, grouping, and equal-sharing strategies, using words, numbers, and pictures.
Specific Learning Outcomes
  • Explore the numerals to ten.
  • Instantly recognise patterns within and for ten.
  • Make and record groupings within and for ten.
  • Recall and apply groupings to ten using te reo Māori.
  • Recognise the usefulness of just knowing combinations to ten.
  • Use an ‘if I know ___, then I know___’ approach to solving number problems.
Description of Mathematics

These lessons build upon the student’s recognition and knowledge of groupings within ten, to scaffold ready combinations and separations in numbers that make ten.

A goal within primary mathematics is for students to use partitioning strategies when operating on numbers. By building images and knowledge of these combinations at an early age, the ability to naturally partition larger numbers will be strengthened. Students should have many opportunities to combine and separate numbers to ten and come to clearly see and understand how these ‘basic facts’ are fundamental building blocks of our number system.

As they work with numbers greater than ten, students will develop knowledge of ‘tidy numbers’ and about ‘rounding to ten’. Students should be encouraged to know and have an intuitive feeling for "ten". Ultimately, they should be able to readily apply this knowledge in solving problems that involve partitioning and combining larger numbers and sets.

Our place value system has ten digits only. It is the place of a digit in a number that determines its value. Ten is the basis of this system. By having the opportunity to briefly explore other number systems (Roman and Mayan), and by considering notation to create their own system, students will better understand the numerals and number representations that we may take for granted within the base ten system we use.

The activities suggested in this series of lessons can form the basis of independent practice tasks.

Opportunities for Adaptation and Differentiation

The learning opportunities in this unit can be differentiated by providing or removing support to students and by varying the task requirements. Ways to support students include:

  • providing more practice with the tens frames to develop the students knowledge of the number facts to 10. Encourage them to subitise (to recognise, without counting) the number of counters and the number of gaps.
  • spreading  session 4 over two or more sessions if the students are unfamiliar with the Māori numbers to ten

The contexts for this unit can be adapted to suit the experiences of your students.  For example, numbers to ten in other languages can be used in this unit in response to the languages and cultures of your students.  For example: numbers from Pasifika cultures could be included in a similar way to how te reo Māori is used in session 4. 

Te reo Māori vocabulary terms such as mati (digit) and meka matua (basic facts) could be introduced in this unit and used throughout other mathematical learning.

Required Resource Materials
Activity

Session 1

SLO: Explore the numerals to ten.

Activity 1

  1. Make paper, crayons/felts, pencils, counters (or similar mathematics equipment) available to the students. Set a time limit as appropriate. Have the students write, draw and show you everything they know about ten.
     
  2. Have the students pair share their work.
     
  3. Write the word ‘ten’ and the numeral 10 on chart paper or in a modeling book. Collect and record the important ideas that the students have generated. Be sure to use words, symbols and drawings of equations, stories or materials.
     
  4. Highlight the fact that in our systems we have ten digits which we ‘reuse’ (for example, the number 10 is made up of the numbers one and zero). On the board show the students 1, 10 and 100 as an example. 
     
  5. Ask if the students know why ten is an important number. Accept the student ideas and say they will be learning more about why ten is so important.

Activity 2

  1. Explain that the class will look briefly at other number systems. Locate Italy on a map, show where Rome is and explain that many hundreds of years ago these people, the Romans, wrote numerals to ten this way.
     
  2. Have the students talk in pairs about what they see. Record all their ideas.
    Image showing the Roman numerals for the numbers 1 to 10.
     
  3. Talk about the similarities and differences in the way we record ten now, 10 compared with X (ten has its own unique symbol).
     
  4. Locate Mexico and Central America on a map. Explain that the Mayan people who lived there hundreds of years ago used these symbols. Have the students talk in pairs about what they see. Record all their ideas.
    Image showing the Mayan numerals for the numbers 1 to 10.
     
  5. Talk about the similarities and differences in the way we record ten now, compared with the Mayan symbol. Discuss why ten is recorded in this way.
     
  6. Have students in pairs invent and record their own numerals to ten. Have them write some simple equations using their symbols, then share their numeral system with another group.
     
  7. Conclude by reviewing different ways of writing ten. Highlight the fact that in our system we have just ten numerals which we ‘reuse’.

Sessions 2-3

SLOs:

  • Instantly recognise and describe patterns within and for ten.
  • Make and record groupings within and for ten.
  • Review families of facts within ten (introduced in the Using five unit).

Introduce the following activities over the next two sessions.

Activity 1

  1. Show a frame with ten dots.
    A tens frame with ten dots in it.
    Have the students show ten on their fingers, then have them describe to a partner how many dots they see and how many fingers they see, using ‘ten and no more.’ Record 10 + 0 = 10
     
  2. Show other tens frames out of order. Direct students to take turns with a partner. Each turn, they should say how many dots they see and describe what they see on the tens frame. For example, “Eight. That’s five dots, and three dots and two empty spaces. That's eight dots and two spaces.” Model this for the class before allowing them to work in pairs. Consider organising the pairs to group together students with mixed mathematical abilities. There may be some students who would prefer to work with the teacher in a small group whilst the rest of the class works in pairs.
    A tens frame with eight dots in it.
     
  3. Record several examples as a class using words and symbols. Seven dots and three spaces, four dots and six spaces, one dot and nine spaces.
    Record equations with unknowns representing some of the tens frames; For example, for dots: 7 + ☐ = 10, 10 = 4 + ☐, 10 = 1 + ☐
    Make it clear that the spaces ask us ‘how many more to make ten?’
     
  4. Model using two different coloured counters to fill the spaces, showing and saying ‘seven dots plus three dots is the same as ten dots’.
    A tens frame with seven black dots and three red dots in it.
    Record equations, 7 + 3 = 10 and 3 + 7 = 10.
    Ask what subtraction equations can be recorded using these numbers. Accept student responses, write and model by removing counters, 10 – 3 = 7 and 10 – 7 = 3
    Highlight that the four equations are related because they use the same 3 numbers. They are known as a family of facts.
    Model with other tens frames: for example 10 = 4 + 6, 6 + 4 = 10, 10 – 4 = 6 and 10 – 6 = 4.
     
  5. Hold up the tens frames in random order. Direct students to call out how many dots they see then record with a “magic finger” on the mat or with writing materials how many more to make ten. For example, show:
    A tens frame with eight dots in it.
    Students say, “Eight,” and write 2. Students with emergent writing skills could be paired with a student with more developed writing skills, or could use counters to demonstrate their understanding of how many more are needed to make ten.

Activity 2

Students play Clever Fingers in pairs. (Purpose: to practice seeing, saying and writing combinations to ten)
They need ten counters, pencil and paper to record winning equations. For each “hand” played they move a counter into a ‘used’ pile.
Students, with their hands behind their backs, make a number on their fingers.

A hand showing 3 raised fingers.  A hand showing 0 raised fingers.               A hand showing 5 raised fingers.  A hand showing 2 raised fingers.
They take turns to call ‘Go.’ On ‘Go’ they show their fingers. If the combination of raised fingers makes ten, they say, “Clever fingers” and one student records the equation. 3 + 7 = 10 When all the counters are used (they have had ten turns). They count their equations. Student pairs compare results.

Activity 3

Students play Snap for Ten in pairs.
(Purpose: to practice seeing, saying combinations to ten)
They need playing cards with Kings and Jacks removed, and use the Queen as a zero.
Turn over a card to begin the game.
Students take turns to turn over a card from the pack, placing the turned card on top of the card before. If the turned card can combine in some way with the previous card to make ten the student says, ‘Snap’, states the equation and collects the pile of cards.
For example: if 9 is turned, followed by a 1, 9 + 1 = 10 is stated and the pile of cards is collected.

Activity 4

Students play Memory Tens in pairs..
(Purpose: to practice seeing and saying combinations to ten)
They need playing cards with Kings and Jacks removed, and use the Queen as a zero.
Cards are turned down and spread out in front of the students.
Students take turns to draw pairs. If the numbers on the two cards combined make ten, the pair is kept by the player.
For example: A player draws 6 and 4 and states 6 + 4 = 10 and keeps the pair.
The game continues till all cards are used up.
The winner is the person with the most pairs.

Activity 5

Students play Fast Families
(Purpose: to practice writing and demonstrating family of fact combinations to ten)
They need pencil and paper.
Students place ten counters of one colour on a blank tens frame.
They take turns to roll a ten-sided dice. The dice roller removes the number of counters indicated by the dice roll and says, “Go.” 
The players quickly write the four family of fact members associated with 10, 6 and 4: beginning with the equation just modeled.
10 – 6 = 4, 6 + 4 = 10, 10 – 4 = 6, 4 + 6 = 10.
The first to write these calls stop.
That player chooses another player to demonstrate and say the other three family members in logical order by adding 6 onto the 4, saying 4 + 6 = 10, then removing 4 counters saying 10 – 4 = 6 and finally adding 4 back onto the 6 and saying 6 + 4 = 10.
If this player is correct, he rolls the dice and the game begins again.
The winner is the student who accurately records the most families of facts.

Session 4

SLO: Recall and apply groupings to ten using te reo Māori.

  1. Students count in te reo Māori up to and back from ten: “Tahi, rua, toru, whā, rima, ono, whitu, waru, iwa, tekau. Tekau, iwa, waru, whitu, ono, rima, whā, toru, rua, tahi.”
    If students are unfamiliar with nga tau, have a number chart displayed.
    A chart of Māori words for the numbers 1 to 10.
    Each student has a set of number words to ten in te reo Māori (Copymaster 1).
    A ten-sided dice is passed around the class circle. Each student takes a turn to roll the dice and call the number in English and in Māori and classmates must hold up the Māori word.
     
  2. Students play in pairs Nga Tau Pairs
    (Purpose: to recognise and come to know number words in te reo Māori)
    A mixed piles of tens frames are provided with a mixed pile of Māori number word cards to ten.
    Both are turned down. The students take turns turning over a tens frame and a word card. If they match they keep the pair.
    The winner is the player who has the most pairs when all the cards are used.
     
  3. Students play in pairs Total Tekau (like Snap for Ten)
    (Purpose: to recognise and come to know number combinations to ten using Māori number words)
    Each student shuffles a double set of Māori number word cards to ten and places the pile face down in front of them.
    They take turns to turn over one word card at a time and place these in one pile, one on top of another. If two consecutive numbers together make ten, the player who played the second card calls, ‘Tekau’ and collects the whole pile and begins the game again.
    The winner is the player with all the cards or with the biggest pile when the game is stopped.

Session 5

SLO: Recognise the usefulness of knowing combinations to ten.

  1. Review and practice known facts.
    Have a set of tens frames displayed to support some students.
    Provide each student with a number fan.
    As the teacher shows a digit, each student finds and shows the complementary digit to ten.
    For example: the teacher shows 3 and each student shows 7.
     
  2. The teacher records subtraction problems and has the students find and show the result.
    For example, the teacher writes 10 – 2 = ☐ and the students show 8, the teacher writes ☐ - 5 = 5 and the students show 10.
     
  3. Register students on e-ako Maths. Support them to become familiar with the addition and subtraction facts learning tool. This tool supports the student to learn unknown facts to ten by building on already known facts. Tens frames images are used. Students will need to be confident using a Chromebook/iPad/laptop to participate in this task. 
     
  4. Introduce the term “basic facts”.
    Ask the students, “What is a fact?” and record their responses. (A fact is something that has really occurred or is actually the case. It is something that can be tested and can be found to be true).
    Ask the students, “What does ‘basic’ mean?” and record their responses. (Something that is basic is essential, fundamental. A ‘base’ is the bottom support of anything or the thing upon which other things rest. It is a foundation.)
     
  5. Identify which are our basic addition and subtraction facts by showing this grid to the students and by exploring how it works. Draw focus to the basic facts that your students are familiar with. Students with more advanced knowledge may be able to share some of the basic facts they know, that make use of higher numbers, with the rest of the class.
    Grid showing basic addition and subtraction facts.
  6. Highlight the importance of knowing combinations to ten and conclude with a game of Memory Tens, as played in session 2.

Session 6

SLOs:

  • Recognise the usefulness of knowing combinations to ten.
  • Use an ‘if I know, so I know’ approach to solving simple number problems.
  1. Review content of sessions 1 – 4. Focus on inverse operations of addition and subtraction as shown in the family of facts.
    Demonstrate this by developing with the students and “If I know this, then I know that ” flow diagram. For example:
    A flow diagram showing "If I know this, then I know that" for 7 plus 3 equals 10.
    The students are being introduced to this idea. They are not expected to immediately apply the principle to the bigger numbers.
    Highlight the important idea that maths is about relationships between numbers, like fact families, and if we look for these and for number patterns, they help us.
     
  2. Begin to complete the addition grid together. Write a sentence together describing something the students notice.
    Have students complete their own copies of the grid (Copymaster 2) and write (up to) five things they notice.
    Have them share with a partner what they have discovered.
     
  3. As a class, discuss and record the students’ ‘discoveries’. Make a list together of how knowing about these patterns helps us.
     
  4. On their own paper, have the students each write their own favourite equation within or to ten. Have them create their own “if I know this, then I know that" brainstorm chart as modelled in 5a.
Attachments

Teddy Bears and Friends

Purpose

In this unit we compare the lengths of ākonga soft toys directly, and then indirectly using non-standard measurement units.

Achievement Objectives
GM1-1: Order and compare objects or events by length, area, volume and capacity, weight (mass), turn (angle), temperature, and time by direct comparison and/or counting whole numbers of units.
Specific Learning Outcomes
  • Compare a group of 3 or more objects by length.
  • Measure length with non-standard units.
Description of Mathematics

In this unit ākonga begin by making direct comparisons between objects and putting a number of objects into order according to length. They are also introduced to measuring with multi-link cubes which allows them to compare objects which cannot be placed together.

Multi-link cubes are an example of a non-standard measuring unit. They reinforce most of the principles that underpin measurement and allow ākonga to find out that:

  • you must not change the unit being used when you are measuring an object.
  • units are chosen for their convenience and appropriateness to the object being measured.
  • units are placed end to end in a straight line and then counted to find the distance (length) between two points.
  • you express measurements to the nearest whole unit or to a specified degree of accuracy, for example, almost 5 handspans, or about 6 ½ straws long.

Ākonga will also be encouraged to estimate. Initially these estimations may be little more than guesses, but estimating involves ākonga in developing a sense of the size of the unit. The skill of estimating is just as important as finding exact measurements, as both skills are used frequently in everyday life, for example, estimating shoe size before trying on a shoe, knowing exact height to go on a waterslide.

Opportunities for Adaptation and Differentiation

The learning opportunities in this unit can be differentiated by providing or removing support to ākonga and by varying the task requirements. Ways to support ākonga include:

  • providing or removing help to ākonga to draw outlines
  • supporting ākonga to make measurements using cubes. This provides an opportunity to support those who need help with the correct placement of cubes or help in counting the number of cubes needed
  • providing some ākonga with other units of non-standard measurement they could use to measure (for example, finger length, lego, strips of paper). Some ākonga may wish to explore with a ruler (standard form of measurement) as well.

As the focus of this unit is making measurements of themselves it is already in a context that is meaningful.  In some situations, it may be more appropriate to use a collection of classroom objects rather than ask students to bring toys to school. 

The context for this unit can be adapted to suit the interests and experiences of your ākonga. For example:

  • providing other objects to measure that your ākonga may enjoy, for example, shoe length, rocks from playground or lunchbox lengths
  • ākonga could go beyond the classroom and measure other objects from around their kura and community, for example, playground equipment, parts of marae, gates and pathways.

Te reo Māori vocabulary terms such as ine (measure), roa (long), poto (short), nui (big) and iti (small) could be introduced in this unit and used throughout other mathematical learning.

Required Resource Materials
  • Multi-link cubes (or blocks)
  • Cuisenaire rods (the 10 rod is best)
  • Scissors
  • A teddy bear or soft toy from home
  • Large sheets of paper for drawing around the toys (A3 or A2)
  • A large roll of paper for drawing outlines of ākonga
Activity

In preparation for this unit, ask ākonga to bring a soft toy to kura. Have a supply of soft toys available to use in the classroom (e.g. for ākonga that forget).

Getting Started

  1. We begin the week by looking at all the soft toys ākonga have brought to kura. Ask the ākonga to introduce their soft toy to the class. The picture book There's a Bear in the Window by June Pitman-Hayes, and translated by Pānia Papa, could be used to ignite interest in this context.
  2. Ask a ākonga to put their toy in the centre of the circle.
    Who has a toy that is taller than this?
    Who has a toy that is shorter than this?
    Who has a toy that is the same height as this?
  3. Let ākonga take turns bringing their toys into the centre to compare. Ask ākonga to show you how they know the toys are taller, shorter, and the same height. Encourage students to identify that the starting point of the measurement must be the same when comparing the height of the toys.
  4. Put taller toys in one group, shorter toys in another and toys of the same height in the third group.
  5. After the heights have been compared, ask the ākonga to suggest other ways that the toys could be compared. For example: bigger or smaller feet, longer or shorter legs, bigger or smaller puku.
  6. Ask groups of 3 ākonga to put their toys into an order. As they do this, ask questions that require them to describe the size of the attribute (type) they are using as a referent. For example, What order have you put these toys in? Why is this toy placed here? Can you order them in a different way?
  7. See if other ākonga can guess the attribute that the groups have used to order their toys.
  8. Show ākonga how to trace outlines of their toys on paper which they can colour to make life-sized portraits for use later in the week.

Exploring

For the next 3 days we make comparisons using ākonga. In pairs, ākonga take turns drawing outlines of their bodies. A tuakana/teina model could work well here. They use these outlines to make measurements using multi-link cubes or cuisenaire rods (the 10 ones work best). Kaiako or ākonga can record their estimates and actual measurements as appropriate.

  1. Demonstrate how to draw around an ākonga to get an outline. Show that they need to draw around both arms and legs. This could be done with chalk outside if it is a fine day.
  2. Give each of ākonga a cube and ask them to estimate (guess) how many cubes you would need to measure the length of the arm.
  3. Check the estimates by measuring with the cubes.
  4. Now give them a cuisenaire rod and ask them to estimate again. By asking them to explain or justify their guess, you can focus their attention on the size of the rod in comparison to the cube.
  5. Check the estimates by measuring with the rods.
  6. Ask ākonga what other parts of the body they would like to measure. List these on a chart (with drawing) for later reference. Be wary of students' feelings about their bodies.
  7. Ākonga can then go back to their pairs and outlines and measure the length of their legs, feet, fingers (for example) using either cubes or rods.
  8. If ākonga choose to measure their waist you will need to discuss how they can measure around something. Discuss how they could use string to mark off the distance around their waist and then measure the string with cubes.
  9. Ask ākonga to record their measurements on their outline.
  10. Once ākonga complete measuring their outline, ask them to measure the outline of their toy.
  11. At the end of each day, share mahi and make comparisons. Remember to make comparisons amongst the same type (toys or ākonga, in this case).

    Whose arm measured more than 25 cubes?
    How many more?
    Which parts of your body were measured shorter than your arm?
    Which is your smallest measurement?
    Which is your largest measurement?
    What have you measured with rods? Why did you choose rods?
    Have you ever been to a place where you were measured? Tell us about it.

Reflecting

Today we line up the outlines of our soft toys ready to go to kura assembly with (the shortest in the front.)

  1. Ask ākonga to measure the height of their soft toy using multi-link cubes and record this on the outline. Have them cut off any extra paper from the top and bottom of the outline.
  2. Tell ākonga that the toys want to go to the kura assembly, and so that everyone can see them, they will need to stand in order from the short ones to the tall ones.
  3. Ask four ākonga to put their toy outlines in order. This could be done using a line on the floor/corridor or the edge of the whiteboard. Let other ākonga check the order.
  4. Other ākonga can now put their toy outlines in the line. As they place their toy outline in the line, ask them why they have chosen that place.
  5. Continue discussing, comparing and moving outlines until all the toys have been ordered.
  6. Display the line in the hallway so that other ākonga and whānau can see it.

A teddy bear with an arm length of 8 cubes and a height of 20 cubes.

How long now?

Purpose

In this unit students compare the duration of events and learn to read time to the hour and half-hour.

Achievement Objectives
GM1-1: Order and compare objects or events by length, area, volume and capacity, weight (mass), turn (angle), temperature, and time by direct comparison and/or counting whole numbers of units.
Specific Learning Outcomes
  • Directly compare the duration of two events.
  • Use non-standard units to compare the duration of two or more events.
  • Tell time to the hour and half hour using analogue clocks.
Description of Mathematics

Duration
Comparing the duration of two events is an important part of developing an understanding of time passing. This can be done by directly comparing two activities that have common starting points, for example, singing a waiata or running around the building.

After ākonga have directly compared the duration of two events we use sand-timers, counting, and other non-standard measures to compare two or more events.

Telling time
In this unit we learn the skills to tell time to the hour and and half-hour. Telling time must enable them to:

  • develop an understanding of the size of the units of time. This includes being able to estimate and measure using units of time
  • read and tell the time using both analogue and digital displays.
Opportunities for Adaptation and Differentiation

The learning opportunities in this unit can be differentiated by providing or removing support to ākonga and by varying the task requirements. Ways to differentiate include:

  • including images, words and numbers on the chart used in session 2 to support beginning readers
  • introducing quarter hour times to those ākonga who are confident with telling time to the half hour
  • providing clocks (if available) that have a minute hand that moves with the hour hand (for example, to show that half-past an hour is halfway between two different hours)
  • providing a selection of different clocks to see and use in the classroom, for example, a digital clock with hours, minutes and seconds displayed, alarm clocks, watches and wall clocks..

The contexts for the duration activities are based on activities that are undertaken by ākonga in your classroom so should be engaging to them. Asking ākonga to choose which activities they would like to compare provides further opportunities for their engagement. For example, they could sing a waiata, complete a hand game or do a short obstacle course.

Te reo Māori vocabulary terms such as karaka (clock), karaka mati (digital clock), karaka ringa (analogue clock), haora (hour), and meneti (minute) could be introduced in this unit and used throughout other mathematical learning.

Required Resource Materials
  • Chart paper/whiteboards
  • Multi-link cubes
  • 2 skipping ropes of different length
  • Large number cards (1-12)
  • A large space
  • Paper plates
  • Cardboard hands
  • Split pins
  • Analogue clocks
  • Pictures of clocks from home
Activity

Session 1: Who finishes first?

In this activity we directly compare two activities to see which takes the longest.

Resources
  • Chart paper/whiteboards
  1. Begin by asking ākonga which they think takes longer, making a tower with 10 cubes or hopping 10 times on each foot.
  2. Write the two events on a chart/whiteboard.
  3. Get two volunteers to complete the activity and discuss the findings as a class (mahi tahi model).
  4. Tell ākonga that today they are going to work with a partner comparing things they do to find out which takes longer. Ask ākonga for their ideas and add these to the chart.  Ideas could include: sing a waiata or draw a picture or a rainbow, collect 3 kākāriki items or collect 3 kōwhai items, say the names of five teachers or say the names of ten friends. Encourage links to relevant learning from other curriculum areas, and to the current interests and events that are a part of the lives of your ākonga.
  5. Get ākonga to work on the activities in pairs. A tuakana/teina model could work well here.
  6. Share and discuss findings.

Session 2: Clapping time

In this activity we indirectly compare "quick" events by clapping, stamping and linking cubes.

Resources
  • Multi-link cubes
  • Chart paper/whiteboards
  1. Begin by asking ākonga which they think would take them longer, writing their name or walking to the board and back to their desk.
  2. Select a volunteer to complete the two events while the rest of the class time the events by clapping. Help the class keep a steady beat.
  3. Record the results:
    Writing my name 9 claps
    Walking to the board 11 claps
  4. Ask for other ideas for timing events, for example. clicking fingers, stamping, linking cubes.
  5. List events that could be timed. Ask ākonga to add their ideas.
  6. Ask each pair of ākonga to select one of the timing methods and use it to time the events. Give each pair a sheet of paper or whiteboard to record the times on.
  7. Display and share the results.

Session 3 : A big clock

In this activity ākonga form a large clock which is then used to show hour times. As you need a large space for the "people clock" this may be best done outside.

Resources:
  • 2 skipping ropes of different length
  • Large number cards (1-12)
  • A large space (potentially outside)
  1. Ask ākonga to tell you all they know about clocks. This will include both digital and analogue. They could draw pictures of different clocks they know about  (for example, grandfather clocks, large clocks in your community, sundials,  watches). 
  2. Ask questions that focus their thinking on what an analogue clock looks like.
  3. Draw a large circle with chalk  or use a pre-painted one from your kura playground.
  4. Choose 12 ākonga to hold the number cards.
  5. Get the rest of ākonga in the class to direct the number holders so that they form a large clock face.
  6. Give another ākonga the two ropes to hold in the centre of the "clock".
  7. Move the ropes so that the clock shows 3 o’clock. Ask ākonga to tell you the time.
  8. Ask volunteers to move the hour hands of the clock to a time they know. Everyone else then reads the time. Draw their attention to the minute hand, and that it always points to the 12. Make sure they understand that at this time there are 0 minutes.
  9. Depending on the success with hour times this activity can be easily extended to half hours.  If you move onto half hours, support ākonga to see the connection between half of a circle and the half past position on the clock.  

Session 4: Making Clocks

In this activity ākonga create their own clocks using paper plates and then use the clock to show times during the school day.

Resources:
  • Paper plates
  • Cardboard hands
  • Split pins
  • Analogue clocks
  1. Look at the analogue clocks and discuss their features:
    • a large hand and a small hand fixed at the centre
    • digits 1 to 12
  2. Discuss ideas for positioning the numbers evenly around the clock.
  3. Construct clocks fixing the hands in place with a split pin.
  4. Now use the clocks to show hour and then half-hour times. Display both the analogue and digital written forms.
  5. Throughout the day ask ākonga to change their clocks to show the "real" time. Do this several times on the hour and half-hour. Each time look at tell the time using both digital and analogue forms.

Session 5: The best times of the day.

In this activity we look at different kinds of clocks and talk about telling the time. We draw a picture of our favourite time of the day.

Resources:
  • Pictures of clocks from home
  • Paper plate clocks (previously constructed from Session 4)
  1. Let ākonga share the pictures that they have drawn or photographs of clocks found at home or in the community.
  2. Discuss the different types of clocks, for example, watches, clock radios, clocks on appliances, grandfather clocks, novelty clocks, large clocks in the community.
  3. Discuss why most of us have so many clocks and when it is important to know the time.
    • so we won’t be late to school
    • so we won’t miss our favourite TV programme
    • so that we get to our kapa haka practice on time
    • so we know when our food is cooked
  4. Ask ākonga to show their favourite time of the day on their paper clocks.
  5. Ask ākonga to draw a picture of their favourite time. The pictures should include a clocks showing the time.
  6. Share and display pictures.

Amazing Mazes

Purpose

This unit introduces some of the key concepts of position and direction in the context of a series of activities around mazes.

Achievement Objectives
GM1-3: Give and follow instructions for movement that involve distances, directions, and half or quarter turns.
Specific Learning Outcomes
  • Use the language of direction to describe the route through a maze.
  • Use the language of direction to guide a partner through a maze.
  • Rotate their body and other objects through 1/4 and 1/2 turns.
  • Follow a sequence of directions.
Description of Mathematics

At Level 1 the Position element of Geometry consists of gaining experience in using everyday language to describe position and direction of movement, and interpreting others’ descriptions of position and movement. In this unit students will gain experience using the language of direction, including up, down, left, right, forwards, backwards in the context of mazes. For more activities that involve students giving and following instructions using the language of position and direction you might like to try Directing Me.

Spatial understandings are developed around four types of mathematical questions: direction (which way?), distance (how far?), location (where?), and representation (what objects?). In answering these questions, students need to develop a variety of skills that relate to direction, distance, and position in space.

Teachers should extend young students' knowledge of relative position in space through conversations, demonstrations, and stories. For example, when students act out the story of the three billy goats and illustrate over and under, near and far, and between, they are learning about location, space, and shape. Gradually students should distinguish navigation ideas such as left and right along with the concepts of distance and measurement. 

Opportunities for Adaptation and Differentiation

The learning opportunities in this unit can be differentiated by providing or removing support to students and by varying the task requirements. Ways to differentiate include:

  • increasing the complexity of the mazes for those students who need more challenge
  • working alongside individual students who need support navigating through the maze
  • providing students with arrow cards that match the directional words (left, right, up, down)
  • giving students materials such as teddies to move through mazes. 

The context for this unit can be adapted to suit the interests and experiences of your students by engaging them in identifying the character and destination for each maze. Simple Māori designs can be used for mazes. Images of Native Garden Mazes can be shared with the children to engage them in the unit.

Required Resource Materials
Activity

There are many books of mazes and online interactive mazes available. Try to have different resources available in the classroom while you are working on this unit. Early finishers or students who need more challenge could be given the opportunity to work with the other mazes or draw their own. 

Session 1

Many students may have some experience of using mazes, whether it is walking through mazes, or solving pen and paper mazes in puzzle books. 

  1. Draw a simple maze on the board (or photocopy one up to A3). Personalise by creating a scenario that gives purpose to the maze.  For example, a ruru finding its nest in a tree, a kiwi going back to its burrow, a rabbit finding its way back to its burrow, a bee flying to its hive, a pirate finding the treasure.  
  2. Ask students if they can use their eyes to see the path through the maze. Alternatively give the students copies of the maze and ask them to trace the path using their fingers and once they have found the end, to trace the path using a pencil.  
  3. Choose a volunteer to come up and draw the path through the maze.
  4. Ask students how they could explain to someone who can’t see the maze where the line has been drawn. Encourage the use of accurate terms like up, down, left, and right. Follow the line through the maze as students describe it.
  5. Draw another example on the board. Provide a context for the maze such as a wētā finding its way to its home in a hole in a log.
  6. Ask students to describe the route they would take to get through the maze. Draw the route as they describe it. Individual students should only give one direction at a time (ie. Go down first). If students give unspecific instructions such as go round the corner draw the line incorrectly to force them to describe the route accurately.

Sessions 2-3

Maze Pairs

In this activity one student has a picture of a maze and the other has a blank grid. There are 4 mazes (two basic and two harder), and two blank grids (one for the basic mazes and one for the harder ones) available as copymasters. You can also easily make more mazes by using a vivid to draw walls on the blank grids.

  1. The student with the maze has to solve the maze and then give their partner instructions for the route to follow through the maze (the instructions should include a direction and a number of squares eg. go down 2 squares). The partner with the grid should draw a line on a grid to show the route described to them. Make sure they start in the correct place.
  2. Once the person following the instructions has completed a line across their grid they can check the answer by comparing the mazes and looking to see if the path drawn goes through any walls.
  3. This could also be done as a whole class activity, with all students having a blank grid and the teacher giving instructions. Then a student could be given the opportunity to give instructions to the class, or students could break off into pairs.

Put Yourself in the Maze

For this extension to Maze Pairs tell students that they have to imagine that they are actually in the maze themselves, and that the only things they can do are to move forward or to turn left or right. This makes the activity much more challenging, as they now need to keep track of the direction they are facing as well as where in the maze they are. Counters with an arrow drawn on to indicate direction faced would be a useful aid.
The activity proceeds as in Maze Pairs above but both partners should use a counter with an arrow as they plot their route through the maze.

Outdoor maze

In this activity students take the direction giving skills they have used in the classroom outside and onto a larger scale.

  1. Draw a large but fairly simple maze on the tennis court with chalk. You may like to provide a context for the maze, such as a tuatara is finding its way back to its burrow.
  2. Get students to take it in turns to be blindfolded and directed through the maze by a partner who is not allowed to touch them, but has to give instructions about direction and distance.
  3. The challenge is to get through the maze with as few instructions as possible and without touching or crossing the lines.
  4. This could be a good opportunity to talk to students about the difficulties faced by people with impaired vision. Was it easy to get through the maze? Was it easy to give someone else directions through the maze?

Session 4

Let students draw their own mazes on grid paper, and challenge a friend to first solve it, and then give instructions for how to get through it. Display some examples of a variety of simple mazes as inspiration.
You may need to give some guidance in drawing mazes – ensure that they are solvable, but try to have plenty of false paths and dead ends.
Possibly students could take their mazes to another class and show them how they have learned to give accurate directions through the maze, or take them home to share with whānau.

I Like Toys

Purpose

In this unit we explore ways to pose and answer investigative questions about our favourites by gathering and analysing data and discussing the results.

Achievement Objectives
S1-1: Conduct investigations using the statistical enquiry cycle: posing and answering questions; gathering, sorting and counting, and displaying category data; discussing the results.
Specific Learning Outcomes
  • Pose investigative questions with support from the teacher.
  • With the teacher decide on how to collect the data to answer the investigative question.
  • Sort objects into categories for display.
  • Make a display of the data collected (pictograph).
  • Make statements about data displays.
Description of Mathematics

In this unit the students begin by brainstorming areas for investigation. Young students' areas of interest are likely to focus on themselves and the activities that they are engaged in. Using the students and their interests is a recurring technique used in junior classes. It provides students with contexts that are meaningful and motivating. With the teacher investigative questions are posed about categorical data.

In this unit we use favourites as the theme for the investigations. Much of the data collected at level one will be real objects. In this unit we begin by posing an investigative question about our favourite toys. Once the data (toys) are collected together they can be sorted into categories ready for display. It is important that the students are involved in deciding how to sort the objects. We then draw pictures of other favourites and use them to make displays.

Once more we stress the importance of letting the students decide how to sort and display the data. In this unit we photocopy the drawings so that each pair of students gets the opportunity to make decisions about how the data should be sorted and displayed. The follow-up discussion of the displays will involve the students making statements about the number of objects in each of the categories. In this unit we do not attempt to get the students to formalise their displays into pictographs. However the thinking carried out in this unit means that the students would be ready to use pictographs in future statistics units.

Opportunities for Adaptation and Differentiation

The learning opportunities in this unit can be differentiated by providing or removing support to students and by varying the task requirements. Ways to support students include:

  • reducing the number of favourites in the data set for students who are beginning to count one-to-one when they are doing individual or small group work
  • extending by recording two types of favourites on data cards so that they can sort in two ways, e.g. by favourite food and by favourite drink.

The context, about favourites, for this unit can be adapted to suit the interests and experiences of your students by selecting favourites of interest to your students.

A te reo Māori term that can be introduced in this unit is rōpū (group). Counting in te reo Māori could be used throughout the sessions.

Required Resource Materials
  • Paper for drawing (cut A4 sheets into 8 pieces)
  • Chart paper
  • Scissors
  • A favourite toy from home
  • Copymaster 1
Activity

Session 1

  1. The previous day or previous week ask the students to bring their favourite toy to school. Ensure there are spare toys in the classroom for children who are unable to bring one or forgot. As an alternative, you could ask students to draw a picture of their favourite toy.
  2. We begin the week by looking at all the toys the students have brought to school. Ask the students, seated in a circle, to introduce their toy to the class.
    Let’s try to find out about our favourite toys. The investigative question we are exploring is "What are the favourite toys of the children in our class?"
  3. Write the investigative question up on the board or a chart.
  4. Ask a student to put their toy in the centre of the circle.
    Do any of you have toys that could belong with this one? Is there some way that your toy is like this one? How does your toy belong? Who has one that doesn’t belong? Why not?
  5. Continue until all the toys are sorted into categories. Together count the toys in each group.
    Four of us brought dolls or action men. Three of us brought balls to kick. Six of us brought toys with wheels. Two of us brought soft animals etc
  6. Record statements on the board or a chart, for example, "Four of us like dolls the best.
  7. Send home the family and whānau letter regarding answering the investigative question "What are the favourite fruits of our class and their families?"
  8. Conclude the session by exploring the investigative question "Which of the toys of Māori children played with 100 years ago do we like best?” 
  9. Introduce the photos (Copymaster 1) and ask the students if they know what the toys could be (A. cat's cradle, B. poi, C. kite, D. stilts and E. spinning top). Compare these traditional toys with ones you might play with today. What are the differences and similarities? 
  10. Have a copy of the photos on the wall and ask your students to  children put a dot underneath the traditional toy they think would be their favourite toy if they lived long ago. 
  11. Leave the activity open as you challenge the students to write statements to answer the investigative question "Which of the toys of Māori children played with 100 years ago do we like best?” Encourage students to use both statements about individual toys (for example, "The most popular toy is the stilts because eight of us chose that"), and comparative statements (for example, "More people liked the spinning top than the kite.")

Session 2

In this session we collect sets of data to use in investigations in the following sessions. If you have time available at the end of the session you may wish to start analysing one of the sets.

  1. Let’s think about some other favourites that we can investigative with the class this week.
  2. With the students, discuss different objects and items that we could explore to see what our favourites are.  Collect the ideas on the board or chart.
  3. Choose three favourites to explore with the class this week.
    Possible favourites include: food, colour, drink, number, animal.
  4. With the students, pose investigative questions to explore. For example: What are the favourite foods of the children in our class? What colours do Room 30 students like best? What are our class’s favourite numbers? What animals do the children in Room 2 have as favourites?
  5. Discuss with the students that we need to collect data from each of them to answer the three investigative questions.  With the students, pose survey questions for each of the investigative questions.  For example: What is your favourite food? What colour do you like the best? What number is your favourite? What is your favourite animal?
  6. Write each of the three survey questions on an envelope. Pin the envelopes up where everyone can reach them.
  7. Ask the students to draw an answer for each of the survey questions onto the prepared pieces of paper (A4 cut into 8 pieces). If they are able, ask them to write their answer beside the picture. Circulate and help those who are unable to write their answers beside the picture.
  8. Put the named pictures (answers) in the appropriate envelope.

Sessions 3 and 4

In preparation for the next two days, make a set of picture sheets for each pair by photocopying the answers from session 2 (8 per sheet of A4). It is worth taking the time to make copies as it gives everyone the opportunity to sort and display the data.

  1. Each day select one of the investigative questions to explore. Take the envelope that contains the student responses to the associated survey question. Spread the pictures out on the mat for the students to look at.
    Can you see your drawing?
    Do you see any that are like yours?
    Which ones are different to yours?
  2. Ask the students for ideas for sorting the pictures.
  3. Sort the pictures according to one of the suggestions, for example, sort foods with others of the same type, for example, ice-creams, fruit, cakes, chips, fish
  4. Together count the pictures in each collection.
  5. Have the students return to their seats to work with their partners. Give each pair a set of the photocopied answers prepared for the day’s investigative question.
  6. Each pair needs to cut the pictures apart and then decide how to sort them.
  7. As the students work ask questions that focus on the approach they are taking to sort the pictures:
    How are you sorting the pictures?
    How many categories or groups have you got? 
    Is it easy to decide where to put the pictures? Why/Why not?
  8. Once the pictures are sorted get the students to glue their pictures onto chart paper that have the investigative question already written at the top. Encourage students to make statements about what their displays shows. Help them write statements about their display if they are unable to write their own statements.
  9. At the end of each session ask the students to share their posters. Ask questions, such as in point 10 above, and 2, 3, and 4 below, and offer models of appropriate language to support the students to effectively talk about the process of making their display and what is presented on it.

Session 5

We begin today’s session by getting the students to select their favourite investigation to display on the classroom walls.

  1. Let's look at all the great statistical investigations that we did this week.
  2. Spend some time looking at the displays and asking the students to tell you what the display is saying about the investigative question.  For example, if the investigative question was "What fruit do Room 30 students like best?", then the teacher would say Can you tell us what your display is saying about the fruit that Room 30 students like best?
    How many chose that favourite (e.g. fruit)?
    Which things are favourites? How do you know? How does your display show that?
  3. Conclude the session by exploring the investigative question "What are the favourite fruits of our class and their families?"  Gather together the fruit pictures that families drew.
  4. Talk about ways to sort the fruit pictures. Choose four or five types and then discuss the use of an "other fruit" category.
  5. When you have agreed on ways to sort the fruit let the students add their families’ pictures to categories. Glue the pictures onto a chart to make a display.
  6. Leave the activity open as you challenge the students to write statements to answer the investigative question "What are the favourite fruits of our class and their families?" They can add these to the display during their own time in the next week or so.
Attachments

Gecko feet

Purpose

In this unit of work we link the development of skip-counting patterns to bars on a relationship graph. We also plot our skip-counting patterns on a hundreds board.

Achievement Objectives
NA1-1: Use a range of counting, grouping, and equal-sharing strategies with whole numbers and fractions.
NA1-6: Create and continue sequential patterns.
Specific Learning Outcomes
  • Continue a skip-counting pattern.
  • Describe skip-counting patterns.
  • Use graphs to illustrate skip-counting patterns.
Description of Mathematics

In this unit we look at skip-counting patterns. These are patterns obtained by adding the same, constant, number to make the next number every time. So the difference between any two terms in a skip-counting pattern is the same. This is a good exercise to help reinforce the various concepts relating to pattern. In particular, it helps us to understand the idea of a recurrence relation between consecutive terms.

Skip-counting patterns are also called arithmetic progressions. In secondary school, expressions for both the general term of an arithmetic progression and the sum of all of the numbers in the progression are found. 

Opportunities for Adaptation and Differentiation

The learning opportunities in this unit can be differentiated by providing or removing support to students and by varying the task requirements. Ways to differentiate the tasks include:  

  • varying the difficulty of the skip.  For example, reduce the complexity by using skips of 2, 5 or 10.  Increase the complexity by using odd numbers or numbers larger than 5
  • increasing the difficulty by asking the students to extend the number of skips in the pattern.  For example, in the Exploring part of the unit ask the students to extend the pattern to 10 or more skips
  • using a variety of materials to represent the skips. For example, multilink cubes joined in groups of 3.

The contexts for the skip patterns used in this unit can be adapted to suit the interests and experiences of your students. For example in the Exploring part of the unit:

  • involving the students in finding or suggesting the skip counting images related to their interests or culture
  • using images of spiders, for example katipō (8 legs), lizards or frogs (4 legs) and butterflies (2 wings), particularly those that are native to New Zealand
  • using images of animals, plants and insects that are found in the local area. For example tuatara, kōwh ai, tūī,  wētā
  • using skip counting in te reo Māori, and the home languages of your students.
Required Resource Materials
  • Counters
  • Cubes
  • Squared paper for graphing
  • Pictures of objects for exploration
Activity

Getting Started

Explain that today we will explore the pattern of 4s by counting the number of feet on geckos.  We then use this information to build a relationship graph.

  1. Ask: How many feet does a gecko have?
  2. Share ideas. Hopefully someone will know that a gecko is a type of lizard, and has four feet. Show students a picture of a gecko.
  3. Using counters begin to develop a chart of the number of feet to the number of geckos.
    Pictograph showing the four feet of 1 gecko.
  4. Ask: How many feet are there on 2 geckos?
    How did you work that out?
  5. It is useful for the students to listen to the strategies that others use. More advanced Level 1 students will be able to count on from 4 to find the answer and many may have 4 + 4 as a known fact.
  6. Repeat the process with 3 and 4 geckos. Each time continue to add the information to the chart.
  7. Ask the students to work out how many feet there would be on 6 geckos. If some of the students find the answer quickly, ask them to find the answer using another strategy.
  8. Share solutions. These may include:
    • skip-counting with or without the calculator
    • counting on using a number line or hundreds board
    • using counters to find 6 groups of 4.
  9. Ask the class to complete the chart with up to 6 geckos.
    A pictograph showing the pattern of gecko feet for up to 6 geckos.
  10. Ask: What can you tell me about this chart?
    Share ideas. Encourage the students to focus on the relationship between the number of geckos and the number of feet.
  11. Ask the students how they could record this information using grid paper.

Exploring

Over the next 2-3 days, the students work in pairs to explore the number patterns of other skip-counts. At the end of each session the students share their charts with the rest of the class.

  1. Place pictures of items that the students are to investigate in a “hat”. Ask each pair to draw one out and then investigate the pattern up to at least 6. Encourage students to extend the pattern beyond 6.
  2. Pictures could include:
    • tricycles (3 wheels)
    • bicycles (2 wheels)
    • hands (5 fingers)
    • spiders (8 legs)
    • glasses (2 lenses)
    • frog (4 legs)
    • kiwi (2 legs)
    • stools (3 legs)
  3. Remind the students that they are to record their explorations on paper or digitally.
  4. At the end of each session share and discuss charts and number patterns.  Ask the students to identify the patterns that are the same.

Reflecting

In today’s session we use calculators to extend our skip-counting into the hundreds.  We record our patterns on a hundreds chart.

  1.  As a class look at the chart to show hands (5 fingers). Skip count together in 5s, shading the counts on a hundreds chart.
    A hundreds chart with every fifth column of 10 shaded in.
  2. As the chart is shaded, ask questions which encourage the students to look for patterns in the numbers as they make their predictions.
    Which number will be next?
    How do you know?
  3. Give the students (in pairs) a hundred’s chart and ask them to shade in one of the skip counting patterns that they had charted on the previous days.
  4. Display, share and discuss at the end of the session.

Equality and equations

Purpose

The purpose of this unit of five sessions is to develop the algebraic understanding that the equals symbol, = , indicates a relationship of equivalence between two amounts.

Achievement Objectives
NA1-4: Communicate and explain counting, grouping, and equal-sharing strategies, using words, numbers, and pictures.
Specific Learning Outcomes
  • Review number expressions involving the operations of addition and subtraction.
  • Make and recognise combined amounts that have the same value.
  • Write statements of equivalence in words.
  • Read and write addition and subtraction equations.
  • Solve addition and subtraction balance problems and explain the solutions, using the language of equivalence.
  • Recognise expressions that are equal in value.
Description of Mathematics

This sequence of lessons provides a fundamental and important foundation for students to be able to read, write, and understand an equation.

The essence of an equation is that it is a statement of a relationship between two amounts. This relationship is a significant one of equivalence. The understanding that the amounts on either side of the equals sign are equal in value, is essential if students are to experience success in algebra, and mathematics.

The most common misunderstanding is when students develop a process view of an equation as a procedure to follow to get an answer, rather than a structural or relational view of equivalence.

Students should be immersed in a range of experiences that support them to explore the concept of equivalence and balance. During these experiences, the teacher must carefully choose the language they use and model. As equations are introduced, recorded, read and interpreted, words and phrases such as ‘has the same value as’, ‘is the same as’, ‘is equal to’ and ‘ is equivalent to’, rather than ‘makes’, or ‘gives an answer of ’ become very important. It is interesting to note that the word ‘equals’, on its own, has subtly become more synonymous with ‘makes’ or ‘gives an answer’, rather than giving the message of equivalence that it should.

When posing problems that position the unknown amount at the beginning or in the middle of an equation, we challenge the students to explore the relationship statement and the operations from a different perspective. This also occurs when students are asked to find ‘different names’ for the same amount.

Students should have opportunities to read and respond to equations, and record them after having interpreted a number problem expressed in words. In developing the ‘balance’ view of an equation, students will understand the equality relationship expressed in an equation such as 6 = 6, rather than being perplexed by the fact that there is no number problem to ‘answer’. Students will also readily understand relationships expressed in equations such as 4 + 2 = 1 + 5, rather than developing an expectation that a single ‘answer’ will follow the = symbol. Instead of expressing solutions in the arithmetic ‘voice’ of ‘problem, calculation and answer’, it is important in early algebra work, for students to explain their solutions in words that make the equivalence relationship explicit.

Opportunities for Adaptation and Differentiation

The learning opportunities in this unit can be differentiated by providing or removing support to students and by varying the task requirements. Ways to differentiate the tasks include:  

  • varying the complexity of the numbers used in the problem to match the number understanding of students in your class.  For example, increase the complexity by using larger numbers for students who are able to count-on to solve problems.

The contexts used in the word problems in this unit can be adapted to suit the interests and experiences of your students. For example:

  • changing Jack and the beanstalk to a story that is popular with, or relevant to, your students (e.g. another fairy tale or Māori legend). 
  • in Session 3, activity 2, replacing the beans with objects that match the story or legend using in Session 1. Remember that the use of the balance scale means that the objects need to be the same weight.
  • te reo Māori that could be introduced within these sessions include orite (equal/same), tōkeke (fair), and whārite (equation) as well as the numbers tahi (1) to rua tekau (20).
Required Resource Materials
Activity

These learning experiences use numbers in the range from 1 to 20, however the numbers in the problems and the learning experiences should be adapted, as appropriate, for the students.

Session 1

SLOs:

  • Review number expressions involving the operations of addition and subtraction.
  • Make and recognise combined amounts that have the same value.
  • Write statements of equivalence in words.
  • Write and read equations, using the language of equivalence.
  • Understand the word ‘equation’.

Activity 1

  1. Introduce the story of Jack and the Beanstalk (or another story or Māori legend relevant to your students and context). Ask who has planted or picked beans. Read the story. Explain that when the beanstalk is chopped to the ground, Jack picks handfuls of beans from it, some of which are bright green and others dark green. Unfortunately, they are no longer ‘magic’.
  2. Draw on the class chart, the combinations of beans in Jack’s handfuls. Have students record beside them, in words and number expressions, what they see. For example:
    This shows a group of 3 beans and a group of 4 beans.three and four beans (3 + 4)
    This shows a group of 2 beans and a group of 5 beans.two plus five beans (2 + 5)
    Pose subtraction scenarios and have students record their number expressions.
    For example:
    Jack has eight beans and drops four. (8 - 4)
    Jack has 6 beans and drops 1. (6 - 1)

Activity 2

  1. Make available to the students pencils, envelopes, and sets of two different coloured beans. Have students work in pairs.
    Pose the problem:
    “Jack wants to give away some packets of beans. He decides he’ll put six in each packet. He puts some beans of each colour into each packet and writes on the outside of the packet how many there are of each colour."  
    Write 6 on the class chart.
    Demonstrate. For example:
    Put 2 bright green and four dark green beans into one envelope and write 2 + 4 in pencil on the outside. 
    Tell the students that they should take turns to put the beans into the packets and to write on the outside.
  2. Have student pairs share their packets and discuss if they have the same combinations recorded. Have them investigate any anomalies (They may have put more or fewer than six in a packet).
  3. Have student pairs return to the mat with their bean packets, which they place in front of them. On the class chart record:
    6 is the same amount as:
    Have students take turns to record their number expressions beside this.
    6 is the same as: 5 + 1, 4 + 2, 3 + 3, 2 + 4, 1 + 5
    Read these together using the language of, “is the same as.”
    Ask whether it would be fair for Jack to give these to his friends. (Yes, because they would be getting the same amount. They would be getting an equal amount.)

Activity 3

  1. Write the word ‘equal’ on the chart.
    Have students tell you what ‘equal’ means. Brainstorm ideas and record these.
  2. Add to the recording in Activity 2, Step 3.
    6 is the same (amount) as: 5 + 1, 4 + 2, 3 + 3, 2 + 4, 1 + 5
    6 is equal to: 5 + 1, 4 + 2, 3 + 3, 2 + 4, 1 + 5
    Ask if students know how to write “is equal to” using a symbol. Introduce =.
    Model writing 6 = 5 + 1.
  3. Have student pairs share the task of writing the complete equation on each of their packets.
  4. Have students place their “6” packets into a class container labelled with a 6 to be used in a later session.

Activity 4

  1. Place containers labelled 3, 4, 5, and 7 in front of the students.
    Explain that Jack needs packets with these different amounts. Demonstrate, using a ‘six packet’, that each envelope must have the “number equals story” on it.
  2. Ask what is the correct word for a “number equals story”. Elicit and record the word equation, highlighting that 6 = 5 + 1 (for example) is called an equation because it uses the = sign to show that both amounts are the same. Ask if they can see part of the word ‘equals’ in the word equation.
  3. Have students make up packets, as before, this time choosing 3, 4, 5, or 7 as their total, and recording a full equation on each packet. For example, 3 = 2 + 1, or 4 = 2 + 2.
  4. Students should pair share and check their packets and equations before they are placed in the appropriate containers.

Activity 5

Conclude the session by reviewing =, equals and its meaning and the meaning of the word equation. Have students explain these, and record what they say.

Session 2

SLO:

  • Write and read addition equations, using the language of equivalence.

Activity 1

  1. Review the words, equal, equation and the symbol =, recorded on the class chart in Session 1.
    Record a ‘six’ equation and read it in different ways together. For example:
    6 = 5 + 1, “six is equal to five plus one”, “six is the same as five plus one”.
    Highlight the fact that each of the packets in the 6 container have an equal or same amount.
  2. Make available to the students, pencil and paper.
    Have students in pairs choose one of the containers (you may need to make multiples of each container depending on class size).
    Students begin by taking turns to read aloud to their partner, in the two ways modeled in Step 1 (above), an equation on an envelope selected from the container. They should return these once read.
  3. Explain that in shops, staff do ‘stocktaking’ to check the amount of items they have. Students are to “stock take’ the beans by checking each packet to see that the equation on the outside matches the beans inside.
    They should take two packets at a time, check that they have exactly the same amount and record what they find on their “stocktaking sheet” like this:
    This shows a stocktake sheet that lists different equations that add to 7: 5 + 2 = 6 + 1, 4 + 3 = 3 + 4, 2 + 5 = 4 + 3.
    Students with containers 3 and 4 in particular, will accomplish this quickly.

Activity 2

  1. Have each student pair join one other pair in this way: two pairs of seven and three, two pairs of six and four and one pair of five and five.
  2. Refer to Jack and the Beanstalk.
    Place in front of the students the cardboard ‘tickets’ and the plastic pegs.
    Pose the task:
    “Jack is going to have a bean stall. He needs pegged pairs’ with ten beans altogether in each. We are going to help him. We need to make labels to show the contents, or what's inside." 
    Elicit from the students that by using one packet from each of their containers, they will have ten beans. If necessary, students can explore this idea and check, using their fingers, showing, for example: 10 = 7 fingers (up) and 3 fingers (down).
  3. Demonstrate that the two packets can be pegged together to make one “pegged pair of ten.” Model on the class chart, how labels should show the content in 3 ways. For example:This shows a label demonstrating how a “pegged pair of ten” can be made in three different ways: 7+ 3, 5 + 2 + 1 + 2, and 6 + 4.
    1. Write an equation using the number on each of the containers.
       We say "7 beans plus 3 beans equals 10 beans" and we write 7 + 3 = 10
    2. Write each of the expressions on each envelope. (The number of each colour in each envelope)
      We say: "This envelope has 5 dark and 2 light (5 + 2) and this envelope has 1 dark and 2 light (1+2). Altogether that equals 10 so " We write:  5 + 2 + 1 + 2 = 10

      Tip out the beans and write the number of each of the colours.
      We say" There are 6 dark beans and 4 light beans and that is 10 beans altogether."
      We write: 6 + 4 = 10
  4. Conclude the session by having the students read aloud some of the tickets they have made for their pegged pairs.
    Review the words, equal, equation and the symbol =, recorded on the class chart in Step 1, highlighting the language of ‘is equal to’ and ‘is the same as’ and that all the equations written are different names for ten.

Session 3

SLOs:

  • Solve addition and subtraction balance problems and explain the solutions using the language of equivalence.
  • Read and write addition and subtraction equations.

Activity 1

  1. Introduce balance scales. Brainstorm and record on the class chart, students’ ideas about ‘how balance scales work’, eliciting language of ‘same, level, equal, balance.’
  2. Place one envelope pair (10) in one pan and ask what could be placed in the other to achieve balance. (Another pegged envelope pair.)
    Again, record and ‘test’ student ideas, trying different combinations of pegged pairs. For example:
    5 + 5 = 6 + 4
    6 + 4 = 7 + 3
    Ask why the results are recorded using =.
    Elicit reasons such as ,”equals shows that they are the same”, “equals shows that they balance”, “equals shows that both amounts have the same value (10)” , “equals means is the same as”.
  3. Record, 10 = 10 and discuss why this has been written and why it makes sense.

Activity 2

  1. Model 5 + 5 = 6 + 4 using the scales.
    Remove the packet of 4 beans, leaving 6 only on one side. Discuss the tipped scales and how to record the removal of the 4 beans.
    Record suggestions. For example:
    5 + 5 is not the same as 10 – 4
    5 + 5 is not equal to 10 – 4
    10 is not equal to 6
  2. Ask what can be done to restore the balance.
    Accept, ‘put 4 back in again’, but work to elicit, ‘take 4 away from the other side.
    Have a student remove 4 beans from one of the 5 bean envelopes (example above), saying how many are remaining in the envelope (1). Return it to the scales.
    Record suggestions that describe what has happened now the balance is restored. For example:
    5 + 5 - 4 is equal to 10 – 4
    10 - 4 is the same as 10 – 4
    10 – 4 = 10 – 4
    6 = 6
    As equations are recorded, have students explain or demonstrate, using the materials, exactly what is happening. Together reach the conclusion: if you take away the same amount from each ‘side’ or pan, the scales will still balance.
  3. Make available to the students, fresh envelopes (or erasers to clear used envelopes), and pegged bundles of ten from Session 2.
    Have student pairs combine the beans from the pegged pairs into single envelopes of ten beans, writing 10 on each.
    Have students work in pairs with envelopes of ten beans, some spare beans, paper to record equations and a set of balance scales.
    Have students undertake the following tasks
    1. Student One removes a number of beans from one envelope, unseen by the other student, and returns the envelope to the scales. This student ‘secretly’ records the equation. For example: 10 – 3 = 7.
      Student Two guesses how many were removed, removes this number from the other envelope, ‘secretly’ records the equation, for example 10 – 5 = 5, and returns it to the scales. They look carefully to check to see if the scales balance. If the scales do not balance, Student Two repeats their turn with another amount. When the scales do balance, both students share their final equations and check the amount in each envelope. Both students finally record the balance, for example, 7 = 7.
      The students reverse rolls.
    2. Students make teen numbers and record equations.
      Student One places one ten envelope and a mixture of both colours of beans into one pan to make a number between ten and twenty. The student records the equation: for example, 10 + 2 + 3 = 15.
      Student Two places one ten envelope and a mixture of both colours of beans into the other pan. The two-bean mix must be a different combination, but the total must balance the scales (in this case must equal 15). This student records their equation: for example, 10 + 1 + 4 = 15.
      Both students then record what they can see in both pans.
      10 + 2 + 3 = 10 + 1 + 4
      15 = 15
  4. Conclude this session with some students sharing their equations from tasks A and B. Record a selection on the class chart and discuss these.
    It is important to highlight the balanced nature of the equations. Elicit from the students what their understanding is about equations.

Session 4

SLOs:

  • Interpret addition and subtraction word problems that involve start unknown, change unknown and result unknown amounts.
  • Write addition and subtraction equations from word problems.

Activity 1

  1. Review conclusions from Session 3, Activity 2, Step 3, referring to the balance scales.
  2. Make available to the students: balance scales, packets of beans, spare beans, and a pencil.
    Explain that Jack, of Jack and the Beanstalk fame, has some problems for the students to solve and that they may want to use the equipment to help them.
    Distribute a copy of Copymaster 1 to each student. Read through the problems together.
    Highlight that each student will be writing equations for each problem.
    Students should choose whether to work on the problems alone or with a partner; however, each student should complete their own recording sheet.
  3. As students complete the recording task, have them compare and discuss their equations and solutions. They can then write some problems for their partner to solve.

Session 5

SLOs:

  • Identify true (correct) from false (incorrect) equations and justify the choice.
  • Recognise expressions that are equal in value.

Activity 1

  1. Students will play two games in the session. Make available beans and balance scales.
    Introduce the True/False game. (Copymaster 2)
    (Purpose: To recognise when amounts are equal or not equal.)
    Model a ‘true’ equation such as 1 + 3 = 2 + 2, highlighting the fact that the amounts on both sides are the same or equal to each other. Each expression is equal to 4. Model a ‘false’ equation such as 1 + 3 = 3 + 2, highlighting the fact that both sides are not the same and not equal to each other. 4 is not equal to 5. This is false (not true).
  2. How to play:
    Students play in pairs. They shuffle the playing cards and deal 10 to each player. The remainder of cards is placed in a pile, face down, handy to both players.
    The aim of the game is to be the first person to have an equal number of true and false equations (five of each).
    As each player turns over their cards, they sort them into true and false groups, face up in front of themselves. If they have more of one group than the other, they continue to take cards from the top of the pile, till the number of their true and false cards is equal.
    The first player to have equal numbers of true and false cards calls, “Stop!”
    This caller must explain to their partner, for each of their decisions, how they know they are correct in their true/false decisions. They can use beans to support their explanation.
    The game begins again. The winner is the person who wins the most of three games.

Activity 2

Students play Same Name snap, using cards from Copymaster 3.
Purpose: To recognise when amounts are equivalent (or not equivalent) and to give the ‘number name’ for the ‘same name’ expressions.

How to play:
Student pairs shuffle the cards and deal all cards so each student has an equal number of cards. These are placed in a pile, face down in front of each student. Student One turns over the top card and places it, face up, between both students. Student Two does the same, placing their card on top of their partner’s card. If the two expressions have equal value, either student calls Same Name, states the number that the expression represents, and the correct equation using either ‘is equal to’ or ‘is the same as’. For example:
2 + 3 is placed on top of 4 + 1.
“Same name! Five! Two plus three is equal to four plus one.” or 
“Two plus three is the same as four plus one.”
The caller collects the card pile, records the equation, 5 = 2 + 3 = 4 + 1 on their scoring paper, and the game begins again, with the winner of this round placing the first card.
The student who does not call, can challenge the caller if they believe the “name” is not true for either or both expressions. If they are correct, they collect the pile and record the correct equation. The original caller must erase the incorrect equation.
The game finishes when one student has all the cards, or when one student has recorded ten ‘same name’ equations.

Activity 3

Conclude this session by discussing learning from the games, and reviewing ideas recorded on the class chart over five sessions.

Making Patterns

Purpose

In this unit students explore patterns involving transformations of shapes. Students make and identify patterns that involve translation, reflection, and rotation. They make their own patterns and pictures to show the transformations, and discuss with others how they included the different transformation elements.

Achievement Objectives
GM1-5: Communicate and record the results of translations, reflections, and rotations on plane shapes.
Specific Learning Outcomes
  • Make patterns that involve translations, reflections, and rotations.
  • Identify translations, reflections, or rotations in patterns.
Description of Mathematics

Translations (slides), reflections (flips), and rotations (turns) are explored in this unit.

Translations are slides or shifts of a shape along a line. 
A shape being translated down and to the right.

Reflections are flips of a shape to make an image as though it is reflected in a mirror.
A shape being reflected.

Rotations are turns, so when a shape is turned about a point, either inside or outside of itself, the image is a rotation of the original shape. This unit uses examples where the rotation happens around the centre point of a shape.

Opportunities for Adaptation and Differentiation

The learning opportunities in this unit can be differentiated by providing or removing support to students and by varying the task requirements. Ways to make the tasks more accessible include:

  • In session 1, show students how to make the first translation of an object before asking them to independently create patterns using translation.  You could also begin with translating a real object and drawing around it before introducing a stamp pad.
  • In session 3, focus on two or three examples of rotations using objects before introducing pictures that show rotations.
  • Students can work in multileveled pairs and small groups to share their thinking.
  • Digital tools can be used to rotate, reflect and translate objects.
  • Large foam shapes or images can be used outside as a class to show translation, reflection, and rotation.

The objects and pictures used in this unit can be changed to suit the interests and experiences of your students.  For example, local flowers and pictures of native insects and butterflies are likely to be more engaging than generic pictures of flowers and butterflies. You could also incorporate an outdoor walk where students look for examples of translations, reflections and rotations. Images of Native plants, animals, butterflies and marine mammals can be found at: Doc Native Plants, Doc Native Animals, Native Butterflies Slideshow and Native Marine Mammals

Te reo Māori vocabulary terms such as neke (translate), whakaata (reflect) and huri (rotate) could be introduced in this unit and used throughout other mathematical learning.

Required Resource Materials
  • Wallpaper or wrapping paper with translation pattern
  • Stamps and ink pad (stamps of native animals)
  • White and blue A4 paper
  • Pictures that show reflection patterns
  • Mirror
  • Scissors, glue, crayons
  • Copymaster
Activity

Session 1

In this session students make patterns that show translations.

  1. Show the students a piece of wallpaper, wall frieze or wrapping paper that shows a translation pattern that they can relate to.
  2. Ask the students: what picture is repeated on the paper to make a pattern? 
    Are the pictures the same each time? (Yes)
    How are the pictures the same? (shape, size, orientation, colour)
  3. Using A4 paper and stamps students are to make their own translation pattern on the page. Ensure that the students keep the stamp orientated the same way as they make repeated stamps on the page.

Session 2

In this session students make patterns that show reflections.

  1. Show the students pictures that show reflections, for example scenery reflections in lakes, butterfly wings, koru patterns, and kowhaiwhai patterns. 
  2. Explain to the students that a reflection picture looks like it could be folded in half so the two sides match. Using a mirror on the fold to show students that the reflection is the same as the other side.
  3. Colouring pictures of butterflies so the wings show a reflection pattern is a common and popular activity. Other ideas are: I make reflection patterns on the wings of paper planes, Māori designs and native insects.

Session 3

In this session students make patterns that show rotations.

  1. Show the students pictures that show rotations, for example, kowhaiwhai patterns, starfish arms, flower petals, windmill blades, propeller blades, bike spokes.
  2. Explain to the students that in these types of examples part of the object has been turned around a centre point. Ask them to identify the part that has been rotated. For example, if you take one spoke on the bike wheel, leave one end at the centre and turn the other end it will rotate on to the position of the next spoke.
  3. Show the students pictures where the object itself has been rotated, for example:
    Four-shot image of a car rotating 90 degrees clockwise with each successive shot.
  4. Using the stamps and ink pads students can show a rotation pattern where the whole object is rotated.
  5. Students can make patterns where part of the object is rotated. For example, drawing a flower by cutting out multiple petal shapes and gluing them around the centre, an aircraft with nose, wing propellers that show blade rotation, starfish and kowhaiwhai patterns.

Sessions 4 and 5

In these sessions students make an underwater sea picture that shows translation, reflection and rotation.

  1. Discuss with students the patterns they have been making over the last 3 sessions. Explain that they will be making a picture that shows all 3 transformations.
  2. Give the students the picture page or one of your choosing. Explain that they will need to make the other half of the octopus. Name the animals in the picture and explain that sea stars (or starfish) are usually found at the bottom of the sea. They will need to cut out the pictures but they don’t need to use them all in their underwater sea picture. The images provided could also be native sea creatures to New Zealand.
  3. Ask the students:
    Which animal shows reflection? (Octopus)
    How else could you show reflection in your picture? (Put two fish nose to nose.)
    How could you show the translation in your picture? (Use 2 or more of the same animal and orientate them the same way.)
    How could you show rotation in your picture? (Use 2 or more sea stars and rotate each one.)
  4. Help the students complete the octopus. Ask the students to cut around the box, fold it in half on the dots, cut around the shape, and open it out.
  5. Students cut out the other animals, colour them and glue them on to blue paper. Remind the students the finished picture needs to show translation, reflection, and rotation.
  6. Students share their pictures with each other. Individuals look for the translation, reflection and rotation elements in each others’ pictures.
Attachments

Matariki - Level 1

Purpose

This unit consists of mathematical learning, at Level 1 of the New Zealand Curriculum, focused around celebrations of Matariki, the Māori New Year. The sessions provide meaningful contexts that highlight Māori culture and provide powerful learning opportunities that connect different strands of mathematics.

Specific Learning Outcomes
  • Assemble parts of a shape to form the whole.
  • Create symmetrical figures (reflection and rotation).
  • Calculate the number of direct ancestors they have.
  • Use fractions to create rhythmic percussion patterns.
  • Order events.
  • Describe the likelihood of outcomes using the language of chance.
  • Measures quantities to follow a recipe.
Description of Mathematics

In this unit the students will apply different mathematical and statistical ideas, such as the properties of symmetry. In this, they will demonstrate understanding of the features of a shape that change and remain invariant under translation, reflection and rotation.

Table showing features of shapes that change and remain invariant under translation, reflection and rotation.

Students also apply simple probability. For example, given this set of cards, what is the chance of getting a bright star if you choose one card at random? Random means that each card has the same chance of selection.

Image showing four cards. One has a picture of a cloud, one has a dull star, and two have bright stars.

The set of all possible outcomes contains four possibilities. Two of those possible outcomes are selecting a bright star card. The chances of getting a bright star are two out of four or one half. There is a one quarter chance of getting a fuzzy star and the same chance of getting a rainy cloud.

Opportunities for Adaptation and Differentiation

The learning opportunities in this unit can be differentiated by providing or removing support to students, or by varying the task requirements. Ways to support students include:

  • explicitly modelling the key mathematical processes that students are required to apply in each session (e.g. measuring, identifying fractions)
  • supporting the use of specific counting and addition and subtraction strategies in reflection of your students’ strengths and strategy knowledge
  • modifying the numbers utilised in each session to suit the needs of your students
  • grouping students to encourage tuakana-teina (peer learning) and mahi-tahi (collaboration).

Although the context of Matariki should be engaging, and relevant, for the majority of your learners, it may be appropriate to frame the learning in these sessions around another significant time of year (e.g. Chinese New Year, Samoan language week). This context offers opportunities to make links between home and school. Consider asking family and community members to help with the different lessons. For example, members of your local marae may be able to share local stories and traditions of Matariki with your class.

Te reo Māori language is embedded throughout this unit. Relevant mathematical vocabulary that could be introduced in this unit and used throughout other learning include āhua (shape), shape names (e.g. whetū - star), hangarite (symmetry, symmetrical), whakaata (reflect, reflection), huri (rotate, rotation), tātai (calculate, calculation), tāpiri (add, addition), hautau (fraction), raupapa (sequence, order), tūponotanga (chance, probability), and ine (measure).

Required Resource Materials
Activity

Lesson One

  1. Introduce Matariki, The Māori New Year, to your class. There are many picture books and online videos that could be used to introduce this context. Matariki begins with the rising of the Matariki star cluster, (Pleiades in Greek), in late May or June. For the previous three months the Matariki cluster is below the horizon so it cannot be seen. The rising signals the turn of the seasons and sets the calendar for the rest of the year.
  2. Show your students the first few slides on PowerPoint 1. Discuss what stars are and how our sun is an example.
    What shape is a star?
    Today we are going to make some stars to display using shapes.
  3. For each slide discuss how the left-hand star is made then built onto to form the right star. Encourage your students to use correct names for the composing shapes, such as triangle, square, hexagon, trapezium. If necessary, provide a chart of the shapes and their names for students to refer to. Using a set of virtual or hard-copy pattern blocks, support students to make the stars on slides three and four by copying the pattern. Model this for students (especially if using virtual pattern-blocks). It may also be beneficial for students to work collaboratively (mahi-tahi) during this task.
  4. Encourage students to use the blocks to create their own stars. Slide 6 is a blank canvas of pattern blocks. With the slide in edit rather than display mode, you can use the blocks to form other patterns.
  5. Copymaster 1 provides two different puzzles for your students. They cut out the pieces to form a star. Glue sticks or blue-tack can be used to fasten the parts in place.
  6. Other Activities with Stars
    • Most star designs have mirror symmetry. That means that a mirror can be placed within the star, so the star appears complete. The reflection provides the missing half of the star. Demonstrate to your students how that works. Copymaster 2 provides four different star patterns. Give students small mirrors and ask them to find the places where a mirror can go so the whole star is seen. You could also demonstrate this on a PowerPoint, or using an online tool. An internet search for “online symmetry drawing tool” reveals a number of websites that could be used. Note that Star Four has no mirror symmetry so it is a non-example. Star Four does have rotational symmetry so it can map onto itself by rotation.
    • Copymaster 2 also has half stars on page two. Ask your students to complete the whole star. Be aware that attending to symmetry is harder when the mirror line is not vertical or horizontal. Can your students attend to perpendicular (at right angle) distance from the mirror line in recreating the other half?
  7. Creating stars by envelopes
    • The diagonals of some polygons create beautiful star patterns. The most famous pattern is the Mystic Pentagram that is created within a regular pentagon. Video 1 shows how to get started and leaves students to complete the pattern. The exercise is good for their motor skills as well as their attendance to pattern and structure. Copymaster 3 has other shapes to draw the diagonals inside. Note that a diagonal need not be to the corner directly opposite, it can also go to any corner that it does not share a side with.
    • Nice questions to ask are:
      How do you know that you have got all the diagonals? (Students might notice that the same number of diagonals come from each corner)
      Does the star have mirror lines? How do you know?

Lesson Two

In this lesson your students explore family trees, working out the number of people in their direct whakapapa. This may be a sensitive topic for some students. Thinking about our relatives who are no longer with us, or have just arrived, is a traditional part of Matariki, the Māori New Year. According to legend, Matariki is the time when Taramainuku, captain of Te Waka O Rangi, and gatherer of souls, releases the souls of the departed from the great net. The souls ascend into the sky to become stars.

  1. Begin by playing a video or reading a book about Ranginui (Sky Father) and Papatuanuku (Earth Mother), the mother and father of Māori Gods. 
  2. Ask: How many parents (matua) do you have?
    That question needs to be treated sensitively but the focus is on biological parents, usually a father and mother. You might personalise the answer by telling your students the names of your mother and father. Draw a diagram like this, or use an online tool to create the diagram:
    Image of part of a family tree showing two parents and their child.
  3. Ask:
    My mother and father had parents too. What are your parents' parents called?
    How many grandparents (koroua) do you have?
    Students may have different ways to establish the number of grandparents, such as just knowing, visualising the tree and counting in ones, or doubling (double two),
  4. Extend the whakapapa tree further.
    Image of part of a family tree showing two parents and their child.
  5. Ask: What do we call your grandparent’s parents? (Great grandparents, koroua rangatira)
    Nowadays, many students will still have living great grandparents. You might personalise the idea using your whakapapa.
    What do we call the parents of your great grandparents?
    Now I want you to solve this problem. How many great great grandparents do you have?
  6. Encourage students to work in small groups. Provide materials like counters or cubes to support students. Ask students to draw the whakapapa diagram to four layers and record their strategy as much as they can. After an appropriate time, share strategies.
  7. Discuss the efficiency of counting based strategies, counting by ones and skip counting in twos. Highlight more efficient methods such as doubling, e.g. 2 + 2 = 4, 4 + 4 = 8, 8 + 8 = 16.
  8. Ask: Now let’s just think about our parents. If three children in this class invited their parents along, how many parents would that be?
    Use the context as a vehicle for introducing even numbers (multiples of two), Act out three children getting their parents (other students) and bringing them to school. Change the number of students and work out the total number of parents. Find a way to highlight the numbers that come up, such as shading the numbers on a virtual Hundreds Board.
  9. Ask: Can anyone see a pattern in the numbers of parents?
    Students might notice that even numbers occur in the 0, 2, 4, 6, 8 columns of the hundreds board.
  10. Introduce a challenge: If everyone in this class brought their parents along, how many parents would that be?
  11. Ask the students to work in small teams with materials. Providing transparent counters and individual Hundred Boards will be useful but provide a range of options. Watch for your students to:
    • structure their model as "two parents for every one student"
    • deploy materials in an organised way to represent the whole class
    • use efficient counting strategies, to systematically find the number of parents
    • use recording to organise their thinking, particularly the use of number symbols.
  12. Share the strategies students used with a focus on the points above. Depending on the current achievement of your students you might extend the problems. For example:
    • Ten parents came along. How many students brought them?
    • How big would our class be if 100 parents came along?
    • If every student in another class brought two parents along, could there be 54 parents? What about 53 parents? Etc.
    • If students in our class brought all their grandparents along, how many grandparents would that be?
    • If we had to provide a Matariki celebration for our grandparents, what food and drink would we need?
    • How much of each food and drink would we need?

Lesson Three

Matariki is a time for cultural activities, such as story-telling, music, and games. Titi Rakau is a traditional game that involves hitting and throwing sticks, usually to a rhythmic chant. It was used to enhance the hand-eye coordination of children and warriors. Rakau can be used as a vehicle for fractions and musical notation, as well as physical coordination. You can make the tasks below as simple or as difficult as you like.

  1. Look at slide 1 of PowerPoint 2
    What fractions has the bar been broken into? (Quarters)
    Each of these notes (crotchet) is one quarter of a bar in this music.
  2. Find a piece of music online with a clear 4/4 time signature. That means there are four crochet (quarter) beats to the bar. This timing is very common in popular music. “Tahi” released by Moana and the Moa Hunters in 1994 is a good example that is easily found online. Ask your students to clap in steady 1, 2, 3, 4, … time with a consistent time between claps as the music plays.
  3. Introduce rākau, made from rolled up magazines taped together with duct tape. Students might practise hitting the ground with the ends of the sticks on every beat of the 4/4 time. This can be changed to beat one on the ground, and beat two ‘clapping’ the sticks together in the air, beat three on the ground, and beat four in the air, etc.
  4. Introduce the rest symbol using slide 2 of PowerPoint Two. In 4/4 time the rest is for one beat. So the rhythm is ‘clap, clap, clap, rest, clap, clap, clap, rest…” as is used in “We will rock you,” by Queen. Slide 3 has a bar with two rests. See if the students can maintain that rhythm.
  5. Slides 4 and 5 introduce the quaver which is a one-eighth note in 4/4 time. See if students can manage the two different rhythms, including the beamed (joined) quavers. Copymaster 4 can be made into cards, or cut out as is, to create different rhythmic bars in 4/4  time. Note that the semibreve (circular note) denotes the whole of four beats, and the minim (stemmed hollow note) denotes one half of a bar. A minim is equivalent to two crotchets.
  6. Let your students make up a single bar using the cards. Encourage them to experiment with possible rhythms by trailing them with Rakau. Rests are usually part of Rakau to allow movement of the sticks from one position, e.g. floor, to another, e.g. chest. The rhythm a student creates can be played by another using Rakau.
  7. Look for your students to:
    • Apply their knowledge of fractions, such as one half and two quarters make one whole (bar)
    • Recognise equivalence, such as two quarters make one whole or two eighths make one quarter.
  8. Share the bar patterns that students create and play them with Rakau. Rhythms can also be checked by finding an online music composer for children and entering the notes. The software usually has playback.
  9. Natural extensions of the task are:
    • Explore different time signatures. Many Māori action songs are in Waltz time (3/4) meaning that there are three crotchet beats to a bar. A crotchet is one third of a bar in that time signature and a quaver is one sixth of a bar.
      The popular chant associated with Ti Rākau (E Papa Waiari - available on YouTube) is in 6/8 time meaning there are six quaver beats to a bar. If you watch a video of a performance with Rākau the sticks are often hit on the ground on the first and fourth beats, or clicked together on the second, third, fifth and sixth beats.
    • Try to work out and record the rhythm of pieces of music, using the cards. Choose a difficulty that suits your students. For example, E rere taku poi, is in 4/4 time and is the tune to “My Girl.”  Kiri Te Kanawa’s recording of Te Tarahiki in 1999 features a six quaver rhythm in 3/4  time. 

Lesson Four

The rising of Matariki, in late May or June, signals to Māori that it is the start of a new year. It is appropriate for students to reflect on the passage of time. For young students there are important landmarks in the development of time, including:

  • Recalling and sequencing events that occurred in their past.
  • Anticipating events that might occur in the future.
  • Recognising that time is independent of events, it progresses no matter what is occurring.

Cooking in a hāngī

In the first part of the lesson students work with the first two ideas, recalling the past and anticipating the future.

  1. Show students a video about preparing and cooking a hāngī. There are many examples online. Before viewing the video prompt your students:
    Watch carefully. At the end of the video I will ask you about how to make a hāngī.
  2. At times pause the video to discuss what might be occurring. Use the pause as an opportunity to introduce important language, like hāngī stones, kai (food), prepare, cover, serve, etc.
  3. Give each pair or trio of students a copy of the first six pictures of Copymaster 5
    I want you to put the pictures in the order that they happened. Put them in a line. Be ready to explain why you put the pictures in that order.
  4. You might allow groups to send out a ‘spy’ to check the order that other groups are using. After a suitable time let the groups ‘tour’ the lines that other groups have created and change their own line if they want to. Bring the class together to discuss the order of events.
    Why does this happen before this?
    Why does this happen after this?
  5. Do your students recognise the consequential effect of order? e.g. The fire cannot be lit until the hole is dug and there is somewhere to put it.
  6. Can the students recognise what events occurred between two events? e.g. Covering the food with soil and waiting four hours occurred between putting the food and stones in the hole and taking the cooked food out.
  7. Discuss:
    What might have happened before the hole was dug?
    What might have happened after the food was served?
  8. Ask students to draw and caption an event that occurred before the sequence of pictures, and another event that happened after. You could also provide a graphic organiser for students to use. For example, the food must be prepared before or while the hole is dug. It must be bought or gathered before it can be prepared. After the food is served it will be eaten. Copymaster 5, pictures 7 and 8 are before and after pictures.
  9. Add students’ before and after pictures to the collection from Copymaster 5. You might create a wall display. Some before and after pictures might need to be sequenced. Picture 9 is an event (uncovering the hole) that occurs between two of the six events. Where does it go? Why?

Chances of a good year

In former times, tohunga, wise people of the village, looked at the sky before dawn to watch the rising of Matariki. They used the clarity of the stars to predict what the new year would bring. A clear sky with the stars of Matariki shining brightly signalled a good season for weather and the growing and harvesting of crops. A cloudy sky signalled bad luck.

  1. At the rising of Matariki, some stars shine brightly while others do not. Each star has a special job. Use PowerPoint 3 to introduce the stars and their jobs. Play a game with Copymaster 6. The first page is a game board. Use the second page to make a set of 12 cards (bright stars, fuzzy stars, and clouds). The second page can be used to make three sets of the cards.
  2. Put the gameboard down and spread the cards face down on the floor. Mix the cards up while students close their eyes. Students select cards one at a time to cover each of the seven stars. For example, Matariki might be covered by the card for a fuzzy star. Slide 2 of PowerPoint 3 shows a completed gameboard (click through it to place the cards).
    If you saw this, what would you predict?
  3. Students should make comments like:
    There will be plenty of rain but not too much, and the crops will grow well.
    It is going to be a bit windy.
    There will be lots of food in the rivers, lakes and sea.
  4. Let students play their own game of predicting the upcoming year. Look to see whether students consider what is on the set of cards in predicting what card might come next.
  5. After playing the game discuss:
    • Is it possible to have a year where every star shines brightly? (No. There are six bright star cards and seven stars of Matariki)
    • What is the worst year you can have? (All two clouds and four fuzzy stars come up)
    • How likely is it that you will have a good year? (Quite likely since half the cards are bright stars and one third of the cards are fuzzy stars)

Lesson Five

This lesson involves making rēwena paraoa (potato bread). The process of making it takes three stages; preparing the ‘bug’, mixing and baking, then serving. Therefore, it is not a continuous lesson. Preparation and serving food are important activities for Matariki celebrations. It would be beneficial to invite older students, or community members, in to help with this session.

  1. Explain: In the next three days we are going to make rēwena bread from potatoes. Why is the bread you buy at the supermarket so light and fluffy?
  2. Some students may have made bread with their parents or grandparents and can talk about yeast as the ‘leavening’ agent. Play an online video of breadmaking and discuss what each ingredient contributes.
  3. In rēwena bread the natural yeast from potatoes is used to raise the dough. The best potatoes are older taewa (Māori potatoes) which are small and knobbly, but any medium sized aged potato will do. One medium sized potato is needed per recipe (for three students).
  4. Weighing the potatoes on kitchen scales is a good opportunity to introduce the students to the gram as a unit of mass. Can your students predict the weight of each potato? You might have a potato peeling competition, using proper peelers (not knives). Focus on peeling slowly, with control, as opposed to quickly and without control. The student who gets the longest peel wins. Naturally, you will need to measure the lengths of the peels and come up with a class winner.
  5. To make one batch of ‘the bug’ cut up the potatoes into smaller bits and boil them in clean water (no salt) until they are soft. You might time how long that takes. Let the potatoes cool and don’t drain the water. Mash the potatoes, water included. Add in (for each recipe):
    2 cups of flour
    1 teaspoon of sugar
    Up to one cup of luke-warm water (as needed to maintain a paste-like consistency)
  6. After you have made a bulk lot of ‘the bug’ put it into clean glass jars to ferment. Fill each jar to one third as the mixture will expand. Cover the jar with greaseproof paper and fix it with a rubber band. Over three of four days the mixture will ferment. Feed it daily with a mix of one teaspoon of sugar dissolved in half a cup of potato water. Your students will be intrigued by the foaming concoction that develops.
  7. After ‘the bug’ has developed, let your students create their own batch of rēwena bread by following the recipe (PowerPoint 4). This is a good exercise in interpreting procedural language. Read the instructions to the class if necessary or use your most competent readers.
  8. Once the bread is made it needs to be cut into slices.
    How many slices should we make?
    How thick will the slices be?
    How many cuts will we make?
  9. You might explore sharing slices equally among different numbers of students. Naming the equal parts will introduce fractions. You might explore the different ways to cut a slice in half or quarters.

Arty Shapes

Purpose

In this unit ākonga participate in a variety of art based activities to develop their knowledge of 2-dimensional shapes. They use their own language to describe their works and the shapes they have used.

Achievement Objectives
GM1-2: Sort objects by their appearance.
Specific Learning Outcomes
  • Name 2-dimensional shapes: triangle, square, oblong (non-square rectangle), circle, oval and diamond.
  • Describe shape attributes (sides, corners, curved and straight lines, edges, pointed) in their own language.
Description of Mathematics

This unit begins an exploration of basic 2D shapes, their properties and the mathematical language associated with them in both te reo Māori and Engligh. There is a progression from the way the ākonga think of and see these objects to the more formal mathematical ideas and descriptions. In order to be able to communicate on any topic, there is a need for a common language. This unit takes the initial steps in the formulation of this common language.

Opportunities for Adaptation and Differentiation

The learning opportunities in this unit can be differentiated by providing or removing support to ākonga and by varying the task requirements. Ways to differentiate the tasks include:  

  • providing ākonga with cut-out shapes if they have difficulty cutting them from paper
  • asking ākonga to suggest objects that they could create with the shapes available
  • providing ākonga with a variety of material that can be used to create shapes and identify their attributes
  • providing ākonga with plenty of opportunities to use the common language developed in this lesson, as individuals, with their peers, and in whole-class environment. 

The context for this unit can be adapted to suit the interests, experiences and cultural makeup of your ākonga. This unit begins with looking at Piet Mondrians's artwork. In Session One, ākonga practice identifying shapes and describing them. Instead, or following this discussion, you could work with ākonga to identify art in their culture. Possible contexts of art in te ao Māori could be raranga/weaving, whakairo/carving, or peitatanga/painting. The art that is utilised in this learning should make clear links to the specific learning outcomes, meaning it should include images of 2-dimensional shapes (i.e. triangle, square, oblong, circle, oval, diamond).

Te reo Māori vocabulary terms such as tahi (one), rua (two), toru (three), tapatoru (triangle), tapawhā rite (square), tapawhā hāngai (non-square triangle), porowhita (circle), porohema (oval) and taimana (diamond) could be introduced in this unit and used throughout other mathematical learning.

Required Resource Materials
  • Examples of Mondrian art. These can be found by doing an online image search.
  • Session One: Black paper, colour copies of the Shape Sheet in a variety of sizes, scissors, glue.
  • Session Two: Paper for each ākonga, shallow containers of PVA glue, paint or food colouring to colour PVA (optional), string.
  • Session Three: A copy of the Tiki copymaster for each ākonga, large stencils made of thick card in a variety of shapes, crayons and dye.
  • Session Four: Salt, flour and water to make salt dough, rolling pins, biscuit cutters in a variety of shapes, drinking straws, coat hangers or similar to hang shapes from, access to an oven to dry salt dough shapes, paint and string.
  • A word wall, vocabulary poster, or T chart may be a useful scaffold addition within the classroom learning environment for students to use throughout the unit. You could create and add to this with your class to conclude each session.
Activity

Throughout each session encourage the ākonga to talk about what they are making and the features of the shapes they are using. Discuss the similarities and differences in shapes and encourage a wide use of a range of terms. Counting the numbers of sides and the numbers of corners each shape has is also a good way to get ākonga to focus on shapes.

Questions or pātai to use:

  • Do you see any ways that these shapes are alike? How are they alike?
  • Can you see any shapes that are different? How are they different?
  • What do these shapes have in common?
  • What are some of the things you notice about the shapes you are using?
  • Do you know what we call these shapes?
  • What can you tell me about that shape?
  • Why have you chosen to use that shape?
  • Are all the sides the same? Are all the corners the same?

A word wall, vocabulary poster, or T chart may be a useful scaffold for ākonga to use throughout this unit.

Session 1: Shape collage

  1. Begin the session by looking at some of Piet Mondrian’s primary coloured and cubist art works. Have ākonga identify the shapes they can see and describe these.

    • What shapes has the artist used in their painting?
    • Can you see where the artist has used corners?
    • Where are the straight lines in this art work?
    • How would you describe the shapes the artist has used?
       

    As the ākonga identify the shapes and their features, record these in a visible place (e.g. whiteboard, on a large poster).
     

  2. Provide ākonga with one sheet of black paper each, a variety of shapes in different sizes and a pair of scissors. To support ākonga, who require more scaffolding in recognising and naming shapes, you could use a tactile material such as play-dough and/or popsicle sticks, stencils, or sand to make these shapes. This could be done as a small group until ākonga are ready to progress to the cutting task.
  3. Have ākonga colour in and cut out a variety of shapes and arrange them in interesting ways to make a picture, this may be abstract or a familiar object such as a car or a person. This could be linked to a relevant context from other areas of the curriculum (e.g. remember we went to a marae last week. The wharenui had a triangle for the roof made by the maihi (arms), and a big oblong-shaped building. It had long oblong posts on either side of the oblong. Can you create a wharenui from the shapes you have cut out?) You might support students by getting them to build their collage first with plastic shapes or sticks and play-dough, so that they have an image to refer back to.
  4. Encourage ākonga to discuss their work and the works of others and to change their designs as their ideas develop.
  5. Once they are satisfied with their pictures, ākonga glue the shapes in place.

Session 2: String shapes with PVA

  1. Revisit the names and attributes of shapes you looked at in the previous session. Use the collage art that ākonga created to encourage discussion of the different shapes and attributes (e.g. who had a square on their collage, show your partner where the square is).
  2. Provide each ākonga with a sheet of paper, strings of varying lengths and access to a shallow container of PVA. PVA may be coloured using food colouring or paint if desired.
  3. Ākonga dip pieces of string into the PVA and place them onto their pictures, making a variety of shapes in their work.
  4. Encourage ākonga to discuss their work and the works of others and to change their designs as their ideas develop.
  5. Once designs are dry they can be used as a block to create crayon rubbings if desired.

Session 3: Shape stencils in crayon and dye

 
  1. Provide each ākonga with a piece of paper, some large stencils made of thick card in a variety of shapes and some crayons.
  2. Ākonga trace around the stencils in a variety of different colour crayons, overlapping shapes to create an interesting effect. You may need to model the tracing action for the whole class, or for individuals or groups of students. Encourage tuakana-teina by getting students to help each other with the tracing.
  3. Encourage ākonga to discuss their work and the works of others. Explicitly model and encourage the language stated in the learning outcomes (i.e. shape names and attributes). Use phrases such as how many lines can you see on your collage? I can see 5 different shapes, can you name them all?
  4. When the shapes are completed ākonga can paint over the shapes with dye, or use crayons, pencils etc. to enhance their work.

Session 4: Shape mobiles

  1. Mix salt dough using equal quantities of salt and flour with enough water to form dough with good consistency. Links to science could be made here (e.g. what happens when we mix wet and dry ingredients? How much of each wet and dry ingredient do we need to add to make a dough?)
  2. Provide ākonga with dough and cutters.
  3. Ākonga flatten dough using rolling pins and cut a variety of shapes using biscuit cutters. Each shape needs a hole at the top to enable it to be hung with string. This can be made using a small piece of drinking straw.
  4. Encourage ākonga to discuss their work and the works of others.
  5. Place shapes in the oven at 100°C for 1 - 2 hours to dry out.
  6. Once shapes are dry they can be painted and hung onto a coat hanger with string to create a mobile.

Session 5

In this session ākonga reflect on one of their art-works made in the previous sessions, discuss and describe it and write about their work. Encourage ākonga to use both te reo Māori and English to describe their artworks.

Their writing could then be published and displayed, either in a classroom display or in a large book for the book corner. Encourage ākonga to share their produced artwork and learning with family and whānau.

Attachments

Teen numbers (building with ten)

Purpose

The purpose of this unit of sequenced lessons is to develop knowledge and understanding of the place value structure of numbers from ten to twenty.

Achievement Objectives
NA1-1: Use a range of counting, grouping, and equal-sharing strategies with whole numbers and fractions.
NA1-3: Know groupings with five, within ten, and with ten.
NA1-4: Communicate and explain counting, grouping, and equal-sharing strategies, using words, numbers, and pictures.
Specific Learning Outcomes
  • Instantly recognise patterns for teen numbers.
  • Make groups of ten and represent teen numbers with materials.
  • Recognise and record words and symbols for teen numbers.
  • Understand that in a teen number the 1 represents one group of ten.
  • Expand teen number notation and understand simple place value.
  • Understand and apply a ten for one exchange.
  • Understand how to decompose a ten in order to subtract.
Description of Mathematics

When ākonga meet the number ten they meet a two-digit number for the first time. They begin to develop awareness of the concept that there are no more numerals to learn and we just ‘recycle’ them. This is their entry into the structural world of our tens based number system.

Ākonga are introduced to the language of digits, place and value. It is a considerable conceptual shift for ākonga to move from a face value understanding (i.e. that a numeral represents a number of units that can be counted) to a complex place value understanding in which a numeral can represent a group or a number of groups, that are in themselves made up of units that can be counted.

As ākonga study teen numbers and their meaning and structure (rather than simply ‘saying’ them in a counting sequence), the focus is on developing the understanding that the value of a digit depends on its' place. This is not trivial and it is made more challenging by the language of teen numbers. 

Ākonga often confuse the number names such as ‘fourteen’ and ‘forty’ because the adult enunciation of the word endings is often unclear. In hearing ‘fourteen’ ākonga may expect to see the 4 appear first in the symbolic form because that is the number that comes first when they say it. Seeing 14 and hearing ‘four – teen’ therefore has the potential for confusion.

Ākonga need many opportunities to make these numbers with materials. When using place value material for the first time, ākonga need the opportunity to group single units to make one ten. By doing this they come to understand that ten ‘ones’ or units do in fact comprise one 'ten'. The first equipment to use therefore is that which can be physically grouped, one by one, to make or compose one group of ten, or a ‘ten’, and be able to be unpacked or decomposed again into ten ones. When this is complemented by symbolic recording that accurately matches the representation of the number, understanding of two-digit notation is developed. Equipment in which the tens are already pre-grouped can be used once grouping to make ten is well understood.

It is a considerable shift for ākonga to then use materials in which the ten looks completely different from the ones (for example, money) and to trust the 'ten for one' trade. The greatest abstraction is the digits in our number system, where the tens and ones look exactly the same but it is only their place that tells their value. 

In depth exploration of place value with teen numbers is essential if our ākonga are to work with real understanding of the numbers within our number system.

The activities suggested in this series of lessons can form the basis of independent practice tasks.

Opportunities for Adaptation and Differentiation

The learning opportunities in this unit can be differentiated by providing or removing support to ākonga and by varying the task requirements. Ways to differentiate the tasks include:  

  • introducing fewer activities and repeating activities for those ākonga who need more support.
  • working with the numbers 11-12 before introducing the numbers 13-19
  • providing multiple sets of materials where ākonga can 'make ten' and then 'make teen numbers'
  • using some of the suggested activities as independent activities for ākonga who need greater challenge. These could be set up as a bus stop activity.

Using the place value language structure within te reo Māori to develop and reinforce the understanding that teen numbers represent 'ten and' may support conceptual understanding of teen numbers. Display a chart to reinforce this conceptualisation. Oral communication of te reo Māori for numbers up to 20 will also be useful in the context of enhancing the interest and cultural relevancy of this learning. 

tahi1tekau mā tahi11
rua2tekau mā rua12
toru3tekau mā toru13
whā4tekau mā whā14
rima5tekau mā rima15
ono6tekau mā ono16
whitu7tekau mā whitu17
waru8tekau mā waru18
iwa9tekau mā iwa19
takau10rua tekau20
Required Resource Materials
Activity

Session 1

SLOs:

  • Instantly recognise patterns for teen numbers.
  • Make groups of ten and represent teen numbers with materials.
  • Recognise and record words and symbols for teen numbers.

Activity 1

  1. Show the ākonga single tens frames. Have them show the same number of fingers as the number of dots, say and write the number with their finger in the air or on the mat.
     
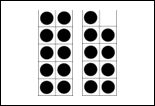
  2. Show two tens frames, one of ten and the other of a number less than ten, together making a teen number. Have ākonga ‘write’ with their finger how many dots they see. For example:
    A tens frame with ten dots in it.  A tens frame with three dots in it.  13
    Repeat with several teen numbers.
     
  3. Write the numbers 11 – 19 in symbols and words on chart paper, highlighting the inconsistencies of the language and exploring for fun alternative forms of some of the teen numbers, for example, eleven (oneteen), twelve (twoteen), thirteen (threeteen), fifteen (fiveteen). For each word, as appropriate, underline teen in the word, practice saying it and hearing the final consonant, ‘n’. Make the connection between this ‘teen’ word and ‘ten’. Retain this chart to add to later. This chart could also include words for 'teen' numbers from other languages relevant to your ākonga.
     
  4. Ask your ākonga what they notice about all of these numbers. (They all have 'teen' at the end and are ten and ‘something’). They are known as teen numbers.

Activity 2

Have ākonga work in pairs to play Teen Pairs. Consider pairing together ākonga of mixed mathematical abilities to encourage tuakana/teina.
Purpose: to recognise and match teen number representations and the words ‘ ten and ____’

Ākonga place between them two piles of cards face down (Copymaster 1).

Pile 1: Tens frame teen number cards (showing two tens frames).

Pile 2: Word Ten and _____ cards. 

Ākonga take turns to turn over one tens frame teen number card and say the number of dots they see. They then turn over a word card and read the words aloud. If the tens frames and word card match, they keep the matching pair. The winner is the ākonga with the most pairs.

For example:
A word card that reads 'ten and nine'.   A tens frame card with two tens frames showing 19 dots altogether.

Activity 3

  1. Have ākonga work in pairs to ‘make’ their own group of ten. Give each pair of ākonga forty ice-block sticks, two elastic hair ties, pens and chart paper or a mini whiteboard.
     
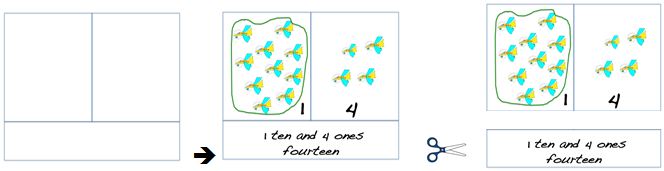
  2. Have each ākonga pair choose and write in symbols a number from eleven to nineteen and take that many sticks. Have them count out and make one bundle of ten using the hair tie, then write and draw what they have. For example:
     A bundle of ten sticks.A single stick.A single stick. 
    12 is ten and two 
  3. Have them unbundle and return their sticks, then repeat with another teen number making use of spare sticks as required.
     
  4. Ask the ākonga to return to the whole group with their drawings, keeping them hidden. Have the ākonga take turns to describe to the class what they have drawn, and ask another ākonga to say what number it is. The drawing is then shown.
     
  5. The kaiako concludes by recording the ‘ten and _________’ words beside each of the teen numbers on the class chart begun in the earlier activity. Also consider exploring together the Place Value sticks animation, available from https://e-ako.nzmaths.co.nz/modules/PVanimations/

Session 2

SLOs:

  • Make groups of ten and represent teen numbers with materials.
  • Recognise and record words and symbols for teen numbers.
  • Understand that in a teen number, the 1 represents one group of ten

Activity 1

  1. Have ākonga sit with a partner. Tell them that each pair is going to be making teen numbers on their fingers and ask them to discuss how they will do this. Look and listen for those ākonga who immediately identify that one of their pair will be the ‘ten person’, holding up ten fingers each time.
     
  2. Hold up a mixture of cards with number names in words, symbols and those reading ‘ten and ___’. (Copymaster 2). Each time, check to see if ākonga pairs can achieve the cooperative representation on their fingers.
     
  3. The kaiako makes a teen number from ice block sticks, having ākonga count to ten as the ten bundle is made.
    A bundle of ten sticks.A single stick.A single stick.A single stick.A single stick.A single stick.
    Hold up the ten bundle and ask, 'Do I still have ten sticks here?' (yes) 'How many bundles of ten do I have?' (1). Record this on the chart, for example, I have fifteen. 15 is ten and five. 15 is 1 ten and 5 ones. Discuss the language of ‘ones’ and that sometimes ‘ones’ can be called ‘units’.
     
  4. Model some more examples then have ākonga individually draw and write about some of their favourite teen numbers. For example '12 is 1 ten and two ones'.

Activity 2

If available, have ākonga work in small groups or pairs to explore, find and display the four matching cards in the BSM 9-1-48 card game.

Alternatively, ākonga can make a class puzzle matching game. Provide each ākonga with card, pens and scissors. Have them make their own puzzle pieces which can then be combined with those made by their classmates and mixed up to make a matching pairs game. Before cutting these up, photocopy an extra 3 or 4 sets to be used later on in this unit.
Examples of puzzle pieces for the puzzle matching game.

Activity 3

  1. Return to the class chart started in Session 1. Record te reo Māori words for teen numbers, highlighting ‘tekau mā’ is ‘ten and’, connecting this mathematics language with the other expressions already recorded.
     
  2. Photocopy a few more sets of the matching game ākonga made in Session 2, Activity 2. Distribute this game so that your ākonga can play it in small groups of 3-4. The purpose of this game is to match word, pictorial and symbol representations of teen numbers.
    Ākonga deal out 7 cards each. The remaining pile of cards is placed in the centre of the group. Ākonga take turns to ask one other player for a card needed to complete a set of 3 teen family cards. If the other player does not have the card sought, the requesting player takes one from the pile. As sets are complete, ākonga place these in front of them.
    The winner is the player with the most complete sets.

Session 3

SLOs:

  • Understand that in a teen number, the 1 represents one group of ten.
  • Expand teen number notation and understand simple place value.
  • Understand and apply a ten for one exchange.

Activity 1

  1. Display the chart started in Session 1. Record beside the numbers 11 – 19 the description ‘1 ten and x ones’ for each of the numbers.
     
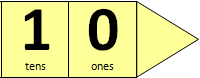
  2. Using enlarged arrow cards demonstrate and discuss the place value notation that we use, highlighting tens and ones language.
    Arrow cards showing one ten and zero ones.Arrow card showing five ones.          Arrow cards showing one ten and zero ones.Arrow card showing seven ones.
     
  3. Introduce ākonga to plastic beans and containers. Have them work in pairs to make up containers with ten beans in each and discuss what the containers will be called. (a container is ‘one ten’ or ‘a ten’). Have ākonga discuss the similarities between the sticks they have been using and the beans.
    A container with ten beans inside it.A single bean.A single bean.A single bean.A single bean.A single bean.
    NB. The container for the beans looks different from the ones, but can still be unpacked. This is a subtle and important shift. Also consider exploring together as a group or class the place value beans animation, available from https://e-ako.nzmaths.co.nz/modules/PVanimations/
  4. Give ākonga time to become familiar with the beans and the arrow cards. Have them make and model teen numbers with the equipment, explaining this to their partner.
     
  5. Have each ākonga complete a think board sheet (Copymaster 3) or a mini poster about one of their favourite teen numbers. Display these.

Activity 2

Ākonga play Go Teen in pairs. A tuakana/teina model could work well here.
Purpose: to use ten ones to make one group of ten, when adding two single-digit numbers.

Ākonga have playing cards (ace - 9), shuffled and face down between them. Alternatively you could print out numeral cards 1-9. They have single beans and empty tens containers (or single ice block sticks and hair ties), single digit and tens arrow cards available.

The players take turns to turn over two playing cards. When the two numbers are added, if they make less than ten they return them face down to a discard pile.

If they make more than ten they keep their playing cards, take the total number of beans, group the materials showing the total as 1 ten and units. They also show the number with the arrow cards.

However, if the number has already been made by their partner, (the arrow cards for that number have been used) the ākonga must simply return their playing cards to the discard pile.

The winner is the player with the most tens (containers with beans) when all the arrow cards have been used up.

Session 4

SLOs:

  • Understand and apply a ten for one exchange.
  • Understand how to decompose a ten in order to subtract.

Activity 1

  1. Kaiako models a teen number with containers and beans and asks, ‘What number is shown here?’. For example, 18:
    A container with ten beans inside it.A single bean.A single bean.A single bean.A single bean.A single bean.A single bean.A single bean.A single bean.
    A problem is posed in which the number being subtracted requires the ten to be ‘unpacked’ or decomposed:
    'Here are the beans Gardener Gavin is going to plant. He plants 9 in the first row. How many beans are left to plant in the second row? How can we work this out?'
    Ākonga can discuss strategies for subtracting 9 and suggest what they can do with the materials. Kaiako models this and some more examples can be explored together.
     
  2. Ākonga are provided with place value materials and are each given some subtraction problems to solve with decomposition (Copymaster 4). Ākonga should record with pictures, words and an equation what they did and what their result is. The thinkboard (Copymaster 3) could be used again - it could be laminated and be reusable with a whiteboard pen.
     
  3. Share as a class and discuss. The language of making ten (composing) and breaking ten (decomposing) can be introduced.

Activity 2

  1. The kaiako asks a ākonga to model twenty using place value material. Discuss what this represents: two tens is the same as twenty. Rua tekau is a good example of this concept.
     
  2. Have the ākonga play in pairs or small groups First to twenty.
    Purpose: to understand how to compose and decompose a ten.
    Equipment: Ākonga beans and containers, numeral cards 11- 14, a set of playing cards 2 – 5, a dice with a + or – symbol marked on each of the six faces, mini whiteboards and markers.

    How to play:
    1. Numeral cards are spread out face down.
    2. Each ākonga selects a card and makes that number using place value equipment.
    3. Players take turns to roll the dice and turn over a playing card. They follow the instructions on the card, either adding or subtracting from their materials.
    4. Each time an ākonga has a turn they are required to write the equation.
    5. The winner is the first ākonga who has two containers of ten beans (twenty).

      For example: one ākonga turns over and models 13, rolls + and 3, and makes 16.
      At their next turn the ākonga may have to – 4, followed on the next turn by – 3.
      This will require the ākonga to decompose the ten.
      The ākonga will have recorded for the three turns so far:
      13 + 3 = 16
      16 – 4 = 12
      12 – 3 = 9

Conclude the lesson with a focus on the words, ‘place value’. The kaiako writes ‘place value’ on a chart and asks ākonga what this could mean. They are encouraged to look at all the recording of teen numbers completed throughout these lessons. Accept all responses, but conclude by highlighting and recording that 'the place of a numeral in a number tells us what it is worth or its value.' Show the enlarged arrow cards drawing attention to the words tens and ones.
Arrow cards showing one ten and zero ones.Arrow card showing seven ones.

Attachments

Seesaws

Purpose

This unit involves the students directly comparing the weight (mass) of two or more objects.

Achievement Objectives
GM1-1: Order and compare objects or events by length, area, volume and capacity, weight (mass), turn (angle), temperature, and time by direct comparison and/or counting whole numbers of units.
Specific Learning Outcomes
  • Compare two objects by weight.
  • Order three or more objects by weight.
  • Describe the weight of objects using comparative language, for example, heavier, lighter.
Description of Mathematics

Weight is a measure of the force of gravity on an object. Mass is the amount of matter in an object and a measure of the force needed to accelerate it. This means that the mass of the object on the moon is the same as its mass on earth, but its weight is lighter on the moon. In a science context, weight is measured in Newtons (N), and mass is measured in kilograms (kg), grams (g), and milligrams (mg). However, these terms are often used interchangeably. For practical purposes, the language commonly used to measure weight and mass in everyday life is kilograms, and grams. Choose one term (e.g.weight or mass) and use it consistently with your students.

An important early goal in measurement is for students to understand the attribute they are going to measure. Comparison activities help students develop an understanding of the attribute that is being measured. In the case of mass, the most personal experience is comparing the weights of two objects by holding one in each hand and feeling which has the greatest downward pull. This personal experience can then be transferred to the use of balance and spring scales.

Young students are influenced by what they see. The shape or the size of an object can easily deceive them. For example, students who do not yet conserve the property of mass will think that if the shape of an object changes then so does its mass. In one of the stations, in this unit, the students change the shape of a piece of plasticine and then weigh it to see that the weight has stayed the same.

Opportunities for Adaptation and Differentiation

The learning opportunities in this unit can be differentiated by providing or removing support to students and by varying the task requirements. Ways to provide more support include:  

  • comparing the weight of objects using hands and outstretched arms (as described above) to further develop a student’s conceptual understanding of weight
  • modelling the tasks to be done at each station
  • providing visual and written instructions for the tasks to be done at each station
  • instead of using stations where students are left to work with partners, convert the stations to daily sessions, offering a more supported experience.  
  • providing opportunities for students to work in flexible, multi-level pairs, groups and as individuals. 

Te reo Māori vocabulary terms such as taimāmā (light), taumaha (heavy), ine-taumaha (scale for measuring weight) and maihea (weight) could be introduced in this unit and used throughout other mathematical learning.

The objects weighed in this unit can be selected to suit the interests, experiences and culture of your students. For example, the students could bring small objects from home or objects that they can collect from around the school playground (e.g. stones, cones, twigs or shells). Bringing items from home might offer important opportunities for oral language (i.e. sharing) When students are making objects out of plasticine, students could make objects to reflect their current learning interests (e.g. a snail, if you are learning about minibeasts). Consider how the use of different objects might reinforce learning from other areas, and contribute to a cohesive learning experience across all sessions/stations.

Required Resource Materials
  • Station 1: Soft drink cans, shoe box lids (cut to about 10 cm in width), plasticine, small toys (plastic vehicles and animals), shells and rocks
  • Station 2: Plasticine, homemade "seesaw"
  • Station 3: Balance scales, toys
  • Station 4: Balance scales, toys
  • Station 5: Hat elastic, bull-dog clip, toys, paper, crayon
Activity

Station One: See-saws

In this station we work with a partner to make a see-saw using a soft-drink can and a shoe box lid. We then use the see-saw to find objects that are the same weight.

  1. Discuss what it means to weigh an item. Students might suggest that it means to find out how heavy something is, or whether one item is heavier than another. Discuss what tools we can use to measure how heavy or light something is, and times when we might measure the weight of different items (e.g. baking, cooking, collecting mātaitai/shellfish). List down the contexts suggested by students. Students might also suggest words that are used to talk about the weight of things in their home language (e.g. taumaha/heavy, taimāmā/light). Record these prompt their usage throughout the sessions.
  2. Explain that the class is going to use a see-saw to find objects that are the same weight.
  3. First make a see-saw.
    Stop the soft drink can from rolling by fixing it to the table with tape or by putting plasticine rolls on each side.
  4. See if the students can balance the lid on the can when it is empty.
  5. Use the cars, animals, shells and rocks to see if you can find things that make the see-saw balance.
  6. Draw a picture to show some of the things that are balanced.
  7. As the students work ask questions that focus on the way that things balance
    How did you make your see-saw?
    What are some things you found that balance? Show me.
    Have you ever been on a see-saw? What happens?

Station Two: Weighing balls and worms

In this station the students, in pairs, experiment with plasticine or play dough to find that changes in an object’s shape does not change its weight.

  1. Give each student a ball of plasticine. Tell them that they need to work with a partner.
  2. Ask them to check that their "balls" are the same weight by using their see-saws. You may need to model how to use the see-saw. A student could also demonstrate.
  3. If they are different ask them to make them the same by removing some of the play dough.
  4. Ask the students to make an object (e.g. a kiwi) using their plasticine.
    Will your kiwis be the same weight? Why /Why not?
    Check on the balance scales.
  5. Ask the students to remake their "kiwi" into the longest worm they can.
    Whose worm is longest?
    Whose worm is heaviest? Check?
    Why are they the same weight?
  6. Ask the students to make their "worm" into different sized balls.
    Whose has made the most balls?
    Which ball is the heaviest? Check?
    If you both put all your balls together on the seesaw what do you think will happen?
    What do you notice? Why is the seesaw balanced?
  7. Ask the students to draw a picture or record what they found out. You could record this on a digital presentation or poster for the whole class to refer back to. 

Station Three: What balances Freddy Frog?

In this station the students experiment to find items that balance Freddy Frog (or an alternative object eg Terry Tui). The students paste their solutions onto a class chart.

  1. Set up the balance scales with Freddy Frog in one of the balance buckets.
  2. Have a collection of different objects at the table for the students to experiment with, for example, linking cubes, pattern blocks, counters, small toys, buttons, shells, rocks.
  3. Ask students to put their solutions with their name on the chart paper or record them on a device. 
  4. Ask questions that focus on their use of the balance scale.
    What happens on the scales when Freddy is heavier?
    Do you think that this "car" will be lighter or heavier? Why do you think that? Were you right?
    What are some of the things that you found that were the same weight as Freddy Frog?

Station Four

In this station we line objects up in order of weight so that we can work out who goes where in our "tower". We need to have the heaviest at the bottom and the lightest at the top. Note this activity can also be taken outside using natural materials.

  1. Give the students four toys and ask them to put them in order of weight.
  2. Before using the balance scales ask the students to hold the toys and guess the lightest and heaviest.
  3. Check guesses with the balance scales.
    Were your guesses correct?
    Tell me how you put the toys in order?
  4. Ask the students to find another toy or object, which is lighter than the four toys they have ordered.
    Did you find a lighter toy on your first guess?
    How did you check your guess?
  5. Ask them to find another toy or object which is heavier than the 5 they now have ordered. Share their findings with a buddy.

Station Five: Bungees

In this station students use a simple piece of elastic as a bungee and measure how far the elastic stretches to compare the weight of different objects.

  1. Set up a bungee by tying a piece of elastic onto a bull-clip or a clothes peg. The top of the bungee will need to be attached to something it can hang from, a string suspended tight across the classroom or a metre ruler suspended across two desks would be ideal. There also needs to be a piece of paper behind the bungee, which the students can use to mark how far down the wall the bungee extends
  2. Have students take one object at a time and attach it to the clip. They then let the objects go, wait till the elastic comes to rest and mark on the paper how far down the object falls.
  3. Students repeat for all objects and then decide which is heaviest.

Skip it to multiply it

Purpose

This unit explores early multiplication where ākonga are encouraged to skip count to solve story problems, rather than counting all. 

Achievement Objectives
NA1-1: Use a range of counting, grouping, and equal-sharing strategies with whole numbers and fractions.
NA1-5: Generalise that the next counting number gives the result of adding one object to a set and that counting the number of objects in a set tells how many.
Specific Learning Outcomes
  • Skip count in twos and fives.
  • Skip count to solve simple multiplication problems with a sum of up to 20.
  • Solve simple multiplication problems in various ways and talk about how they found the answer.
Description of Mathematics

This unit develops the skill of skip counting to find the total of several equal sets. At Level One, ākonga are expected to use a range of counting strategies such as counting on, counting back and skip counting. Both conceptual understanding and procedural fluency are important to counting. Skip counting involves understanding that a set can be treated as a composite unit. The last number counted tells how many objects are in the set. Composites can be combined whether they are equal or not, but skip counting (e.g. 5, 10, 15, 20) can be used particularly when the sets are equal. The procedural fluency ākonga need to enact skip counting is knowledge of the skip counting sequences. Ideally, learning word and numeral sequences, like 2, 4, 6, 8… are learned in conjunction with quantity. That way, ākonga realise that the next number is the result of adding two more objects to what is already there.

As well as knowing skip counting sequences, ākonga need fluency in tracking the number of counts. Initially they may use fingers to do that. For example, the fingers in four hands might be skip-counted as 5, 10, 15, 20, while the number of hands is tracked as 1, 2, 3, 4.

Opportunities for Adaptation and Differentiation

The learning opportunities in this unit can be differentiated by providing or removing support to ākonga and by varying the task requirements. Ways to differentiate the tasks include:  

  • extending the number of skip counts in the pattern. For example, ākonga could extend the pattern to 10 or more skips
  • reducing the difficulty by focusing on skips of 2 until ākonga are secure in their understanding, and before moving to skips of 5
  • providing opportunities for ākonga to skip count forwards and backwards, and from different starting points (e.g. 55, 20).  

The contexts for skip patterns used in this unit can be adapted to suit the interests and experiences of your ākonga. For example:

  • Ask ākonga to suggest the contexts for different For example, cockles in groups of 5 or 10, poi per tamariki, tuĪ in kōwhai trees, and as an extension counting sheep in the two way sort gate (many farmers count in threes). Consider how links can be made between the items you are counting and area of ākonga interest, or relevant learning from other curriculum areas (e.g. learning about Minibeasts in science).

Te reo Māori vocabulary terms such as tatau māwhiti-rua (skip count in twos), tatau mawhiti-rima (skip count in fives), whakamua (forwards), and whakamuri (backwards) could be introduced in this unit and used throughout other mathematical learning.

Activity

Each of the following sessions is designed to take 20 to 25 minutes. This series of sessions can be used in whole class (mahi tahi) or small group situations. The first session develops ākonga ability to skip count in a variety of ways.

Session 1 – Skip Counting

  1. Begin by skip counting in twos. Get ākonga to tap their knees and whisper the number 1. Then get them to clap their hands and say 2 in a bigger voice. Continue the sequence 1 (whisper), 2 (big voice), 3 (whisper), 4 (big voice) etc. 
  2. Choose different odd numbers to start from. Don’t always start from 1. Try backwards skip counting in twos as well.
    Encourage ākonga to continue counting while you record the numbers they are saying in a loud voice on the board. Then stop and talk about the number sequence and the patterns they can see. 
    What can you tell me about the big voice numbers?
    What patterns can you see?
  3. Tie a weighted object to a piece of string and swing it from side to side. Get ākonga to count as the pendulum swings. Then omit the odd numbers. This will enable ākonga to focus on counting in twos. Try backwards skip counting in twos as well.
  4. You might use Animation 1A to connect the spoken words to numerals on the Hundreds Board or Animation 1B to connect numerals to putting counters on a Slavonic Abacus. Animation 1C and 1D deal with skip counting in fives. Links to animations are in the list of required resources.
  5. Challenge ākonga to see if they can count backwards in twos from 10. Animation 1E - 1H use the Hundreds Board and Slavonic Abacus to count backwards by twos and fives.
  6. Counting circles - put ākonga in different sized groups of up to eight ākonga.  Each group sits in a circle.  Ākonga skip count forward and backwards in fives around the circle. One or two ākonga have an individual piece of paper (a post-it note would work well). When the counting reaches them, they record the number they say as a numeral, e.g. 25.  Ākonga continue to count around the circle as far as they can. If a mistake is made or there is a hesitation, the group can start again. The person who hesitated or made the mistake can choose the starting number and whether they will go forward or backward (the teacher may need to support ākonga with the restarts). After a period of time, ask ākonga to bring their numbers back to share with the whole class. Place the numbers on the mat.
    What patterns did you see?
    What numbers are missing from the pattern?

Session 2 TūĪ in Kōwhai trees

  1. Begin the session by choosing one of the skip counting activities from Session 1 as a warm up exercise.
  2. Seat ākonga in a circle.  Place containers (for example, ice cream containers) upside down in the middle of the circle. You could print out pictures of kōwhai trees and tūī to use in this session or you could pretend by using other objects from around your classroom.
    Here are four kōwhai trees.
    Place two tūī in (under) each kōwhai tree. 
    There are two tūī in each kōwhai tree (uncovering the collections and hiding them sequentially). How many tūī are there altogether?
  3. Give ākonga some time to think about the problem.  Encourage ākonga to share their answers and come into the circle to demonstrate what they did.
    Try to record their responses e.g.  Len thought 1, 2, 3, 4, 5, 6, 7, 8; Elinda went 1 2, 3 4, 5 6, 7 8; Hemi went 2, 4, 6, 8; and Kelly went 4 + 4 = 8 (note that this is an additive, not counting, response).
  4. Continue to pose several other similar problems.
    For example, “There are 6 kōwhai trees on High Street. There are 5 tūī in each kōwhai tree. How many tūī are there altogether?” Encourage ākonga to explain how they got their answer. 
  5. Change the bolded numbers in the problem to alter the complexity of the task. Be aware that increasing the number of kōwhai trees encourages skip counting by making one by one counting inefficient. Changing the number of tūī to other multiples such as 3 and 4 greatly increases difficulty, especially if ākonga do not know the skip counting sequence. Using ten tūī in each kōwhai tree supports place value development.
  6. Pair up ākonga and give them counters to represent tūī and some containers or cups to represent kōwhai trees. A tuakana/teina model could work well here. Ākonga take turns to hide the same number of tūī under each kōwhai tree while their partner hides their eyes or turns around.  When the ākonga turns back, their partner says "There are 2 tūī under each of these kōwhai trees.  How many are there altogether?" Their partner then works out how many tūī there are altogether.

Session 3 – Fish in Fishponds

  1. Start the session by choosing one of the skip counting activities from Session 1 as a warm up exercise. Include the skip counting sequence in fives.
  2. Set up the scenario for this session by seating ākonga in a large circle. In the middle of the circle make 4 fishponds using four pieces of string joined up to make them look like ponds (or use chalk). Give each ākonga 1 fish (Copymaster 1). 
  3. Ask five ākonga to put their fish in one of the ponds, then another five ākonga to put their fish in another pond.  Continue until all the ponds have five fish. 
    How many fish are there altogether?
    How can we work it out without counting the fish one by one?
  4. Talk about how you might be able to work it out without individually counting each fish.  Give ākonga some time to work the answer out and then encourage individuals to share their strategies.
    Did anyone do it a different way?
  5. With the skip counting by five sequence, ākonga may use additive knowledge, e.g. 5 + 5 = 10, 10 + 10 = 20. Thinking like that should be encouraged. Record ākonga strategies using numbers and operation signs. Include the multiplication notation 4 x 5 = 20, asking ākonga to explain what the 4, 5, and 20 represent, as well as considering what the x and = symbols mean.
  6. Choose one ākonga to go fishing.  Ask them to take a fish out of each pond. 
    Is there a quick way to work out how many fish there are left?
  7. Change the equation to 4 x 4 = □. Do your ākonga use these strategies?
    • Skip count in twos, i.e., 4, 6, 8, 10, 12, 14, 16.
    • Take away one set of four from 4 x 5 = 20, 20 – 4 = 16.
  8. Go back to 4 x 5 = 20. What if someone puts one more fish in each pond? How many fish will there be altogether, then?
  9. Continue to pose similar problems. Increase the number of ponds and the number of fish put in each pond with awareness of the difficulty level of the problems, and the skip counting knowledge of your ākonga.
  10. Copymaster 2 is an activity sheet with further pond and fish problems.  The starting problems are closed but the later problems are open so you or your ākonga can add the missing information.

Session 4 – Cartons and Eggs

  1. Begin the session by repeating a skip counting activity from Session 1.
  2. Discuss how many eggs are usually in a carton. Have a dozen and half dozen cartons available and larger trays if they are accessible.
  3. Put down three half dozen cartons.
    How many eggs are there altogether? (You might have cubes, ping pong balls, or other objects as the make-believe eggs).
  4. Ask ākonga to explain their strategies. Some may count in ones. Others may use skip counting in twos or threes. Some may use addition, such as 6 + 6 = 12 and count on the last six.
    Sixes are hard to count with, so we are going to use smaller cartons today.
  5. Set up problems such as “Here are five cartons with three eggs each. How many eggs are there altogether?” You might write 5 x 3 = __ to model the equation form. Mask the cartons at first but be prepared to uncover them if ākonga need support with image making. Discuss their strategies and the efficiency of counting by ones, composites or just known facts.
  6. Ākonga can then work in small groups to reinforce this learning - a tuakana/teina could work well here. Provide each group with many egg cartons of the same size (twos, threes, fours and fives) and make-believe eggs.
    I want you to make problems for each other using the same sized cartons.
    You can record your strategies using numbers.
    Be ready to share one of your problems with the whole class at the end.
  7. Roam and check if ākonga are setting problems with equal sets. Also support ākonga using non-count-by-ones strategies when they have the available skip counting or addition knowledge.
  8. Gather the class to share their favourite problems. Encourage your ākonga to reflect on what is the same and what is different about the problems (equal sets, different numbers of sets, different sets between problems).
  9. Pose problems like this, “Four cartons of five eggs and two extra eggs. How many eggs altogether?” Extras or missing eggs in a carton require ākonga to adapt skip counting, e.g. 5, 10, 15, 20, then 21, 22.

Session 5: Legs on animals

  1. Use the context of legs on animals to set problems for ākonga. Remember to challenge ākonga to think of efficient ways to solve the problems.  Try to encourage them not to count by ones.
  2. Copymaster 3 provides some open problems where the number of the legs on each animal is given, but the number of animals is left open. Using toothpicks or bits of paper so that some ākonga can physically model each problem by giving the animals 'legs'. They then use whatever strategies they have available to anticipate the number of 'legs' that are needed.
  3. You might photocopy and laminate pictures of the ‘legless’ animals to use in problem posing. Ākonga can create their own skip counting problems using different animals or providing ākonga with 'legless' animal printouts such as Copymaster 3. Ākonga can share these with the class.
  4. Challenge the class with these problems.
    How many legs would be on five goldfish? Do ākonga still realise the problem can be written and solved, 5 x 0 = 0? 
    How many legs would be on 10, 50, 100 goldfish?” What is always true?
  5. You might do the same with kiwi with one leg.
    How many legs would be on 10, 50, 100 1-legged kiwi? What is always true?

Snakes and Scarves

Purpose

In this unit we explore linear patterns using snakes as the context. We examine, construct and record snakes of different patterns. We also put scarves on our snakes and predict what is hidden.

Achievement Objectives
NA1-6: Create and continue sequential patterns.
Specific Learning Outcomes
  • Record patterns on grid paper.
  • Make predictions about ‘missing’ sections of a pattern.
  • Use words to describe linear patterns.
Description of Mathematics

The main idea behind this unit is for ākonga to develop basic concepts relating to pattern by exploring simple patterns in a novel situation. Ākonga will use multi-link cubes masquerading as snakes. The snakes have colourful ‘skin’ (it's a good chance for everyone to use their imagination). Ākonga play with a variety of snakes, both inventing their own and investigating ones made by other ākonga. In the process, they should begin to see that:

(i) patterns are made up of repeating sections of coloured cubes;

(ii) they can continue a pattern by adding on more cubes of the right colours; and

(ii) they can predict parts of a pattern that are missing.

Pattern is an important idea both in mathematics generally, and as a precursor to algebra. Discovering patterns enables us to predict events. For example, by knowing how the tides work we can predict when high tide will be and when will be a good time to go fishing. This pattern concept generalises in secondary school to finding results that work again and again. 

Opportunities for Adaptation and Differentiation

The learning opportunities in this unit can be differentiated by providing or removing support to ākonga and by varying the task requirements. Ways to differentiate the tasks include:  

  • actively supporting ākonga, as needed, to record their snakes on grid paper
    • ensuring ākonga are confident with patterns of two colours before introducing three colour patterns. Some ākonga may be ready to move to four or more colour patterns
    • challenging ākonga, who are ready for extension, to predict parts of the snake that they haven't made yet.

The snake context used in this unit could be adapted to other animals such as huhu grubs, worms or eels. Alternatively, ākonga could come up with their own creature that has a multi-coloured, pattern body.

Te reo Māori vocabulary terms such as tauira (pattern) and He aha muri? (What is next?) could be introduced in this unit and used throughout other mathematical learning. Also, the simple counts and primary colours used in the unit provide an opportunity to use te reo Māori and Pasifika words alongside English, for example, whero (red) and tahi (one).

Required Resource Materials
  • Multi-link cubes
  • Pieces of fabric for the scarves
  • Prepared snakes (made with multi-link cubes)
  • Snakes with scarves booklets
  • Strips of cubed paper for recording (from an old maths book would work well)
  • Crayons or felt pens
Activity

Getting Started

Today we investigate snakes with special colour patterns. We think about what would come next as we increase the length of our snakes. We also think about what happens when we cover part of our snake with a scarf.

  1. This week we are going to investigate patterns. Does anyone know what a pattern is?
    Share ideas about patterns. Encourage ākonga to look around the classroom or think about places in their community for examples of patterns. For example, kōwhaihai patterns at marae or flower patterns at community gardens. 
  2. I am going to make a snake for you out of these multi-link cubes. Watch carefully to see if you can guess what kind of snake I am making.
    [Make a snake with a blue, red, blue, red, blue pattern.]
    Who knows what colour comes next in our snake?
    How did you know?
  3. Let ākonga have turns adding cubes to the snake.
  4. Ask if anyone could think of a way of describing the snake to someone who can’t see it. This could be someone who rings to find out what you have been doing in class today.
  5. As a class, read the pattern 'red, blue, red, blue, red, blue…'
  6. Record the pattern on strips of grid paper, one cube wide.
  7. Repeat the process of constructing and examining a snake, finding its pattern and then extending the pattern. This time use a snake that is made of three repeating single colours.
    Who knows what colour comes next?
    How did you know? 
  8. Now wrap a scarf around the snake and ask ākonga to predict what colour cubes are hidden. Make the scarf about 3 cubes wide.
    What cubes are hidden?
    How did you know?
  9. Take the scarf off and check.
  10. Continue with this activity until you feel that the ākonga are ready to explore pattern snakes independently.

Exploring

Over the next 2-3 days we examine, construct and record the patterns of our snakes.  We cover parts of our snakes with scarves and play ‘guessing games’ with other ākonga.

  1. Let each ākonga (or pair of ākonga) select a pattern snake from the ‘basket of snakes’. Alternatively you could give each pair of ākonga a collection of prepared snakes. Also give each pair a supply of cubes that they can use to extend the patterns and plain grid paper strips for recording.
  2. As ākonga examine the snake ask questions that focus on their search for a pattern.
    Can you tell me about your snake?
    What colour cubes is your snake made of?
    Can you see a pattern in your snake?
  3. When ākonga have discovered the pattern, ask them to extend it using the supply of cubes. Let ākonga decide on the length of their snakes.
  4. Ask ākonga to record their completed snakes on the recording strips.
  5. As the snake recordings are completed they could be displayed on a line at the front of the class for others to see.
  6. Alternatively ākonga could make snakes-in-scarves pages for a class booklet.  These pages could have a grid to record the snake and a ‘flap’ to cover part of the snake.
  7. The process is repeated as ākonga select new snakes to investigate.  You may also wish to have a basket for ākonga to put their snakes in. Other ākonga can then examine them.
  8. At the end of each session, look at the snakes displayed and select a couple to put ‘scarves’ on.
    With all the ākonga gathered together (mahi tahi model) ask:
    What cubes do you think are hidden under the scarf?
    How do you know?

Reflecting

We conclude the unit by sharing the pattern snakes that we have made. We look for snakes that are alike.

  1. Give each ākonga one of the recorded snakes from the previous days’ exploration.
  2. Ask one of the ākonga to show their snake to the rest of the class. Together ‘read’ the pattern of the snake.
  3. Ask if anyone else has a snake that has a pattern that is the same as, or similar to, the one being displayed.
  4. How are they alike?
  5. The snakes may be alike in a number of different ways. Accept all the possibilities and then focus the ākonga on the snakes that have exactly the same pattern.
  6. Which snakes have the same pattern as this one?
  7. Sort the snakes according to patterns
  8. Repeat by asking ākonga with a different snake to come to the front of the class. Continue to sort the snakes according to their patterns.

Lonely kiwi

Purpose

In this unit we have a first look at uncertainty and chance. We begin to develop an intuitive sense of what chance and possibilities are about through games that involve following rules, making predictions and seeing what happens.

Achievement Objectives
S1-3: Investigate situations that involve elements of chance, acknowledging and anticipating possible outcomes.
Specific Learning Outcomes
  • Use everyday language to talk about chance.
  • List outcomes of simple events.
Description of Mathematics

Although students at this level won't be ready to fully grasp the idea of chance they will develop some valuable intuitive notions. Underlying the activities is the idea that some events can be influenced by information, whereas others rely largely on luck. This provides the basis for the two ways of determining probabilities: theoretically and experimentally. Later on, we explore certain situations such as rolling dice, using spinners, choosing cards to determine precise values of probability. This is the theoretical aspect. Ideally you would always like to do this as you are then sure exactly what the probability is. However, in other situations we have to rely on a series of experiments and deduce the likely probability of an event through the long-term frequency of its occurrence. This applies to the kind of events that insurance companies are interested in such as the likelihood of an accident or the length of life of a 30 year old male.

Opportunities for Adaptation and Differentiation

The learning opportunities in this unit can be differentiated by providing or removing support to students and by varying the task requirements. Ways to adjust the difficulty of the tasks include:

  • altering the numbers of each type of bird/animal
  • having two students play a demonstration game so that the whole class can see how the game works before playing independently
  • changing the number of sides with each colour on the dice for the Greedy Pūkeko game.

The contexts for this unit can be adapted to suit the interests and experiences of your students. For example:

  • create cards that reflect native birds or animals/insects in your local community
  • use different cards instead of the provided native bird cards. This could be any kind of collecting card, or cards that you make yourself with images to interest your students. Ensure that the numbers of each added type are the same as those in the original collection
  • choose a different context for the Greedy Pūkeko game. This could be an existing story about a hungry person or animal (for example Awarua, the taniwha of Porirua) or a made up story about a familiar local animal such as the school cat or the teacher's dog.  

Te reo Māori vocabulary terms such as ika (fish), ōrite (same), rerekē (different) and tūponotanga (chance) as well as colours in te reo Māori (such as whero, ma, kōwhai, etc) and counting from tahi ki tekau (one to 10) could be introduced in this unit and used throughout other mathematical learning.

Required Resource Materials
Activity

Session One: Tūi and Kereru

In this first session we make our own set of cards using pictures of Tūi and Kereru.

  1. Give each pair of students 20 cards. You might like to use the Tūi and Kereru from Copymaster 1, otherwise you will need to direct the students to draw Tūi on 10 of the cards and Kereru on the other 10, or provide them with cards relevant to your context or their interests.
  2. When the students have completed their pack of cards, demonstrate a game of 'Tūi and Kereru'.
  3. Rules
    Shuffle the cards.
    Put the cards face down in one pile.
    Players decide who will collect "same pairs" and who will collect "different" pairs.
    Take turns turning a card from the top of the pile.
    Compare the two cards. If they are the same, the player collecting "same pairs" takes them. If they are different, the other player takes them.
    The game continues until all cards are used.
    The winner is the player who collects the most cards.
  4. After the students have played a few games. lead a discussion highlighting their observations about the chances of winning.
    Was one of the players luckier than the other one? What made you think this?
    How many times did you win?
    How many times did your partner win?
    Was it better to be a "same" or a "different"? Why?
    (note: The probability of different pairs is slightly greater than that of same pairs.)

Session Two: Tūi, Kereru and Kea

I this session we add 6 Kea to our pack of Tūi and Kereru cards and play the game again.

  1. Give the pairs of students 6 blank cards to draw the Kea or use the Kea from Copymaster 1. Add the Kea to the pack of 20 Tūi and Kereru used in session one.
  2. Play the same pairs and different pairs game from yesterday.
  3. After the students have played a few games, lead a discussion highlighting their observations about the chances of winning.
    Was one of the players luckier than the other one? What made you think this?
    How many times did you win?
    How many times did your partner win?
    Was it better to be a "same" or a "different"? Why?
    Was it easier to win today? Why/Why not?

Session Three: The little lost kiwi

In this session we add one kiwi to our pack of Tūi, Kereru and Kea and play a new game.

  1. Give each pair of students one kiwi card to add to their set.
  2. Explain that today we are using the cards to play animal memory.
    Rules:
    Spread the cards out face down.
    Players take turns to turn over two cards.
    If the cards are the same the player keeps the pair of cards but does not have another turn.
    If the cards are different the cards are turned back face down.
    Continue taking turns until all the cards (except the kiwi) are collected.
  3. As the students play the game ask questions that focus on the likelihood of finding pairs.
    What card do you think you will turn up next? Why do you think that?
    Which cards do you think will be the last?
    Which are the hardest pairs to find? Why?
    Which are the easiest pairs to find?
    What can you tell me about the kiwi?
    Why do you think the game is called The little lost kiwi?
    Can you think of another name for our game?

Session Four: Greedy Pūkeko

Resources:
  • Wooden cubes with two of the faces red, two blue and two green (dot stickers work well)
  • Pictures of 3 Pūkeko from Copymaster 2
  • Pictures of fish cut outs from Copymaster 3 (30 per page)
  • Felt pens (colours to match the dots)

In this activity the students roll a dice to feed fish to our three Pūkeko. The students will investigate the chance of giving a fish to their Pūkeko.

  1. Give groups of 3 students the three Pūkeko pictures, a prepared dice and 30 fish.
  2. Each student chooses one of the three colours for their Pūkeko and colours it in (single colour only).
  3. The students play 'Greedy Pūkeko'
    Rules:
    The students take turns rolling the dice.
    The student whose colour shows gives their Pūkeko a fish.
    The game continues with players taking turns until all the fish are eaten.
  4. After allowing the students to play the game(s), discuss:
    Which coloured Pūkeko got the most fish?
    Was there a lucky colour in your group?
    Was it lucky in all the groups? Why/Why not?

Session Five: Feeding Greedy Pūkeko

Resources:
  • Dice 1: 5 blue faces representing the greedy Pūkeko, one red face for the second Pūkeko.
  • Dice 2: 3 blue faces, 3 red faces.
  • Copymaster 3 of Fish Cut Outs (30 per page)
  • Copymaster 4 of blue greedy Pūkeko and red greedy Pūkeko

In this game the students experiment with different dice.

  1. Tell the students all about Pūkeko and how they love to eat and steal food. Discuss the Pūkeko's need for food and how he will chase other birds and screech for food. The picture books Squark! by Donovan Bixley, or A Pukeko In a Ponga Tree by Kingi M. Ihaka could be used to engage learners in this context.
  2. Give pairs of students the two Pūkeko pictures, the prepared dice and 20 fish.
    Rules:
    The students take turns first selecting and then rolling one of the dice.
    They give a fish to the Pūkeko whose colour is shown.
    The game continues with players taking turns until all the fish are eaten.
  3. After allowing the students to play the game(s), discuss:
    Which Pūkeko got the most fish?
    Was there a lucky colour in your group? Why?
    Was it lucky in all the groups? Why/Why not?
    What difference did the dice you chose make?
  4. Now pose a problem for the students:
    In the game we want to stop Greedy Pūkeko from screeching for food. What should we do? (Check that the students understand that they need to feed Greedy Pūkeko to stop him screeching.)
  5. Send the students away to explore the problem as they play the game.
  6. After allowing the pairs time to explore the solution, come together as a whole class and share thinking about the problem.
Attachments

The teddy bears’ fraction picnic

Purpose

This unit supports students to equally partition objects and sets into fractional parts.

Achievement Objectives
NA1-1: Use a range of counting, grouping, and equal-sharing strategies with whole numbers and fractions.
Specific Learning Outcomes
  • Partition a length, area or volume into equal parts.
  • Partition a set into equal parts and anticipate the result.
  • Recognise that the numerator of a fraction is a count.
  • Recognise that the bottom number of a fraction gives the size of the parts being counted.
Description of Mathematics

In this unit students explore equal partitioning of objects and sets, and how to name the parts they create using fractions. The easiest partitions are those related to halving since symmetry can be used. For example: halves come from partitioning a whole into two equal parts, and quarters come from partitioning a whole into four equal parts.

An object is partitioned according to an attribute, or characteristic. For example, a banana might be partitioned by length, but a sandwich partitioned by area. Some attributes are more difficult to work with than others. Length is the easiest attribute but others such as area, volume (capacity), and time are more difficult.

The results of partitioning a set into fraction parts can be anticipated, using number knowledge and strategies. For example, one quarter of 20 could be found by:

  • organising 20 objects into four quarters one by one, or in collections of two
  • halving 20 into 10, then halving again
  • realising that putting one object on each quarter uses four each time, and repeatedly adding four until 20 is used up.

In this unit we apply three criteria when evaluating students’ capacity to partition and object or set into fractional parts:

  • the correct number of parts is created
  • the shares are equal
  • the whole is exhausted (used up).
Opportunities for Adaptation and Differentiation

The learning opportunities in this unit can be differentiated by providing or removing support to students and by varying the task requirements. The difficulty of tasks can be varied in many ways including:

  • encouraging students to work collaboratively in partnerships
  • pausing to allow students to share their work with others
  • using play dough, cardboard, or other physical materials to model key concepts
  • restricting or extending the range of fractions students are asked to work with.

The contexts for this unit can be adapted to suit the interests and experiences of your students. For example:

  • the first slide of PowerPoint 1 could easily be replaced to change the whole context of the unit to be about any different characters you choose
  • preferences for different types of bread can invoke a good discussion. For example white or brown bread, rewena or pita
  • more types of food could be added to better reflect the food your students usually eat.

Te reo Māori vocabulary terms such as hautau (fraction), ōrite (equal), haurua (half), hauwha (quarter), hautoru (third) and toha (share) as well as counting from kore ki tekau (zero to 10) could be introduced in this unit and used throughout other mathematical learning. Other te reo Maori that could be useful in this unit are teti pea (teddy bear) and hanawiti (sandwich).

Required Resource Materials
Activity

Session One

  1. Use PowerPoint 1 to tell the story of two teddy bears going on a picnic. Unfortunately, Pāpā Bear, who made the lunch, forgot to cut up the food items equally. What are Rawiri and Hine Bear supposed to do?
    Rawiri and Hine are friends. They always share their food equally. How could they cut this sandwich? (Slide Two)
  2. Discuss ways to cut the sandwich in two equal pieces. Having two teddy bears available allows for acting out the equal sharing.
    What does equal mean?
    What do we call these pieces? (halves)
  3. Write the words “one half” and the symbol 1/2.
    Why do you think there is a 1 and a 2? (2 refers to the number of those parts that make one)
  4. Look at Slides Three and Four of PowerPoint 1. 
    Is the sandwich cut in half? Why? Why not?
  5. Provide the students with three ‘sandwiches’ made from Copymaster 1
    What other ways could Rawiri and Hine cut their sandwich in half?
  6. For students who complete the task quickly, give them another sandwich.
    Cut this sandwich in two pieces that are not halves.   
  7. When each student has produced at least two halved sandwiches bring the class together to share their thinking. Make a collection of halves and ‘non-halves’ and discuss those collections. 
    What is true for the sandwiches that are cut in half?
    What is the same or the sandwiches that are not cut in half?
    The key idea of halving is that both Rawiri and Hine get the same amount of sandwich. As the sandwich is not exactly symmetric through a horizontal mirror line you might get interesting conversation about the equality of shares. Slide Five may provide some stimulus for the discussion. Using the cut-out pieces of sandwich, show how halves map onto each other by reflection (flipping) or rotating (turning). With paper sandwiches you can fold to show that mapping of one half onto another.
  8. Luckily Pāpā Bear prepared more than just one sandwich. Copymaster 2 has some other food items that Papa packed. Ask your students to work in pairs to cut each item in half. They need to record where they will cut each item and justify why they put the line where they did.
  9. After enough time bring the class together and discuss their answers. Act out the halving, either with real objects or imitations, e.g. banana and cheese made from playdough of plasticine. This is particularly important in the case of the bottle of fruit drink and the bag of 12 cashews. Note there are different ways to partition each object into two equal parts. Points to note are:
    • Do your students create two parts, exhaust all of the objects or set, and check that the parts are equal in size?
    • Do your students see halving as a balancing, symmetric process?
  10. As an example, get two clear plastic cups. Ask a student to pour half of the drink bottle into each cup, one for Rawiri and one for Hine. Look to see that the student balances the level in each cup. Capacity is a perceptually difficult attribute for measurement.
     
  11. Similarly, look to see if students equally share the cashews by one to one dealing.
     
  12. Finish the session with the final two slides of PowerPoint 1. 
    Can your students distinguish when a shape or set has been halved?

Session Two

In this session, students explore the impact of other Teddy Bears joining in the picnic. What happens to the size of the portions as more shares are needed? How do we name the shares?

  1. Remind the students about the previous session. Use a chart of halves and ‘not halves’ to focus attention on equal sharing and the words and symbols for one half.
    Imagine that four Teddy Bears went on the picnic instead of two. Pāpā still packed the same amount of food. What would happen then?
  2. Sit four teddy bears around in a circle. Give them names like Rawiri, Hine, Aleki and Sina. Use Copymaster 1 to make a few sandwiches.
    How could we cut a sandwich into four equal parts? What will the parts be called?
  3. Students should find quartering intuitive, as it involves halving halves. Symmetry is still useful. Let students share how they think a sandwich could be partitioned into four equal parts. Act out giving one part to each Teddy Bear.
    Does each Teddy Bear get the same amount of sandwich?
    Common solutions are:
    A diagram showing two different ways that a sandwich could be partitioned into four equal parts.
    Students often miss the option of dividing the area of the sandwich by length…
    A diagram showing two different ways that a sandwich could be partitioned by length into four equal parts.
    Or other possibilities…
    A diagram showing two other possibilities for how a sandwich could be partitioned into four equal parts.
  4. Ask students: How big is one quarter/fourths, compared to one half? How many quarters is the same as one half?
  5. Use pieces of’ ‘sandwich’ to check. It is good for students to see that two quarters make one half irrespective of the shape of the pieces. Challenge the students to find some ways to cut a sandwich into four pieces that are not quarters. Examples might be:
    An image showing some ways to cut a sandwich into four pieces that are not quarters.
    An image showing some further ways to cut a sandwich into four pieces that are not quarters.
  6. You may need to highlight the lack of equality of non-quarters by mapping the pieces on top of one another. Discuss that quarters are only quarters if:
    • four pieces are made
    • all the sandwich is used
    • the pieces are all equal in size.
  7. Provide the students with copies of Copymaster 2 again.
    This time the challenge is to share each picnic food into quarters.
  8. Give the students enough time to record where they would partition the items before gathering as a class to discuss their ideas. Pay attention to the different ways that the foods are partitioned. Act out the partitioning either with real objects or imitations, e.g. banana and cheese made from playdough of plasticine. For example, the banana is a length, so the partitioning is most likely to be by length. Some students may attend to area (second example):
    An image showing a banana partitioned by length into quarters.or An image showing a banana partitioned by area into quarters.
    The shape of the sector of cheese places a restriction on how it can be partitioned. Likely responses are (left is correct, right is not):
    An image showing a correct way to partition a triangular piece of cheese into quarters.          An image showing an incorrect way to partition a triangular piece of cheese into quarters.
  9. Equally sharing the bottle of fruit juice among four glasses might be done in two main ways:
    • set out four plastic cups and keep pouring while balancing the water levels
    • halve the bottle into two plastic cups. Pour half of each cup into another cup until the levels match.
  10. Look to see that your students can equally share the 12 cashews by dealing one to one for each teddy bear. Highlight that the half share is six cashews and the quarter share is three cashews.
  11. Record the words and symbols for one quarter. Create a chart of quarters for the food items.
  12. Finish the session with the game called ‘Make a whole sandwich.” Students need copies of the first page of Copymaster 3 (halves and quarters) and a blank dice labelled, 1/2, 1/2, 14, 2/4, 3/4 and choose. The aim of the game is for players to make as many whole sandwiches as they can.
    Players take turns to:

    • roll the dice
    • take the amount of sandwich shown on the dice, e.g. if 3/4 comes up, then the player takes three one quarter pieces of sandwich
    • if 'choose' comes up the player chooses any single piece.
       

    At any time a player can rearrange their sandwich pieces to make as many whole sandwiches as possible. Time the game to finish in five minutes which is long enough to gather a lot of pieces.
     

  13. Discuss what might be learned from the game. For example:
    • three quarters is three lots of one quarter
    • two quarters is the same amount as one half
    • two halves and four quarters both make one whole.
  14. Record those findings symbolically and discuss the meaning of + and = as joining and “is the same amount as”, e.g. 3/4 = 1/4 + 1/4 + 1/4 or 2/4 = 1/2.

Session Three

In this session, students explore the equal sharing of picnic foods among three Teddy Bears. Thirding an object or set is generally harder than quartering because symmetry is harder to use. Your students should observe that thirds of the same object or set are smaller than halves but larger than quarters.

  1. Begin with a reminder of what you did in the previous session:
    We explored how to cut sandwiches into two and four equal parts. What are those parts called? (halves and quarters)
  2. Be aware of the non-generality of early fraction words in English. Halves should be twoths, and quarters should be fourths, to match what occurs with sixths and further equal partitions. In many other languages, such as Maori and Japanese, the word for a fraction indicates the number of those parts that make one. Maori for one fifth is haurima (rima means five) and in Japanese one fifth is daigo (go means five).
    What parts will we get if we share the food among three Teddy Bears?
  3. Point out that third is a special English word for one of three equal parts. Show the students one half and one quarter of a sandwich.
    Which is bigger, one half or one quarter? Why?
    How big do you think one third will be? Why?
  4. Students might conjecture that thirds are smaller than halves but bigger than quarters. That is true on the assumption that the whole (one) remains the same. Give the students copies of four ‘sandwiches’ from Copymaster 1. Set out three Teddy Bears.
    Find different ways to share one sandwich equally among the three Teddy Bears.
  5. PowerPoint 2 shows two examples and three non-examples of cutting a sandwich into thirds. Note that the successful cuts are vertical and horizontal. Students should notice that the two non-examples produce unequal parts. On slide five ask:
    Is this sandwich cut into thirds? (No, the parts are unequal)
  6. Give the students a copy of Copymaster 2. Ask them to work in pairs to share each food item into thirds. After a suitable period, bring the class together to discuss their equal sharing.
  7. PowerPoint 2 contains animations of partitioning some of the foods into thirds. You may want to act out model answers, certainly with pouring among three plastic glasses while keeping the levels balanced. Discuss issues that arise. For example:
    Do the parts have to be the same shape to be equal? (Banana is a good example)
    Why are thirds harder to make than halves and quarters? What other fractions would be hard to make? Why?
  8. In the next part of the session, students anticipate the result of cutting thirds and quarters in half. What are the new pieces called?
    PowerPoint 2- Slides 9-11, show how halving quarters produces eighths and halving thirds produces sixths. It is important for students to connect the naming of these equal parts to how many of those parts form one whole (sandwich).
  9. Use parts of sandwiches made from Copymaster 3 to build up students’ counting knowledge of fractions. Lay down and join the same sized pieces and ask students to name the fraction. For example:
    An image of a sandwich, starting with one sixth of it and showing a further one sixth with each successive image until four sixths is reached.
    One sixth                     Two sixths                   Three sixths                Four sixths 
                                        (or one third)               (or one half)                (or two thirds) 
  10. Count with the same sized parts past one whole and write the fraction symbols as you count.
    How much of a sandwich is 2/3? 3/4? 5/8?  etc.
  11. It is important that students understand that the top number of a fraction (the numerator) is a count of equal parts. The bottom number (the denominator) tells how many of those parts make one.
  12. Change the game from session two called “Make a Whole sandwich.” Include all the pieces from Copymaster 3 so that thirds, sixths and eighths are also available. Alter the dice to read 1/2, 1/4, 1/3, 1/6, 1/8 and 'choose'. Allow the students more time to play that game (ten minutes).
  13. Discuss some ways that the students found to make one whole sandwich. Record their suggestions using symbols, e.g. 1/2 + 1/3 + 1/6 or 3/4 + 2/8. Begin a chart of ways to make one that students can add to using pictures (using pieces from Copymaster 3) and symbols.

Session Four

In this session, students work from part to whole. Usually students encounter problems where the whole is well-defined, and they are shown, or must create, the required fraction. As they progress to more complex tasks, it is also important that students can relate a fraction-part back to the whole from which that part may have been created.

  1. Use Copymaster 4 to create a set of paper part foods. With each challenge below, the aim is to draw the appearance of the whole, in schematic rather than detailed form. Place the fraction piece in the middle of an A3 sheet of photocopy paper to allow space to draw.
    Suppose there are eight Teddy Bears at the picnic. This piece is one eighth of a sandwich, how can we find the size of the whole sandwich?
  2. Check that students recognise that eight pieces of that size will make the complete sandwich. Ask a student to draw around the outside of the piece to show the whole sandwich.
    How can we check [Name]’s estimate of the whole sandwich?
  3. Iterating (copy and pasting) eight copies of the piece will give the area of the sandwich. Note that the whole could look differently as the eighths could be arranged on a line or as a rectangle or other formations. However, the context suggests a rectangular arrangement is best. Other challenges are:
    This is one fifth of the banana. How long is the banana?
    This is one third of the doughnut. How big is the doughnut?
    This is one half of the bun. How big is the bun?
    This is one sixth of the chocolate cake. How big is the cake?
    This is one quarter of the packet of walnuts. How many walnuts are in the whole packet?
  4. Build on the capacity example used earlier. Tell your students that a plastic cup filled to a certain level is one third, quarter, fifth, etc. of a whole bottle. Can they make the quantity of water that fills the bottle?

Independent work

  1. Show your students a set of pattern blocks. Choose one shape as ‘the piece of food’, e.g. a rhombus.
    I will make a chart with this pretend piece of food.
  2. Develop the chart as you go rather than present it as complete.
    Image showing examples of pattern blocks as a fraction of a 'piece of food', and what the whole might look like.
    Provide the students with a copy of Copymaster 5 to reduce the writing load.

Session Five

In this session, students connect fractions of regions and fractions of sets. Partitioning of a set into equal parts fluently requires multiplicative thinking that most young students do not possess yet. However, exposure to problems with equal partitioning provides opportunities to learn that develop additive part-whole thinking and the ‘sets of equal sets’ concept, that is fundamental to multiplication and division.

  1. Use PowerPoint 3 to introduce the context of the four Teddy Bears sharing a chocolate cake. 
    How many smarties do you think go on each quarter? Remember that the quarters must be equal.
  2. Students need to use their number understanding to anticipate a result. Some students may ‘virtually’ share the smarties one at a time (look for eye, hand and head gestures). Tracking the number of ‘virtual’ smarties in each quarter puts a significant load on working memory. Estimates of three, four or five should be worked with.
    Let’s imagine there are three smarties on each quarter. How many smarties would that be on the whole cake?
  3. Working from part to whole in this way checks the estimate. Using actual objects, like counters, to enact the sharing, might follow once anticipations are made and justified.
  4. Other students may use additive knowledge, such as 4 + 4 = 8 (one half), then 8 + 8 = 16 (whole cake). Students might adjust from an initial prediction, such as 20 smarties is four more than 16, so each quarter must get 4 + 1 = 5 smarties.
  5. Slide Two makes a minor adjustment to the number of shares to see if students can anticipate the effect of more parts on the size of shares. With five parts (fifths) additive knowledge with fives is more likely to be used.
    Last time the cake was in quarters. What fractions is it in now? (fifths)
    Will the five Teddy Bears get more or less than four Teddy Bears got?
  6. Check that students recognise that fifths are smaller than quarters, even in the sets of smarties context. Encourage use of additive thinking by animating one smarty on each fifth of the cake.
    How many smarties are on the cake?
    If I put two smarties on each fifth how many would be on the whole cake?
    How many smarties can I put on each fifth?
  7. Slides Three and Four present two other situations of equally sharing smarties onto a cake. Ask your students to name the fraction parts and anticipate the result of the equal sharing.
  8. Let your students play the Birthday Cake Game in pairs or threes. The game is made from Copymaster 6. You will need blank dice and counters as well.

Ways to Add

Purpose

In this unit students explore different ways to communicate and explain adding numbers within ten and beyond. The representations included are number lines, set diagrams, animal strips and tens frames.

Achievement Objectives
NA1-1: Use a range of counting, grouping, and equal-sharing strategies with whole numbers and fractions.
NA1-4: Communicate and explain counting, grouping, and equal-sharing strategies, using words, numbers, and pictures.
Specific Learning Outcomes
  • Draw representations to show simple addition equations.
  • Write an equation/number sentence to match their representation.
Description of Mathematics

In this unit students are introduced to different ways to represent the addition of single digit numbers using sentences, equations and number lines. Students will be able to communicate their thinking using the representations.

Opportunities for Adaptation and Differentiation

The learning opportunities in this unit can be differentiated by providing or removing support to students and by varying the task requirements. The difficulty of tasks can be varied in many ways including:

  • adjusting the size of numbers used as appropriate
  • varying the location of the unknown in the equation, result, change, or start
  • using digital tools such as interactive tens frames and number lines created on a PowerPoint, or online tens frame tools, to model concepts. Search for “tens frame animations” to find a variety of these
  • encouraging students to work collaboratively.

The contexts for this unit are a tens frame waka and native animals. The materials can be adapted to suit cultural knowledge and interests of your students. Using physical items that have significance to your students might be more engaging than using standard mathematical equipment. For example, if you have a big set of shells or stones for environmental studies you might use those shells as the materials for session 1. You might create ‘story shells’ that are appropriate to your students, such as hatchlings in a nest, baked goods in a tray, whanau members in whare, or people at a feast.

Activity

Session 1

In this session students are introduced to using a diagram or picture to communicate an addition equation. You may need to adjust the numbers used in the lesson in response to the knowledge of your students.

  1. Place 5 blue counters in a tens frame. The tens frame will support subitising (instant recognition of number in a set)
    Image of a tens frame horizontally with a blue counter in each of the top five spaces.
    How many kaihoe/rowers are in the waka?
  2. Place 2 red counters in the tens frame and ask:
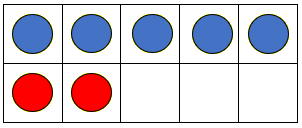
    How many kaihoe/rowers are in the waka now?
    Image of a tens frame horizontally with a blue counter in each of the top five spaces, and a red counter in two of the bottom spaces.

    Students may count from one, i.e. 1, 2, 3, 4, 5, 6, 7.
    Some students will be able to count on from the five i.e. 5... 6, 7.
    Using two different colours will help encourage students to count on and support subitising (recognising 7 counters instantly).

  3. Use another tens frame and place 5 blue counters in it.
    How many kaihoe/rowers are in this waka? 
    Count with me as I add more kaihoe/rowers.
  4. Add 3 counters and count as each counter is added "6","7","8".
    How many kaihoe are in the waka now?
    How many red counters did we put in?
  5. Introduce the idea of recording what the diagram shows. Tell the students you are going to write the number sentence.
    How many blue counters are there? (Write 5 in blue.)
    And how many red counters are there? (Write 3 in red)
    5 and 3 makes how many counters?
    Record the equation 5 + 3 = 8.
    Image of a tens frame horizontally with a blue counter in each of the top five spaces, and a red counter in three of the bottom spaces. Text saying 5+3=8.
  6. Use Copymaster 1 as an open story shell to develop addition equations with numbers to ten in the waka context. Work with the students to draw tens frame diagrams. Use coloured pens to draw circles instead of using counters (or use coloured round stickers). Use the coloured pens to write the number sentence beside the set diagram. Number sentences can focus on facts to five or facts to ten depending on the students’ knowledge.
  7. Students can work in pairs or as individuals to practise using the waka tens frame diagram.

Session 2

In this session students continue to use tens frames to represent addition equations. They work on simple “change unknown” problems (e.g. 8 + □ = 10) in this lesson. You need a set of tens frames with dots. These can be made using the Copymaster.

  1. Remind students about the waka that holds 10 kaihoe/rowers.
    Show students the waka model. How many kaihoe can get in the waka? How do you know? 
    Some students may recognise that 5 + 5 = 10.
  2. Show the students a tens frame waka with 6 kaihoe. For example:
    Image of a tens frame horizontally with a blue counter in each of the top five spaces, and in the bottom left space.
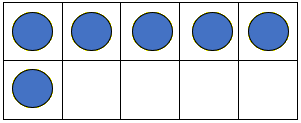
    How many kaihoe are in the waka?
    The waka needs a full crew. How many more kaihoe do we need?

    Students may be able to image 4 more dots and then count all the dots, or they may need you draw the 4 dots before they can count all the dots. Consider providing physical materials (e.g. counters) for those who need it.

  3. To encourage students to use counting on strategies, use a coloured pen to draw 4 more dots or add 4 more counters. Count with the students as extra kaihoe is added "7", "8", "9", "10".
  4. Write beside the tens frame the number sentence 6 and 4 makes 10, and record the equation 6 + 4 = 10. 
  5. Make copies of the tens frames and ask pairs or individual students to complete addition equations for stories you give them. You might use Copymaster 2 as the source of the problems. Encourage students to count on as they add the extra dots or counters. Students then write the number sentence. Use an empty box to represent the extra dots or counters that are added. For example:
    4 + □ = 7

Session 3

In this session students are introduced to Animal strips as a way to communicate addition equations. The animals are native to Aotearoa/New Zealand.

  1. Show the students the animal strips.
    How many animals are on the strip? 
  2. Students may be able to recognise the patterns and answer instantly, rather than counting each animal. Show the students the dotted line after the 5th animal of the longer strips. The aim is that they subitise the number of animals using 'five and' groupings (i.e. recognise how many animals there are without counting them). 
  3. Show the students an animal strip.
    How many animals are on the strip? 
    Animal strip with seven seals.
  4. Show the students another animal strip and ask the students:
    How many animals are there altogether?
    Animal strip with two bees.
  5. Encourage the students to count on, i.e. "8", "9".
  6. Write under the animal strip the number sentence "7 and 2 makes 9” and the equations 7 + 2 = 9.
  7. Make copies of the animal strips and ask pairs or individual students to make their own addition equations. Encourage students to count on as they add the animals. Then ask the students to write the number sentence underneath. Be open to students using early part-whole strategies and encourage other students to make sense of the strategies. For example, a student might add 5 + 4 using 4 + 4 = 8 and adding one to the answer.
  8. To extend student use addends with sums above ten, e.g. 6 + 5 = 11 or 7 + 8 = 15.

Session 4

In this session students are introduced to the number line as a way to represent addition problems.

  1. Put 4 counters on a number strip (Number strips) as shown below. Add another three counters. As you model with the materials say:
    "I am making a putiputi (woven harakeke flower). I pick 4 strips of harakeke. Then I pick another 3 strips of harakeke. How many strips of harakeke do I have?
    Image of number strip with red counters on 1, 2, 3, and 4 and yellow counters on 5, 6, and 7.
    Expect students to tell you that the total is 7.
    Draw a number line above the number strip as shown below. Highlight that the numbers go at the end of the counters, not the middle as you might do when pointing to the counters.
    Image of number strip with red counters on 1, 2, 3, and 4 and yellow counters on 5, 6, and 7. Aligned number line showing 4+3=7.
    Remove the number strip and counters so only the number line remains.
    What numbers have I written?
    Why did I only write those numbers?
    Number line showing 4+3=7.
  2. Rehearse counting on with the students using only the empty number line. Say, "5", "6", "7".
  3. Record the number sentence 4 and 3 makes 7 and write the equation 4 + 3 = 7.
  4. Model the same process with other numbers such as 3 + 5 and 6 + 2. When students appear secure in moving between the number strip and number line representations, provide them with Copymaster 3 to work on in pairs. Some students may still require the number strip and counters to support their creation of the number line.
  5. Encourage the students to count on as they mark the jumps but be aware that students may use part-whole strategies as well, particularly based around doubles facts.
  6. After a suitable time, gather the class and discuss their answers.

Session 5

In this session students consolidate their use of representations. Provide them with an open people to solve, such as:

Mihi collected some paua in the morning and some more paua in the afternoon.
She collected 12 paua altogether. How many paua did she collect in the afternoon?

  1. Act out one possible solution using objects to represent the paua. Record the solution in various ways, such as:
    Image of two plates, each with 6 paua on it. One is labeled morning, and the other is labeled afternoon.
    6 and 6 equals 12
    Number line showing 6+6=12.
    6 + 6 = 12
  2. Let students explore possible solutions. Encourage them to use as many representations as possible. Some students may need support with counters and numbers strips.

    Can you find all the answers? How will you do that?

  3. After a suitable time, record all the answers students found. Organise the equations systematically.

    1 + 11 = 12
    2 + 10 = 12
    3 + 9 = 12
    ….
    9 + 3 = 12
    10 + 2 = 12
    11 + 1 = 12

    Ask students what patterns they notice. Can they explain why the patterns occur?

  4.  Investigate starting with the 6 + 6 scenario and explore moving paua from one time to the other.
    Image of two plates, each with 6 paua on it. One is labeled morning, and the other is labeled afternoon. Arrows indicating two paua moving from afternoon to morning.
  5. If time permits, use the same scenario to explore change-unknown addition problems.

    Mihi collected 5 paua in the morning and some more paua in the afternoon.
    She collected 9 paua altogether. How many paua did she collect in the afternoon?
    Change unknown problems can be represented using a number line and equation.
    Image of two plates, one with 6 paua on it, labeled morning, and the other with a question mark, labeled afternoon.
    Number line showing 5+?=9.
    5 + ㅁ = 9

  6. For high achievers explore start-unknown addition problems such as:

    Mihi has some paua. She gets 4 more paua. Now she has 10 paua.
    How many did she have to start with?

Attachments

Taller/Wider/Longer

Purpose

This unit encourages students to use measurement language and counting to compare the attributes of length, width or height of objects in a variety of game situations. The transition from counting all to advanced counting is also supported.

Achievement Objectives
GM1-1: Order and compare objects or events by length, area, volume and capacity, weight (mass), turn (angle), temperature, and time by direct comparison and/or counting whole numbers of units.
Specific Learning Outcomes
  • Use measuring language to compare length, width, and height.
Description of Mathematics

Measuring is about making a comparison between what is being measured and a suitable measurement unit. The first step in the measuring process is understanding that objects have attributes that can be measured. Initial experiences are needed to develop awareness of the attribute and to introduce the necessary language, for example, long, longer, short, shorter, tall, taller, wide, wider, narrow, narrower.

The activities in this unit provide experience in using measurement vocabulary.

Opportunities for Adaptation and Differentiation

The learning opportunities in this unit can be differentiated by providing or removing support to students and by varying the task requirements. The difficulty of tasks can be varied in many ways including:

  • modelling each game for the class before they begin
  • scaffolding students who need support while playing the game with teacher support
  • reducing the number of pieces added or removed each turn, or eliminating subtraction altogether
  • deliberately encouraging tuakana-teina by grouping students to play the games with each other (2 students working with 2 other students). 

The contexts for this unit can be adapted to suit the interests and experiences of your students. For example:

  • making your own templates for the games. You may prefer to use a different shape of tree for session 3 or fence pieces instead of brick walls for session 4
  • referring to native worms such as the NZ flatworm can create an interesting context for the game Wiggly Worms
  • using eels instead of worms as a context
  • relating the game Treemendous Trees to native trees or plants in your area. E.g. kowhai tree
  • adding koru patterns or kōwhaiwhai to the brick or wooden panels for wonderful walls and giving a context of Te Marae.

    Te reo Māori vocabulary terms such as tāroaroa (tall - person), poto (short), tāroaroa (height of a person), teitei (height, tall), whānui (wide, width), whāiti (narrow) roa (long, length) could be introduced in this unit and used throughout other mathematical learning. Numbers in te reo Māori can be used alongside English throughout the unit.
Activity

Session 1

In this session we introduce the language of comparison that will be used throughout the unit.

  1. Ask students to put their hand up if they think they are tall.
  2. Choose two of the taller students.  Get them to stand up.  Ask the rest of the class:
    Are they tall? 
    Who is taller?
    Compare the heights of the two students to see who is taller.
    Ensure that all students understand that taller means more tall than.
  3. Repeat with short and shorter.
  4. Give each student a piece of string (ensure that the pieces are of a variety of lengths).
  5. Allow students to compare in pairs:
    Is my string longer?
    Is my string shorter?
  6. If you have a variety of toy cars or similar, you could use them to practice width comparison language in a similar way.
  7. You might also develop the concept of “tall” and “taller” by taking a walk around your school and looking at the height of different buildings and structures (e.g. the assembly hall, the flag pole).

The following three sessions provide games in which students will practice the language of comparison.The games could be introduced in three separate sessions or all be introduced in one session and then played in groups rotating over several sessions. These games are also suitable to go into a general box for early finishers to use during other maths lessons.

Session 2: Wiggly Worms

Wiggly Worms is about the language of length. Students will be encouraged to use the words long, short, longer, shorter, longest, shortest.

  1. Wiggly Worms is a game to play in pairs. Each pair needs a dice with the sides labelled +1, +2, +3, +4, -1, -2, and a set of Wiggly Worm pieces (Copymaster 1). Students can cut out and colour in their own worm pieces to make them more appealing.
  2. Students start by each building a 5 piece worm as shown below. 
    Five wiggly worm pieces put together to build a 5-piece worm.
  3. Students take it in turns to roll the dice and follow the instructions on it. If the dice says +2, they add two pieces to their worm, if it says -1, they remove one piece.
  4. Each time a student has a turn they have to say whether their worm is longer or shorter than their partner’s or than their own before they roll the dice. They should check which is longer by counting the number of pieces in each worm.
  5. As the worms get longer, students should be encouraged to keep track of how long their worm is and count on or back to find its new length. For example My worm was 7 long and I’m adding 3 so it’s 8, 9, 10 long now, it’s longer than it was.
  6. The game finishes when one student’s worm reaches 20 pieces long (or whatever other number you assign). If a student rolls a minus which is greater than the number of pieces left in their worm they should ignore it.
  7. The game can be easily modified to suit your students’ ability by changing the numbers on the dice (or simply using a counter with 1 on one side and 2 on the other and excluding subtraction altogether).

Session 3: Tremendous Trees

Tremendous Trees is about the language of height, students will be encouraged to use the words tall, short, taller, shorter, tallest, shortest.

  1. Tremendous Trees is a game to play in pairs. Each pair needs a dice with the sides labelled +1, +2, +3, +4, -1, -2, and a set of Tremendous Trees pieces (Copymaster 2). Students can cut out and colour in their own tree pieces to make them more appealing.
  2. Students start by each building a 5 piece tree on their trunk as shown below.
    Picture of a 5-piece tree.
  3. Students take it in turns to roll the dice and follow the instructions on it. If the dice says +2, they add two pieces to their tree, if it says -1, they remove one piece.
  4. Each time a student has a turn they have to say whether their tree is taller or shorter than their partner’s or than their own before they rolled the dice. They should check which is taller by counting the number of pieces in each tree.
  5. As the trees get taller, students should be encouraged to keep track of how tall their tree is and count on or back to find its new height. For example My tree was 7 tall and I’m adding 3 so it’s 8, 9, 10 tall now, it’s taller than it was.
  6. The game finishes when one student’s tree reaches 20 pieces tall (or whatever other number you assign).  If a student rolls a minus which is greater than the number of pieces left in their tree they should ignore it.
  7. The game can be easily modified to suit your students’ ability by changing the numbers on the dice (or simply using a counter with 1 on one side and 2 on the other and excluding subtraction altogether).

Session 4:  Wonderful Walls

Wonderful Walls is about the language of width, students will be encouraged to use the words wide, narrow, wider, narrower, widest, narrowest.

  1. Wonderful Walls is a game to play in pairs. Each pair needs a dice with the sides labelled +1, +2, +3, +4, -1, -2, and a set of Wonderful Walls pieces (Copymaster 3). Students can cut out and colour in their own wall pieces to make them more appealing.
  2. Students start by each building a 5 piece wall as shown below.
    Picture of a 5-piece wall.
  3. Students take it in turns to roll the dice and follow the instructions on it. If the dice says +2, they add two pieces to their wall, if it says -1, they remove one piece.
  4. Each time a student has a turn they have to say whether their wall is wider or narrower than their partner’s or than their own before they rolled the dice. They should check which is wider by counting the number of pieces in each wall.
  5. As the walls get wider, students should be encouraged to keep track of how wide their wall is and count on or back to find its new width. For example My wall was 7 wide and I’m adding 3 so it’s 8, 9, 10 wide now, it’s wider than it was.
  6. The game finishes when one student’s wall reaches 20 pieces wide (or whatever other number you assign). If a student rolls a minus which is greater than the number of pieces left in their wall they should ignore it.
  7. The game can be easily modified to suit your students’ ability by changing the numbers on the dice (or simply using a counter with 1 on one side and 2 on the other and excluding subtraction altogether).

Session 5:  Reflection

  1. In this session students could be given time to play their favourite game from the previous three sessions. Alternatively, your class might want to create their own comparison game to play. Ideas could include trains (adding carriages), skyscrapers (adding floors), fences (adding rails), Te Marae (adding wall panels) or anything else their imagination provides.
  2. As a final revision (and possible summative assessment) students could be given Copymaster 4 to work through. In this Copymaster they are asked to use the words they have been practising all week in sentences. Possibly the first couple could be done as a class experience to ensure that students understand the task, and then they could work independently on the remainder.

Inequality symbols and relationships

Purpose

The purpose of this unit of three session is to develop understanding of how to recognise and record relationships of (equality and) inequality in mathematical situations.

Achievement Objectives
NA1-4: Communicate and explain counting, grouping, and equal-sharing strategies, using words, numbers, and pictures.
Specific Learning Outcomes
  • Understand the equals symbol as an expression of a relationship of equivalence, and explain this.
  • Recognise situations of inequality and use the inequality (‘is not equal to’) symbol, ≠.
  • Understand that < and > symbols can make equivalent statements.
  • Use relationship symbols =, <, > in equations and expressions to represent situations in story problems.
  • Understand how to find and express the difference between unequal amounts.
Description of Mathematics

The first relationship symbol that most students encounter is the equals symbol, =, which communicates a relationship of equivalence between amounts. It is important for students to understand that symbols help us to express relationships between numbers and that equivalence is just one such relationship.

Inequality is the relationship that holds between two values when they are different. Their relative value is described with specific language including ‘is greater than’, ‘is more than’, ‘is bigger than’ or ‘is less than ‘ or ‘is fewer than’. These are expressed using the symbols, <, >, which are said to show ‘strict’ relationships of inequality. Whilst not introduced here, the symbols, ≤ , meaning ‘is less than or equal to’, and , ≥, meaning ‘is greater than or equal to’, are known as ‘not strict’. The notation ≠, meaning ‘is not equal to’ is briefly introduced here as it is a useful, if infrequently used, relationship symbol.

Algebra is the area of mathematics that uses letters and symbols to represent numbers, points and other objects, as well as the relationships between them. Through exploring both equality and inequality relationships, and the symbols used to express these, students develop an important and heightened awareness of the relational aspect of mathematics, rather than simply holding the computational view of mathematics that arises from the arithmetic emphasis that is dominant in many classrooms.

Opportunities for Adaptation and Differentiation

The learning opportunities in this unit can be differentiated by providing or removing support to students and by varying the task requirements. The difficulty of tasks can be varied in many ways including:

  • encouraging students to work collaboratively in partnerships such as older or more skilled learners working with younger or less capable learners (tuakana/teina)
  • varying the complexity of the numbers used in the problem to match the number understanding of students in your class.  For example, increase the complexity by using larger numbers for students who are able to count-on to solve problems.
  • using the activities suggested to form the basis of independent practice tasks.

The contexts for this unit can be adapted to suit the interests and experiences of your students. For example:

  • instead of heights of buildings you might use heights of trees in a native forest, the heights of mountains such as the Southern Alps, or heights of people
  • change the stories from the copymaster to include more familiar contexts
  • te reo Māori that could be introduced in these sessions are orite (equal) and kaore e orite (not equal)
Required Resource Materials
  • Unifix cubes
  • Street map diagram (a simple, made up one), A1 or A2 size, for example:
    A made up street map diagram.
  • Small blank cards
  • Copymaster 1
Activity

Session 1

SLOs:

  • Understand the equals symbol as an expression of a relationship of equivalence, and explain this.
  • Recognise situations of inequality and use the ‘is not equal to’ symbol.
  • Recognise and describe in words the relative size of amounts.

Activity 1

  1. Begin by talking about buildings in your school, suburb, town, city, or a city nearby. List any tall buildings which are known by name. Ask if anyone knows any (familiar) buildings that might be the same height. If using trees, begin by talking about the trees in a local bush reserve, forest or garden and have an image of a forest scape ready for step 2.
  2. Show a skyline picture of Auckland City and ask what features the students notice. (eg. ‘buildings are of different heights’).
    Photo of Auckland City skyline with buildings of different heights.
    Elicit descriptive, comparative language: tall, taller, tallest, short, shorter, shortest, same).
    Point out that we have been comparing and describing the buildings in relation to one another and explain that we will now be investigating relationships between numbers.
  3. Make unifix cubes available to the students and tell them to think of their favourite number between (and including) one and ten. Ask them to take this number of cubes of one colour.
    For example, one student takes seven pink cubes.
    Place a simple city street map in front of the students, or create one with them.
    A made up street map diagram.
    Have the students join their cubes to make buildings for this city. When they have made their ‘tower buildings’, have them locate them, standing up, in places of their choice between the streets, creating a ‘cityscape'. If adapting to use native forest, rivers and streams could replace the roads of the street map, and cubes can become 'trees'. This adaptation would be continued on throughout the remainder of the sessions and activities. 
  4. Have students look carefully at their ‘city’ and identify any buildings that they think might be the same height. Select several students to test their idea by taking the two identified ‘towers’, standing them side-by-side and comparing their heights. If they are the same they should count the number of ‘storeys high’ they are (number of cubes) and, on the class chart, write an equation and words to show this. For example:
    Cube model of buildings that are the same number of storeys high.     5 = 5      five is equal to five
    Read the equation together, “Five is equal to five” and “Five is the same as five.”
    The buildings are then returned to their place ‘in the city’.
  5. Have students now identify towers that are not the same in height.
    Cube model of buildings that are not the same number of storeys high.
    Have a student describe how these numbers (of storeys) are ‘related’: “six is more than four”, “four is less than six”, “six is not equal to four.” Ask, “How can you write this?” Record the students’ suggestions, accepting all ideas.
  6. On the class chart write "6 ≠ 4, six is not equal to four" and have students in pairs, read this expression of inequality to each other, read it together.
    Have students identify more ‘unequal buildings’ and record these as inequality statements on the chart and read them.
    If possible retain the class ‘cityscape’ for Session 2.

Activity 2

  1. Make plain A4 paper, felt pens, and cubes available to students. Have them work in pairs to create their own small ‘city’ with street map and cube buildings (or forest or mountain range).
  2. On separate paper, each student is to write about the buildings in their ‘city’. They should draw at least four pairs of buildings and for these, write both equality and inequality statements in words and symbols, as modeled in Activity 1, Step 5 (above).

Have student pairs retain their maps for Session 2.

Activity 3

Conclude the session by having the students share their recording and discussing how the symbols = and ≠ show us how numbers are related to each other.

Photograph the class and pair ‘city models’ to display with student recording from Activity 2, and from further sessions.

Session 2

SLOs:

  • Recognise situations of inequality and use the appropriate symbols, ≠, <, >, to express this.
  • Understand that in using < and > symbols, we can make equivalent statements.

Activity 1

  1. Place the class ‘city’ from Session 1 with its map and tower buildings in front of the students. Review the symbols = and ≠ and ask the students, “What is common about these symbols?” (They both express a relationship between numbers.)
    Explain that there are more relationship symbols and that they will learn about two more in this session.
  2. Ask for a volunteer to find two towers that match this number expression:
    6 ≠ 4
    Have student pairs discuss the towers
    Cube model of buildings that are not the same number of storeys high.
    then, as a class, record their observations, including ‘6 is more than 4’ and ‘4 is less than 6.’ Ask if anyone knows symbols that show each of these relationships.
  3. Write these symbols on the class chart.
    < > 
    Write the words, ‘is more than’, and ‘is greater than’, together on the class chart, and ‘is less than’ or ‘is fewer than’ together.
    Have students discuss these in pairs and decide which symbol goes with which pair of phrases and why they think that.
  4. Accept all ideas. Conclude, agree, model and record "six is greater than/is more than 4".
    Cube model of buildings that are not the same number of storeys high, including the greater than symbol.

Activity 2

  1. Make available to the students small pieces of card (the same size)and felt pens or pencils. Explain that they are now to work in pairs with their own ‘city’.
    Each student is to write at least four inequality cards for pairs of ‘buildings’. For example:
    Cube model of pairs of buildings that are not the same number of storeys high, with examples of inequality cards.
  2. Have the students then mix up their cards so that they don’t match the ‘buildings’. They then swap with another student pair, and correctly match their cards and ‘buildings’.

Activity 3

  1. As a class, discuss and conclude that the same relationships can also be expressed using the “is less than’ or ‘is fewer than’ symbol. Demonstrate with ‘buildings’ (cubes) from Activity 1, Step 4. (above):
    Cube model of buildings that are not the same number of storeys high, including the less than symbol.
    "Four is less than/is fewer than 6"
  2. Have students return to their own displays from Activity 2, Step 1 and write four more cards expressing ‘is less than’ relationships.
    Each student should now have written at least 4 pairs of cards; 16 cards in total for the pair.

Activity 4

  1. Have students shuffle the cards they have made in Activity 3, Step 2 and swap these with another student pair.
    Each pair is to play a short Memory game with these cards by spreading them out face down in front of them and trying to find matching pairs of statements. For example:
    Example of an inequality statement card.Example of an inequality statement card.
  2. Students who finish quickly can create towers to match some of the pairs of inequality statements.

Activity 5

Conclude the session by reviewing the four relationship symbols (one of equality and three of inequality) that have been used in Sessions 1 and 2.
=, ≠, <, >.
Retain student ‘cities’ and relationship cards for Session 3.

Session 3

SLOs:

  • Use relationship symbols =, <, > in equations and expressions to represent situations in story problems.
  • Understand how to find and express the difference between unequal amounts.

Activity 1

  1. Begin asking, “Who walked to school this morning?” Say that you are going to read a short story (Copymaster 1).
    Explain that the students must listen very carefully to the story. As they do so, they should record relationship expressions, in order, for any numbers that they hear. Read the story once. Highlight an example (eg. 3 >2 weetbix) and read the story again.
  2. Have students compare their expressions and equations in pairs.
  3. Share and discuss the expressions and equations as a class, recording them on the class chart.

Activity 2

  1. Write the word ‘difference’ on the class chart. Ask students to explain this, giving examples from their own life, and record their ideas. For example: "There’s a difference between the number of people in my family and Maia’s family. There’s five in my family and eight in Maia’s. They’re not the same."
  2. Refer to the inequality expressions recorded on the class chart in Activity 1, Step 2
    For each discuss and record the difference. For example:
    Weetbix: 3 > 2, 2 < 3,
    Three is one more than two. Two is one less than three.
    The difference is one.
    Age: 60 > 50, 50 < 60
    Sixty is ten more than fifty. Fifty is ten less than sixty.
    The difference is ten.
    Cats: 6 > 0, 0 < 6
    Six is six more than zero. Zero is six less than six.
    The difference is six.
    Dog: 1 = 1
    One is the same as one. There is no difference.
    The difference is zero.

Activity 3

  1. Make available to the students, small pieces of card (the same size) and felt pens or pencils.
    Display two ‘towers’ from the class ‘city’. Ask. “What is the difference between the two towers? How do you know? For example:

    Show: Cube model of buildings that are not the same number of storeys high.Example of an inequality statement.Example of an inequality statement.  and write The difference is 2, referring to the inequality example. 
    Elicit explanations such as 'there are two more green ones, there are two less/fewer yellow ones'.
    Write 6 – 4 = 2 on the class chart and on a card. Subtraction problem based on the inequality example.
    Highlight the fact that when we solve a subtraction problem we are finding the difference.
  2. Have student pairs go to their ‘cities’ and relationship cards from Session 2.
    Explain that they are to write a difference card and a subtraction equation card as shown in Activity 3, Step 1 for each of their inequality expression pairs. Have partners check each other’s cards.
    For the pair, there are now 32 cards in total, 8 sets of four cards.
    Example of an inequality statement.Example of an inequality statement.The difference is 2, referring to the inequality example.Subtraction problem based on the inequality example.
    These can be put together in a bag, or combined with an elastic band.
  3. Have student pairs exchange full sets of cards. Have pairs, or fours, play Fish for Four with one set of cards.
    Purpose: To recognise equivalent pairs of inequality expressions, and their matching subtraction equation and difference statements.
    How to play:
    Cards are shuffled. Five are dealt to each player. The spare cards are put in a pile, face down, handy to all players.
    Players check to see if they have any complete sets in their hand. If so, these are displayed face up in front of them. Each player then privately identifies which set they will collect and they take turns to ask one other named player for a specific card to complete their set.
    For example:
    In hand: Subtraction problem based on the inequality example. and Example of an inequality statement.
    At their turn, the player says, “Name, do you have the card, four is less than six?”
    If the named player has the card, they must forfeit it. The successful player can ask again till they are told, “No. Go fish.” That player then takes a card from the top of the upturned pile of spare cards. It is then the turn of the next player.
    The winner is the player with the most complete sets when all cards are used.

Activity 4

Conclude this session by reviewing key learning from this series of three lessons. Sets of cards can be used as an independent consolidation task.

Printed from https://nzmaths.co.nz/user/75803/planning-space/late-level-1-plan at 3:34am on the 20th May 2024