Purpose
The purpose of this activity is to support students using the spatial structure of a growth pattern to predict further shapes in the pattern.
Achievement Objectives
NA3-8: Connect members of sequential patterns with their ordinal position and use tables, graphs, and diagrams to find relationships between successive elements of number and spatial patterns.
Required Resource Materials
- Square tiles or squared paper
- PowerPoint (in paper form or displayed on a shared screen)
Activity
- Use slide 1 of the PowerPoint to introduce this pattern of growing letter ‘t’.

Pose the following sequence of questions and instructions:
What is the same about all three letters in the pattern?
Students might notice that all three letters have a horizontal bar of three squares.
What changes as the letter t grows?
Student might notice that the central column grows by one square.
How tall is Letter Four in this pattern?
How many squares will Letter Four be made of?
Draw/Make Letter Four.
- Let students anticipate a further shape in the pattern several steps removed from Letter Four.
Imagine Letter 14. What will it look like?
How many squares tall will Letter 14 be?
Students should conclude that Letter 14 will be 16 squares tall because the height is always two more than the Letter number. Draw a schematic diagram to show what Letter 14 will look like. Discourage drawing every square as the focus is on organisation (structure) of the pattern.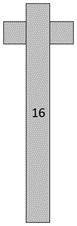
Next steps
- Provide further challenges using the growing letter patterns in the PowerPoint. Allow students to work in groupings that will encourage peer scaffolding and extension. Some students might benefit from working independently, whilst others might need further support from the teacher. Note that the patterns get progressively more complex. In general the sequence of investigation is:
- What is the same about each letter in the pattern?
- What changes as the Letter number gets bigger?
- Draw Letter Four.
- Predict what a further letter might be. Letter 10 is a good choice for ease of calculation of the number of squares.
- Draw a schematic drawing of that further letter. Avoid drawing every square. Draw blocks.
Answers and suggestions are as follows:
- Letter L (Slide 2)
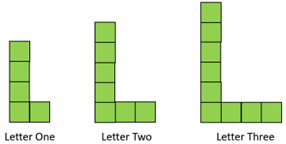
The left corner square is constant. The horizontal and vertical ‘arms’ grow by one with each step. Students need to link the letter number to the height and width of the shape. The height is always three more than the letter number and the width is always one more. Therefore, the tenth letter will be 13 squares tall and 11 squares wide. A schematic diagram might take several forms. Letter ten has 23 squares.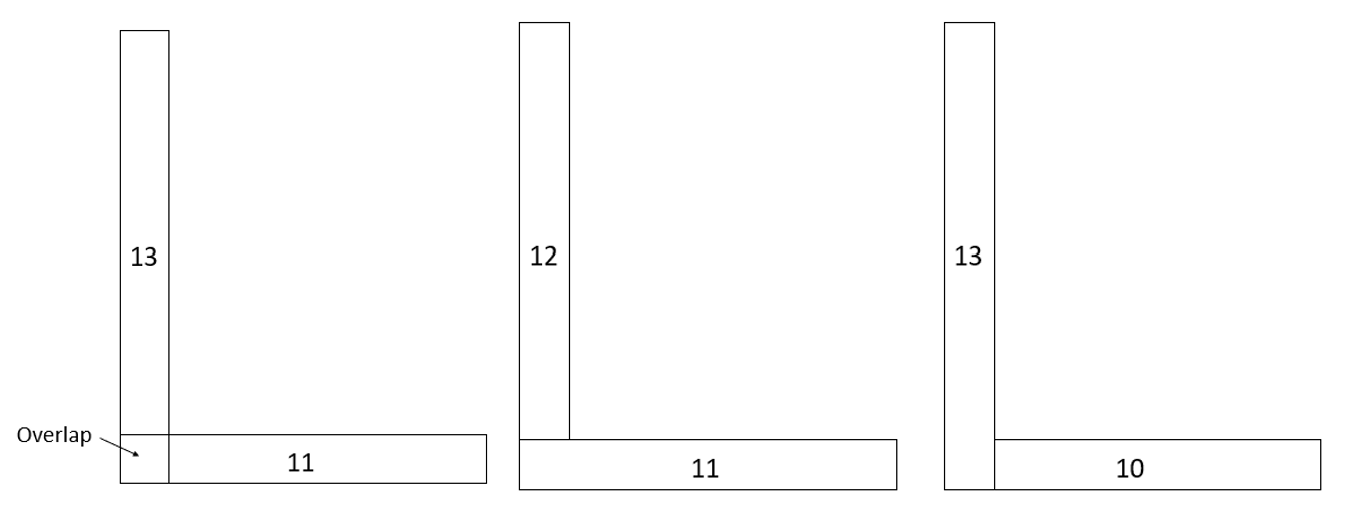
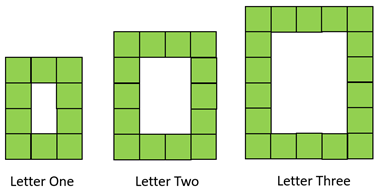
- Letter C (Slide 3)
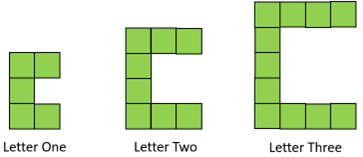
The two corner squares are constant, and the ‘spine’ and horizontal rows of the letter grow by one square in each step. The spine always has two more squares than the letter number and the horizontal rows always have one square more than the letter number.
Therefore letter ten will have a spine of 12 squares and two rows of 11 squares. There are two overlapping squares in the corners. Therefore, the total number of squares is 12 + 2 x 11 – 2 = 32. Various schematics are possible, including: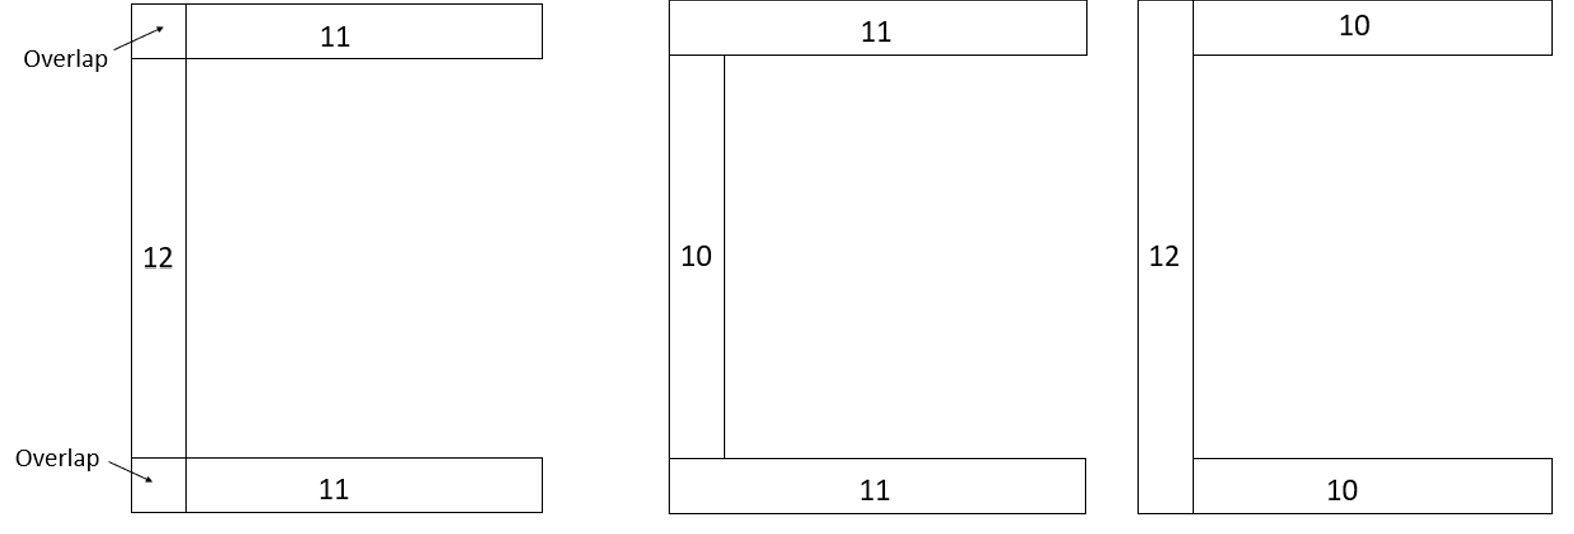
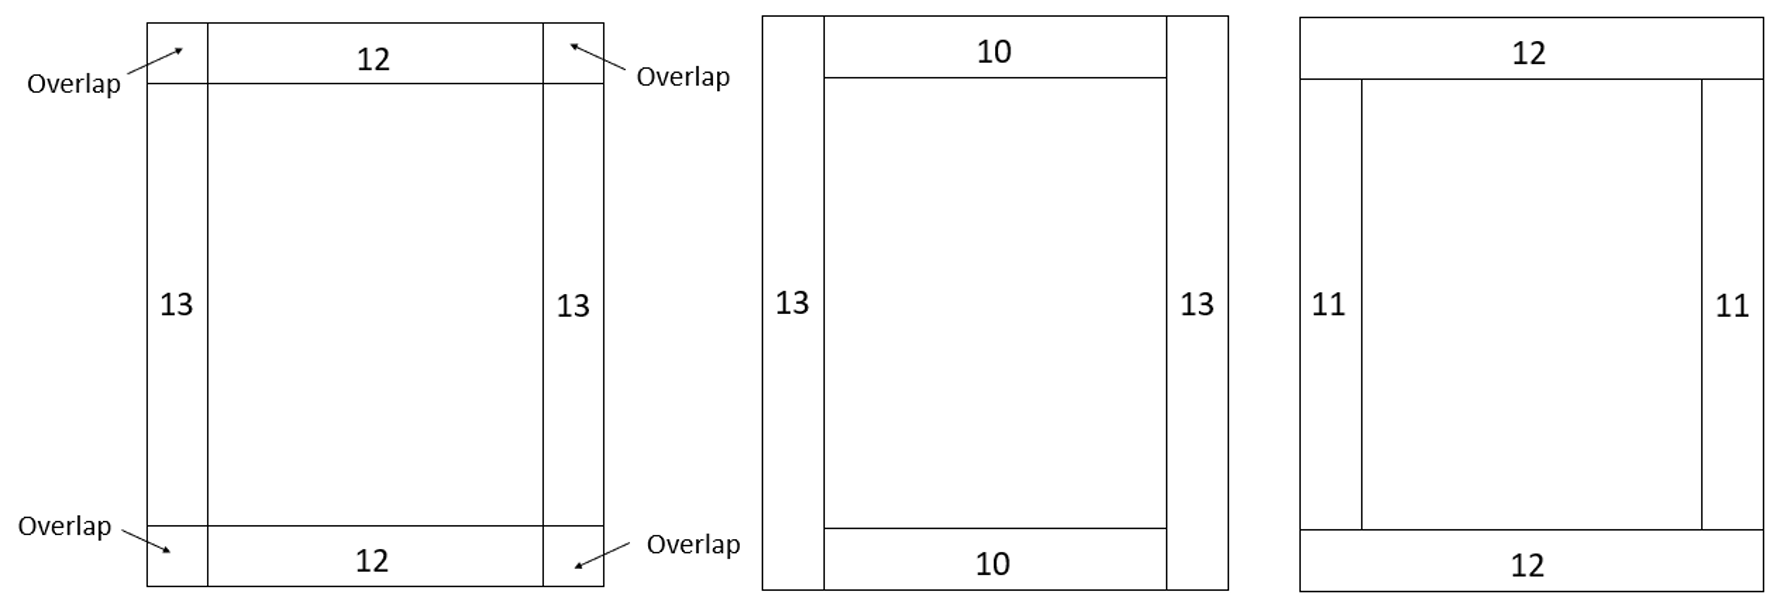
- Letter O (Slide 4)
Students should notice that the letter is always one square taller than it is wide. The corner squares are constant, and the sides all increase by one square with each step. The height of the letter is always three squares more than the Letter number and the width is two more. Therefore, the tenth letter will have (2 x 13) + (2 x 12) – 4 = 46 squares. Subtracting four allows for the overlap of the corner squares. As a check a student might notice that Letter One has 10 squares then add on 4 x 9 = 36 to allow for adding 9 extra squares to each side. Various schematic drawings are possible for letter ten including:
- Letter h (Slide 5)
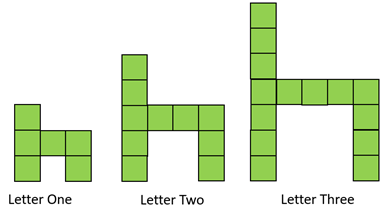
Students should notice that the letter h is always made up of a long and short vertical, that form the back and front of the h. The back vertical grows by two squares each step. The other part of the h is the horizontal row that grows by one square each step.
Students need to connect the Letter number with the number of squares in each part to predict letter ten. The back vertical has twice the letter number plus one squares. The front vertical has the letter number plus one squares. The horizontal part that bridges the verticals always has the Letter number of squares.
Therefore, letter ten has 21 + 11 + 10 = 42 squares. Possible schematic drawings include: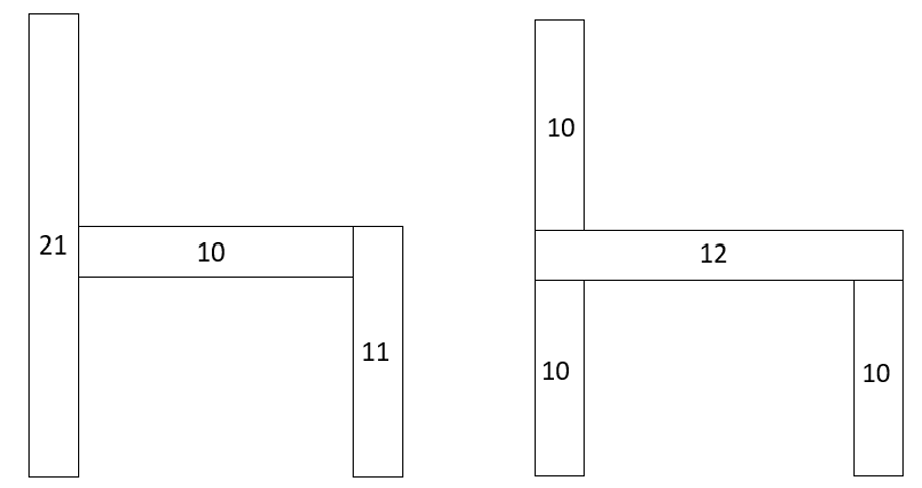
Attachments
Add to plan
Level Three