In this unit we explore the size of a metre and develop our own ways to estimate a metre length.
- Recognise the need for a standard unit of length.
- Recognise a metre length.
- Estimate and measure to the nearest metre.
When ākonga can measure lengths effectively using non-standard units, they are ready to move to the use of standard units. The motivation for moving to this stage often follows from experiences where ākonga have used different non-standard units for the same length. They can then appreciate that consistency in the units used would allow for the easier and more accurate communication of length measures.
Measurement experiences must enable ākonga to:
- develop an understanding of the size of the standard unit
- estimate and measure using the unit.
The usual sequence used in primary school is to introduce non standard measures followed by standard measures; the centimetre first, then the metre, followed later by the kilometre and then millimetre.
The centimetre is often introduced first because it is small enough to measure common objects. The size of the centimetre unit can be established by constructing it, for example by cutting 1-centimetre pieces of paper or straws. Most primary classrooms also have a supply of 1-cm cubes that can be used to measure objects. An appreciation of the size of the unit can be built up through lots of experience in measuring everyday objects. Ākonga should be encouraged to develop their own reference for a centimetre, for example, a fingertip.
As ākonga become familiar with the size of the centimetre they should be given many opportunities to estimate before measuring. After using centimetre units to measure objects, ākonga can be introduced to the standard ruler (30cm). It is a good idea to let ākonga develop their own ruler to begin with. For example, some classrooms have linked cubes which can be joined to form 10 cm rulers. Alternatively pieces of drinking straw could be threaded together.
The correct use of a ruler to measure objects requires specific instruction. The correct alignment of the zero on the ruler with one end of the object needs to be clarified.
Metres and millimetres are established using a similar sequence of experiences: first construct the unit and then use it to measure appropriate objects.
This unit can be differentiated by varying the scaffolding provided or altering the difficulty of the tasks to make the learning opportunities accessible to a range of learners. For example:
- ākonga could continue to use non-standard units of heel toe steps or hand spans to measure if they are not ready for standard units
- clearly and deliberately modelling the correct use of a metre ruler, ensuring that the start of the scale is used as the starting point rather than the end of the ruler, and there are no gaps or overlaps between measures. This will need to be done in multiple ways, multiple times
- introducing the use of millimetres for students who are confident working with centimetres and 10x basic multiplication facts
- discussing how to measure incomplete measurements (for example, 2.5 m or 2 1/2 m)
- directly supporting ākonga in small groups to measure accurately, reinforcing the correct use of the metre ruler.
The context for this unit can be adapted to recognise diversity and student interests to encourage engagement. For example, the unit could be focused around the journeys of Pasifika and Māori peoples to Aotearoa, by including activities that make use of non-standard measures to standard measures. For example, how did Māori know how long or wide their wharenui had to be without any standard measures or the length of their new waka or how long their journey to another marae might be. Ask ākonga what they think are the advantages and disadvantages of non standard measures.
Te reo Māori vocabulary terms such as inea (to measure), mitarau (centimetre), and mita (metre) could be introduced in this unit and used throughout other mathematical learning.
- A metre strip of card, ribbon/string/wool or a metre ruler
- Chalk for drawing on concrete
- Light card for handspans and footprints
- 1kg weight (clay wrapped in plastic wrap or a shot put from the PE shed)
- Rugby ball
- 1cm blocks
- String
- Copymasters for sports day, Toss the Cannon Ball, Jump from the Plank and Metre Kick
Session One
Begin the session by acting out the following scene with your class (mahi tahi model).
Characters:
Captain Kaiwhakaako - teacher
Crew - ākonga
Props:
Treasure - a small box
Crooked palm tree - desk
Captain Kaiwhakaako, the pirate, decided to bury their treasure.
They started from the crooked palm tree and carefully counted 12 steps, (heel, toe) and then stopped and placed the treasure on the ground.
To make sure that they remembered where they left it, they wrote down on their map - 12 steps.
He wanted to make really sure that he had measured correctly before digging the hole so he asked a cabin boy or girl to check.
Captain Kaiwhakaako was puzzled. How could the crew member have a different number of steps?
Had they made a mistake?
- Discuss with ākonga the reasons for the differences.
Can you think of a measure that Captain Kaiwhakaako could use that is the same for everyone?
If ākonga come up with the suggestion of a metre, ask:
How long is it?
When and where is used as a measurement? - Tell the ākonga that Captain Kaiwhakaako is really interested in using metres on their map but they're not sure how long, wide or high a metre is. Captain Kaiwhakaako wants their crew to go around the island (classroom), and make a list of all the things that are less than one metre, about one metre and more than one metre and then share it with them so that they can learn about a metre.
- Provide ākonga with a metre stick or a one metre length cut from ribbon/string/wool or cardboard.
- At the conclusion the ākonga can share their findings with the crew and Captain Kaiwhakaako and find out if they had similar measurements for objects in the room.
- Finally they could measure from the crooked palm tree to the treasure and record the answer in metres. The letter m could be introduced as a means of recording. Suggestions on how to record incomplete metres could also be discussed.
Session two
Tell ākonga that Captain Kaiwhakaako has decided that now they know what a metre is, they want to start drawing up plans for their new pirate ship and that they would like the crew to help.
Discuss with ākonga the type of boats that pirates sailed in. This could include discussion about waka and waka ama (outrigger canoe).
Provide them with chalk and a metre measure and take them outside to draw the boat to Captain Kaiwhakaako requirements.Measurements of Captain Kaiwhakaako's new pirate ship:
- Length: 10 metres
- Middle mast: 5 metres
- Front/back mast: 4 metres
- Plank: 1 metre
- Ākonga might like to add extras like flags, anchor ropes, and cannons and add them to the measurement list. Encourage ākonga to estimate before drawing.
- Ask ākonga to stand and show how high they think a metre would be from the floor. Check with their metre measure and reference it to their body.
A metre is as high as …………….(my ribs).
How wide is a metre? A metre is from my fingertips to ……………
Session three
- Ask ākonga to estimate how many of their handspans would be the closest to a metre.
- Trace an outline of their handspan on to paper and then cut it out and use it to measure along the metre. Record results. Have ākonga estimate how many of their footprints would be closest to a metre. Make outlines by removing their shoe and tracing around their foot.
Check how ākonga position the shapes when measuring.
Do they begin from the same baseline?
Do they use the measuring unit consistently without gaps or overlapping?
Ākonga can show their results by pasting their outlines on to paper and recording the number beside it.To measure 1 metre it takes: ____ of my handspans 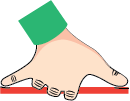
_____ of my footprints 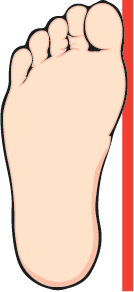
- To finish, pose this problem for the crew,
Captain Kaiwhakaako has gone to a boat shop to buy some new canvas for sails. They want two metres. Can you show me using a body measurement how long two metres would be?
Session four
- Provide ākonga with a standard metre ruler to explore. Look at the markings on it and discuss what they can see.
- Talk about where you begin measuring from. (Ākonga can have difficulties identifying the starting points on calibrated rulers. They start from the edge rather than the markings.)
- If ākonga haven’t offered the word centimetre in the discussion, explain to them that the space between the numbers is one centimetre and place centimetre cubes along the ruler.
- Ask: How many centimetre cubes might fit along the metre?
If 1cm cubes that connect are available join 100 using two different colours to distinguish the decades. Place the line of cubes on top of the metre ruler and count in tens to 100. - What are the advantages and disadvantages of using standard measures?
Provide ākonga with string, scissors and glue and let them investigate the different ways of creating patterns with 1 metre of string. Ākonga can first measure a metre, and then make a pattern.
e.g. spirals 
zig zags 
straight lines 
curves 
- Glue their discoveries to cardboard and display the one-metre patterns.
Discuss that different patterns look as though they have different lengths.
Session five
Captain Kaiwhakaako has decided to have a sports day for the pirate crew. The events for the day are:
- Toss the cannon ball (1kg of clay or a shot put from the PE shed): Copymaster 1: Toss the Cannon Ball
- Jump from the plank (A standing jump from a rectangular piece of cardboard): Copymaster 2: Jump from the Plank
- Metre kick (A rugby ball): Copymaster 3: Metre Kick
- A graphic organiser (e.g. table) for ākonga to record their measurements in
You could adapt this session to include games you have played as a class that involve throwing, kicking, jumping, and tossing. The key learning is estimating and measuring in metres. At each station, ākonga need to estimate how far they will kick/jump/throw/toss in metres, and then measure the actual distance covered.
- Set up the activities in the three stations and provide each student with a one metre long piece of string or metre ruler. Model how to complete the activity at each station. With ākonga, come up with a criteria for how to measure the different tasks properly (e.g. the string must be straight, no gaps between the measuring tools). Set a time limit at each station (approximately 10 minutes).
- When ākonga share their results at the end, talk about the half metre, or the extra bit and the need to have a smaller unit of measure.
- Ākonga will need to work with a partner who can stand where the rugby ball lands after the kick, a tuakana/teina model could work well here. As above, have ākonga record their estimation prior to measuring. After tossing the cannon ball, ākonga estimate how many metres, and then measure.
Dear family and whānau,
We have been busy this week doing lots of measuring using metres. We have found out how many of our handspans equal a metre so that we can estimate lengths. We have also used our metre measuring strings to measure distances around the classroom.
Measuring Strings
Use your measuring strings to measure these distances in metres:
- The distance from your letterbox to your front door.
- The length of your bedroom.
- The length of your hallway.
If you walked 10 metres from your letterbox where could you end up? Draw a map showing this.