This is a Level 3 Geometry activity from the Figure It Out Series.
A PDF of the student activity is included.
Click on the image to enlarge it. Click again to close. Download PDF (154 KB)
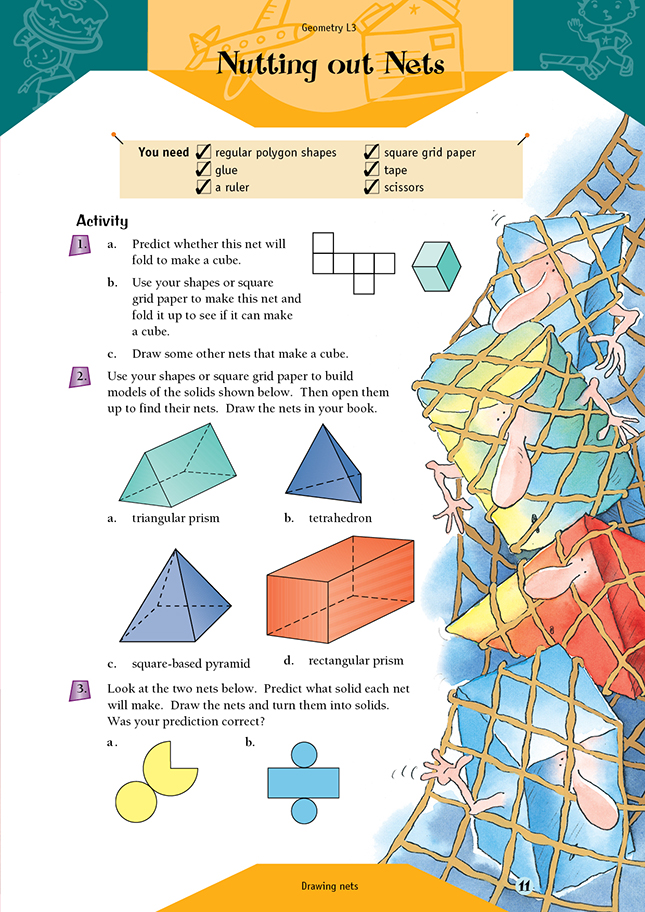
- Drawing nets for three-dimensional objects.
- Regular polygon shapes
- Square grid paper
- Glue, tape, scissors and a ruler
- FIO, Level 3, Geometry, Nutting out Nets, page 11
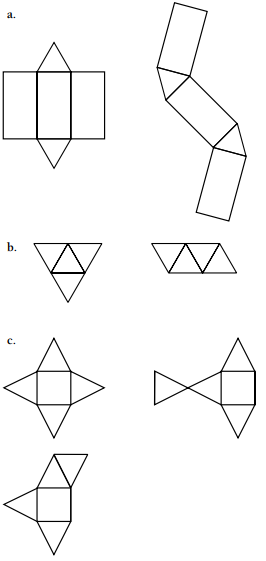
Give students the opportunity to predict, visualise, and explain before they make up the nets shown on this page. The following definitions may be helpful:
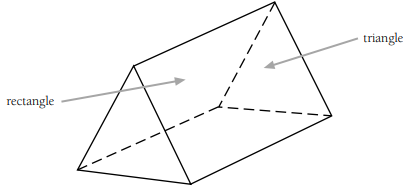
- Triangular prism: A prism has a pair of congruent and parallel faces, in this case, triangles. All other faces are rectangles.
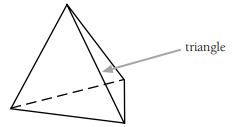
- Tetrahedron: All faces are triangles. Another name for this solid is a triangular-based pyramid.
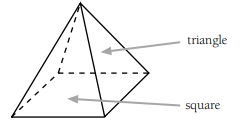
- Square-based pyramid: A solid shape that has triangles for faces and a square for the base.
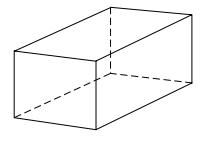
- Rectangular prism: All six faces are rectangles.
For question 2, students will need to know the shape of each face in each of the three-dimensional shapes. Students could look at the net of one of these shapes and discuss why it is an accurate net. For example, they could carefully pull apart the glued edges of a cereal box, which is a rectangular prism. They could look at where the tabs are on the cereal box and discuss why they might be there. See also the nets on page 19 of Answers and Teachers’ Notes: Geometry, Figure It Out, Levels 2–3.
A good introduction to both the cone and cylinder, in question 3, is to consider both shapes in a reallife situation. A cone-shaped ice-cream wrapper is a good example of a cone net. Remember to include the lid of the wrapper, which is the base of the cone. A can of baked beans is a good starting point when thinking about the net of a cylinder.
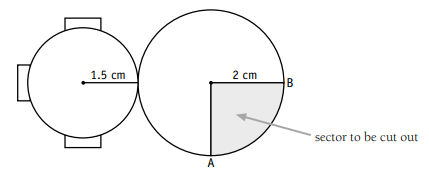
To draw a net for a cone:
- Choose a radius length for a circle, for example, 2 centimetres.
- Mark a quarter of the circle, as shown. (This is cut out later and A is joined to B.)
- Draw a base with a radius that is three-quarters of the first circle’s radius. Tabs are optional.
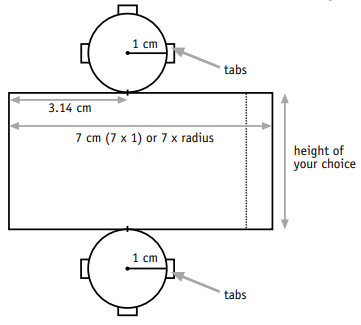
To draw a net for a cylinder (a sheet of A4 paper is ideal for this):
- Choose a radius length for a circle. A radius of 1 centimetre is ideal. (The instructions below are based on this radius.)
- Draw the circle with tabs (optional), as shown.
- To make the body of your cylinder, draw a rectangle that is seven times as long as the length of the radius. Make sure each circle is 3.14 centimetres (pi) from one end of the rectangle, as shown. The height of the cylinder can be your choice.
- Draw another circle with tabs at the other side of the rectangle.
Answers to Activity
- a. The correct prediction is that the net will make a cube.
b. Practical activity
c. Answers will vary. Some examples are:
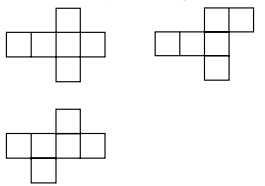
- Answers will vary. Some examples are:
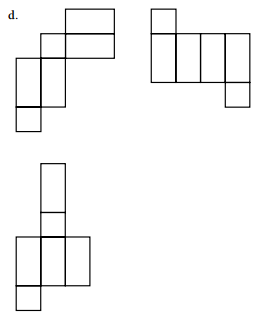
- Practical activity. The net of a makes a cone. The net of b makes a cylinder.