Purpose
The purpose of this activity is to support students in identifying the rows and columns of units in rectangles. Student also use multiplication to find areas.
Achievement Objectives
GM2-1: Create and use appropriate units and devices to measure length, area, volume and capacity, weight (mass), turn (angle), temperature, and time.
Required Resource Materials
- Squared paper or square tiles
- Calculators (if needed)
- Copymaster
Activity
- Introduce the lesson with a rectangle that measures 4 units long by 3 units wide (see page 1 of the Copymaster). The actual size depends on the units you have available. You might use tile patterns, chocolate blocks, cobblestones, tapa cloth sections, etc. as a context. Consider how links might be made to your students' interests, cultural backgrounds, or learning from other curriculum areas.
How big is this whole rectangle?
-
Invite ideas from your students which might include:
- The rectangle is 4 spaces (units) wide.
- The rectangle is 3 spaces (units) wide.
- The rectangle has 12 squares.
The latter idea refers to area, meaning the amount of flat space enclosed by the shape. Discuss the difference in the units used for length and area. Length is measured in part of a line and area is measured by squares. You might introduce relevant te reo Māori kupu such as roa (length), tapawhā hāngai (rectangle), and horahanga (area).
Why do you think area is measured in squares? (Fit together with no gaps or overlaps) - Discuss the ways to work out that the rectangle contains 12 squares. Students might suggest additive strategies like 4 + 4 + 4 = 12 or 3 + 3 + 3 = 12, or multiplicative strategies like 4 x 3 or 3 x 4.
What do the three, four and 12 represent in the picture?
Draw students’ attention to 4 x 3 meaning “four columns of three squares” and 3 x 4 meaning “three rows of four squares.”
- Repeat similar discussions around the other three rectangles introduced in pages 2-4 of the Copymaster.
Look for students to apply multiplication using the rows and column numbers as factors.
- Provide students with a sheet of square grid paper.
Draw some rectangles that have an area of 24 squares. You can use the calculator to work out how long the sides should be. Organise students in groupings that will encourage peer scaffolding and extension, as well as productive learning conversations. Some students might also benefit from working independently, whilst others may need additional support from the teacher.
Roam as students draw rectangles. Look for students to:- apply multiplication, for example, by using five as the row length and finding how many rows are needed.
- seeing relationships among the rectangles, for example, by perceiving 6 x 4 and 4 x 6 as the same rectangle turned around. 12 x 2 is a result of cutting 6 x 4 in half and moving the halves together.
- Provide other ‘draw a rectangle’ challenges. Good target areas are 16 squares, 20 squares, and 30 squares as these numbers have many factor pairs and involve easier multiplication facts.
Next steps
- Progressively require students to image the rows and column and work out the area by multiplication. Pages 5 – 7 show some examples but it is easy for you and students to create their own.
The unit square needs to be iterated (repeated) across the length and down the width to find the size of the rows and columns in the rectangle. In this case there are 5 squares per row and 4 squares per column. The area is 5 x 4 = 20 squares.
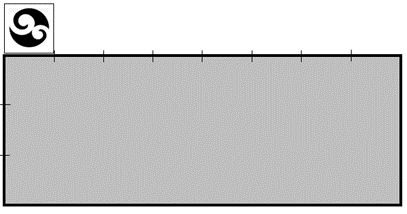
- Provide examples where students use one square unit to find the area of a rectangle. The idea is for them to measure the side lengths in that unit and use the side measures to anticipate how many units in total will fill the rectangle. This example is provided on Page 8 of the Copymaster.
Attachments
finding-areas-of-rectangles.pdf648.07 KB
Add to plan
Level Two