This is a level 4 geometry strand activity from the Figure It Out series.
A PDF of the student activity is included.
Click on the image to enlarge it. Click again to close. Download PDF (234 KB)
design a logo using transformation elements
FIO, Level 4+, Geometry, Book Two, Design a Logo, page 13
compass
ruler
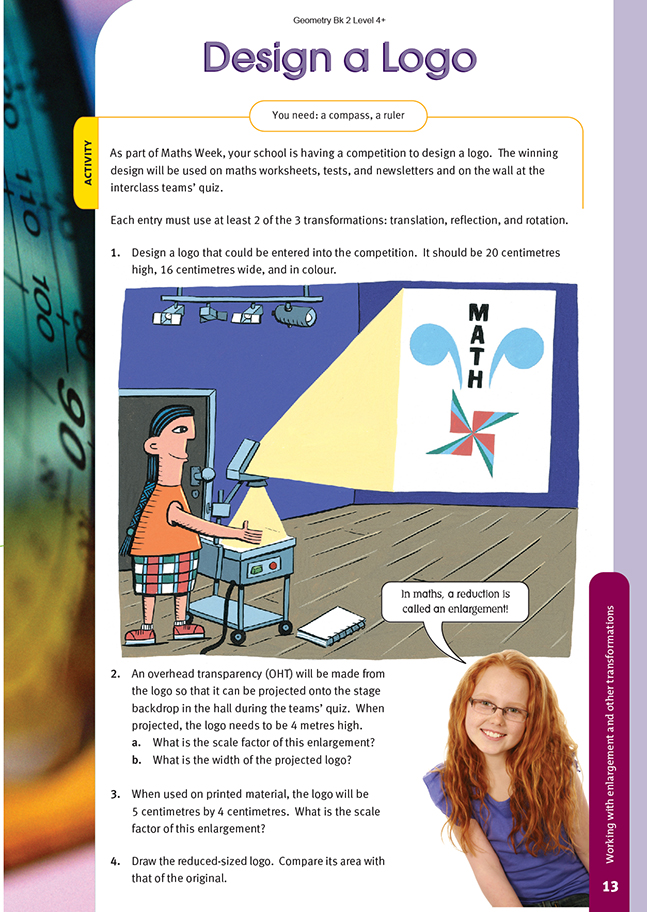
Like the previous activity, this one is about enlargement, but it also involves the other three transformations known to the students: translation, reflection, and rotation.
An A4 sheet of paper is ideal for question 1. The students should begin by drawing a frame the correct size.
They should take care to make this as accurate as possible, with corners that are right angles.
They will find it helpful to experiment on rough paper first as they try to come up with their design concept. They should look for ideas that have a maths theme, that incorporate at least 2 of the 3 transformations, and that they can work up into an attractive and tidy finished design. When the students are satisfied with their
sketches, they can draw them more carefully as "finished art". You could make a competition of the task and offer to make an overhead transparency of the three best designs.
When answering question 3, the students need to compare the projected height of the logo (4 metres) with its actual height (20 centimetres). The question is: how many times greater than 20 centimetres is 4 metres? The answer, 20, is the scale factor of the enlargement. All dimensions, including the width, increase by this factor.
Question 3 involves the reverse process: a reduction. The printed height of 5 centimetres is to be reduced from 20 centimetres. Clearly, the scale factor is 1/4 (or 0.25). At 4 centimetres, the width of the printed logo is also 1/4 of the original width.
In questions 2 and 3, the students have to find the scale factor by comparing 2 lengths. This method will always work provided they follow these two principles:
- They compare only corresponding lengths. This means that one is the enlarged version of the other. (They can't find the scale factor by comparing the length of the first with the width of the second.)
- They divide the enlarged (new) length by the original (old) length. For example, in question 3, we start with 20 (old) and end up with 5 (new). New divided by old gives 5 ÷ 20 = 1/4.
The answer to question 4 will come as a surprise to many students, but as long as they follow the instructions correctly, they will be convinced by it. The reason that the area of the printed logo is just 1/16 of the area of the original logo is that two dimensions have been quartered, not just one. It has 1/4 of the length and 1/4
of the width, so it has 1/4 x 1/4 = 1/16 of the area.
As an extension of question 4, the students could explore the areas of different squares and rectangles when they are increased or decreased by a variety of scale factors. They could then try other shapes and see if they can work out what happens to their areas under various enlargements. From these experiences, they should
be able to generalise that the area of any shape is always enlarged by the square of the scale factor. Reinforce the point that this is true of any 2-D shape, no matter how complex or irregular it may be.
Answers to Activity
1. Logos will vary. Check that you have used 2 transformations.
2. a. 20. (4 m = 400 cm. 400/20 = 20)
b. 3.2 m. (All lengths are increased by the scale factor of 20. The original width times 20 is 16 x 20 = 320 cm or 3.2 m.)
3. 1/4. (5/20 = 0.25 or 1/4)
4. Practical activity. The area will be 1/16 of the original (1/4 x 1/4).