Purpose
This is a Level 3 Geometry activity from the Figure It Out Series.
A PDF of the student activity is included.
Achievement Objectives
GM3-6: Describe the transformations (reflection, rotation, translation, or enlargement) that have mapped one object onto another.
Student Activity
Click on the image to enlarge it. Click again to close. Download PDF (170 KB)
Specific Learning Outcomes
- Design and make a pattern using reflection, rotation or translation.
Required Resource Materials
- Circular shapes
- FIO, Level 3, Geometry, Circle Power, page 20
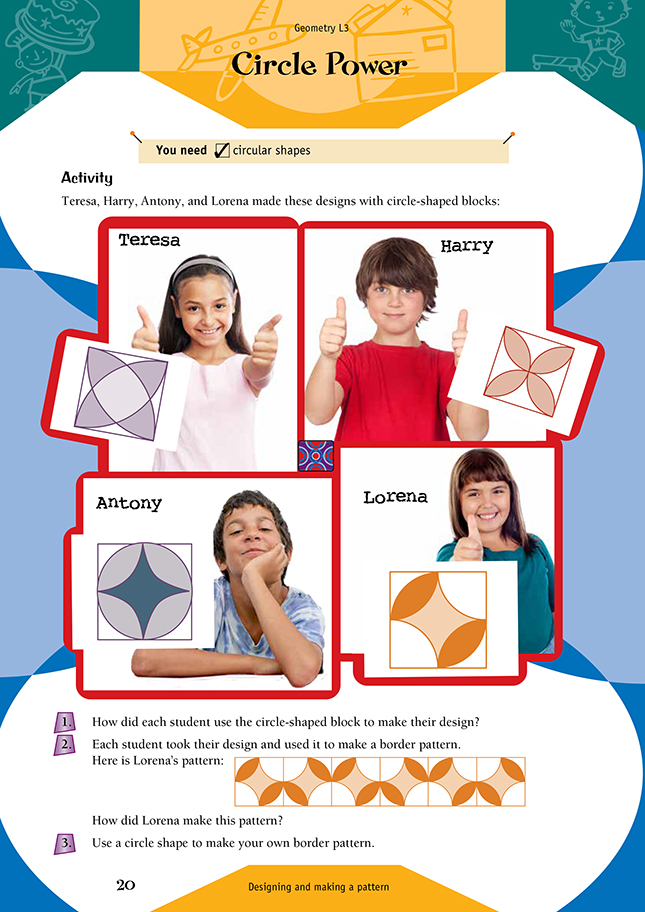
Activity
Students will need experience with reflection, translation, and rotation. (See also pages 4 and 19 of the students’ booklet.) They could practise drawing simple circles and patterns so that they learn how to be very exact when drawing with a compass, for example, drawing a circle with a set radius or drawing an equilateral triangle, using the following method:
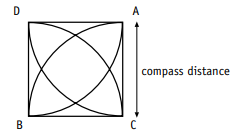
- Measure 4 centimetres on the compass. Place the point of the compass on A and draw an arc a–d.
- Place the compass point on B and draw an arc b–c.
- Join AC and CB where the arcs cross.

Answers to Activity
- Teresa drew a square. She made the compass distance (radius) the same as that of the side of the square. Then she put the compass on point A and drew an arc. She put the compass on point B and drew an arc. She did the same with points C and D.
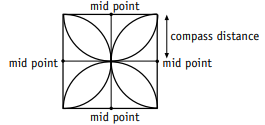
Harry drew a square. Then he marked in mid points on each side. He set the compass distance as shown and then put the compass on each mid point and drew a half circle.
Antony drew a square and marked all the mid points. He used these to work out where the centre of the circle was. Then he drew a circle within the square, using the compass distance as shown. Finally, he put the compass on each corner of the square and drew an arc.
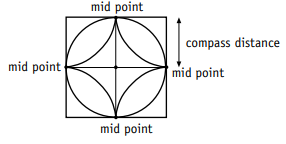
Lorena used the same method as Antony. As a final step, she rubbed out the circle lines shown as dotted lines in the diagram below.
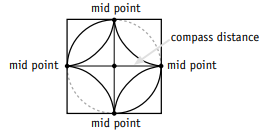
- Lorena’s border pattern has been made by reflection. It is the same basic shape as Antony’s pattern.

- Practical activity
Attachments
CirclePower.pdf101.1 KB
Add to plan
Level Three