The purpose of this activity is to support students sorting a set of three-dimensional shapes by their properties. Properties are connections between visual features and include criteria like:
- Number and shape of faces
- Number of vertices
- Number of edges
- Curved surfaces
- Symmetry
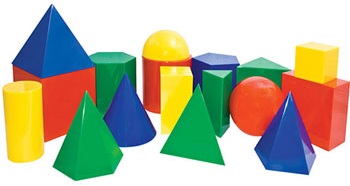
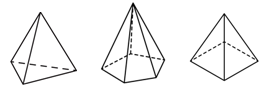
- A set of solid shapes, such as relational solids (pictured)
- Cards made from Copymaster
- Hoops or skipping ropes in a loop
- Spread out all the three-dimensional shapes on the floor or tabletop.
Can you sort these shapes into groups? The shapes in the groups should be the same in some way.
Let students attempt a sort. Ask them to justify the allocation of shapes to groups.
It is likely that students will opt for a binary sort (2 options). Look for explanations like:
“I put the shapes that have flat faces over here and the shapes that have curved surfaces over here.”
This opens a discussion about whether a shape can have faces and curved surfaces. For example, a cylinder has two circular faces and a curved surface.
“I put the shapes with triangle faces in this group and all the other shapes in this group.”
“I put all the pyramids over here and the other shapes over there.”
This signals the student has created a class of solids and opens an opportunity to discuss what properties the pyramids have in common.
Within this discussion, you might introduce relevant te reo Māori kupu, such as the names for different solid shapes.
- Introduce the property cards from the Copymaster. Note that they are presented in sets and are shaded accordingly:
- Rectangular faces – Triangular faces
- Curved surface - Faces
- All identical faces – Non-identical faces
- Less than 12 edges – 12 edges – More than 12 edges
- Even number of vertices – Odd number of vertices – No vertices
- No parallel faces – Some parallel faces.
- Discuss what each term means. You might demonstrate the more complex properties like “identical” and “parallel” in relation to specific shapes. For example: a rectangular prism has three pairs of parallel faces.
- Show the cards marked “triangular faces” and “rectangular faces.”
Label a hoop for each group with the cards.
Invite students to choose a shape and allocate it to one of the hoops.
Can you explain why you put your shape in that group? -
Ask students to convince the others that the shape meets the criterion.
Do any shapes not belong in these sets? (Curved surfaces such as the cylinder, cone, and sphere do not belong so should be placed outside the hoops)
Do any shapes belong in both hoops? (There are several shapes that go into the intersection of the two sets. For example, a square-based pyramid has faces that are one square and four triangles.)
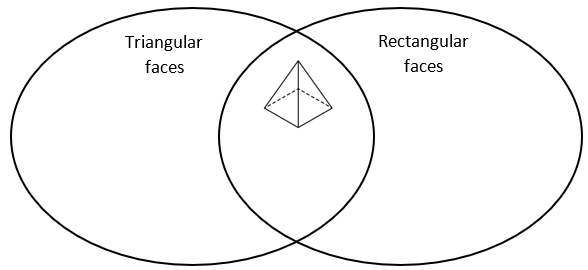
Students might also not realise that a square is a kind of rectangle so a cube belongs in the set of shapes with rectangular faces.
After a complete sort, the Venn Diagram should look like this: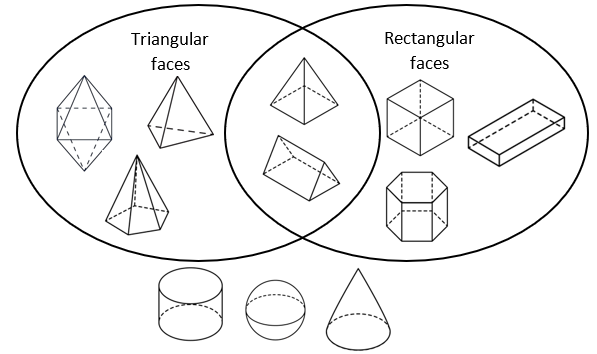
- Choose another set of property cards, such as “identical faces” and “non-identical faces.” Make the Venn Diagram using the property cards and hoops. Ask students to predict which set will have the most shapes in it. Clarify that the only shapes that go into the identical faces set have faces that are all the same shape.
Let students choose a shape and locate it where they believe it belongs. Ask them to convince the others that the placement is correct.
At the end of the sort the Venn Diagram might look like this:
Note that it can be argued that a cylinder has two identical circular faces as well as a curved surface.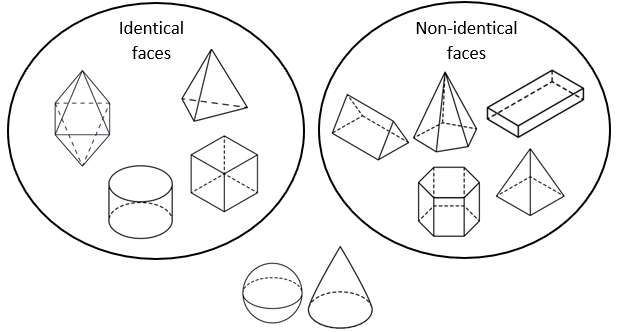
- Provide each pair of students with their own set of three-dimensional shapes, two or three hoops, and a set of property cards, and ask them to collaboratively to sort the shapes. Consider organising students pairs to encourage tuakana-teina (reciprocal learning). Roam as they work, looking for the following:
- Do they understand the property they are using to classify the shapes?
- Are they consistent in applying the criterion?
- How do they deal with intersection of groups if it applies?
- How do they deal with shapes that the criteria do not apply to?
- After a suitable time provide time for students to share their shape sorts. Ask them to explain why they have allocated certain shapes in the way they have. Ask questions to encourage detailed explanations that demonstrate understanding of shape properties.
Look at the set of shapes with an even number of vertices. Do the shapes have anything else in common?
Students might notice that the prisms all have an even number of vertices. Why?
Do any pyramids have parallel faces? Why not?
Do all prisms have parallel faces? Which prisms do? Which prisms don’t?
Which shapes have less than 12 edges? Why does that happen?
The students with “even number of vertices”, “odd number of vertices”, and “no vertices” should have a display like the one shown below.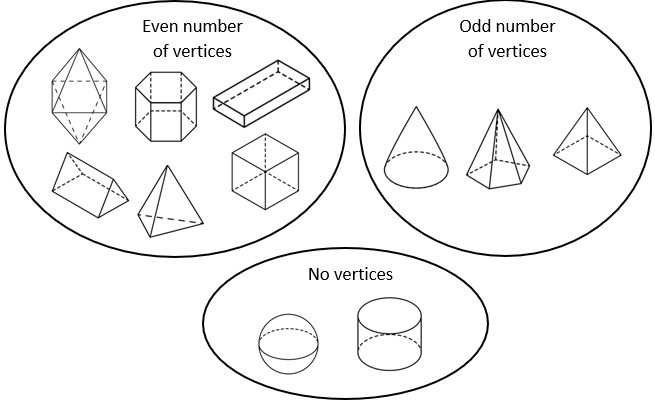
You may decide to change the set of property cards you give to each group and see if they can re-classify the shapes by the new criteria. This is a good way to assess the depth of students’ understanding of properties.
Next steps
- Develop students’ mathematical terminology to include shapes that arise from sorting, by choosing three shapes that have some property or properties in common. For example, what is the same about these three shapes?
- Ask students to draw shapes that meet properties you provide. Begin with a single property then increase the number of properties that students need to get correct simultaneously. For example:
- Single property
- 6 faces
- 12 edges
- 10 vertices
- 1 curved surface
- Two properties
- Two identical faces and a curved surface
- 6 identical faces and 8 vertices
- 5 vertices and an apex
- Single property