Purpose
The purpose of this activity is to support students in identifying the properties of common three-dimensional shapes. There is particular focus on corners (vertices), faces, and edges, and on curved surfaces.
Achievement Objectives
GM3-3: Classify plane shapes and prisms by their spatial features.
Required Resource Materials
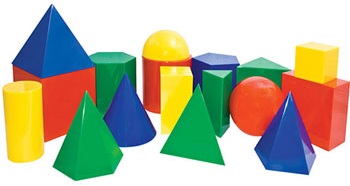
- A set of solid shapes, such as relational solids (pictured)
- Pictures with examples of three-dimensional shapes from your local area.
Activity
- Begin the lesson by allowing students to explore the set of solids. Focus students’ attention on the name and properties of each shape.
What can you tell me about this set of blocks?
Do you know the mathematical names of the solids?
Do you know a thing in real life that is shaped like that?
Students might identify the different shapes, including those that act as the faces of the solid shapes, but may not know the mathematical names. Shapes like the triangular prism, cylinder, and sphere are likely to less familiar than the cube and square based pyramid.
- Discuss important words like face, edge, and vertex (plural of vertices). Create a definition for each feature. You might go online to search for an easy definition. You might also introduce relevant te reo Māori kupu such as tapa (side/edge), akitu (vertex), and mata (face).
- Face – a flat shape that forms the boundary of a solid.
- Vertex – a point where the corners of faces meet, a point where edges meet.
- Edge – a line segment where two faces meet, a line segment that joins two vertices.
- Illustrate the meaning of faces, edges, and vertices with a simple solid like the cube.

- Choose another solid from the set, such as a triangular prism.
What is the name of this three-dimensional shape?
How many faces has it got?
Encourage students to use the structure (organisation) of the shape to count the faces systematically, rather than randomly. For example:
It has two triangles at the ends. How many rectangles wrap around the triangles? Why are there 3 rectangles?
How many faces is that altogether? Create a table for the triangular prism:
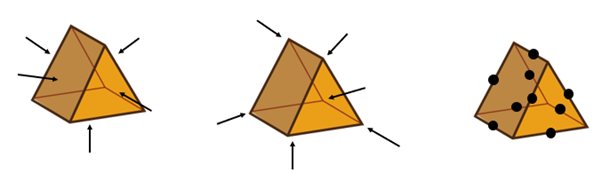
Shape Faces Vertices Edges Triangular Prism 5 6 9 - Put the students in pairs and ask them to choose one of the remaining shapes. Consider organising students pairs to encourage tuakana-teina (reciprocal learning).
Talk about the shape you have.
Can you describe to someone else what your shape looks like without using the name of the shape?
Come up with some properties for them to look for.
- After a suitable time gather the students. Display all the shapes out on the tabletop or floor.
Give each pair of students a chance to describe their shape, one property at a time. As each property is described, the remaining students should work together to identify the shape being described. This might start with identifying several shapes, and then eliminating different shapes as further descriptions are given. If there are several possible shapes that meet the description, ask:
What else could you tell us that will mean we end up with your shape?
- Ask the students to create a display (e.g. a small poster, video, speech, diagram) illustrating their shape. The display should include the mathematical name, a picture, and a list of properties. Consider which means of actions and expression will best enable your students to demonstrate their mathematical understanding.
Next steps
- Provide the students with opportunities to dis-embed three-dimensional shapes from a picture. Use pictures of local places that have interesting examples of geometric shapes.
What three-dimensional shapes can you find in this picture?
Check to see that it has the properties of that shape.
Discuss how students might find given shapes in a picture.
What do you look for?
As an alternative, you might go for a shape walk around the school. Make sure that opportunities are available to see a variety of shapes. You may want to leave out some sports equipment (cones and balls) before the walk.
- Put a variety of three-dimensional blocks in a feely bag. Ask a student to feel inside the bag, without looking, and identify the solid by feel. They can describe the shape to the rest of the class. The remaining students can try to guess the shape by the given verbal description.
What can you feel?
What shapes could it be?
Add to plan
Level Three