Purpose
The purpose of this activity is to support students in finding the areas of rectangles by measuring and multiplying side lengths.
Achievement Objectives
GM3-2: Find areas of rectangles and volumes of cuboids by applying multiplication.
Required Resource Materials
- PowerPoint
- Rectangles of various sizes with whole number of centimetres dimensions. (See slide 3 of the PowerPoint)
- Rulers
- Unit place value blocks – 1cm3 (optional) or Squared paper
- Calculators
Activity
- Show students slide 1 of the PowerPoint.
What is the area of this notebook?
How will you work out the area?
Let students discuss a strategy to try. Roam and look for them to:- notice that the side lengths are measured in centimetres.
- understand that area is the amount of flat space enclosed by the rectangle.
- consider using square units that are 1cm x 1cm (these are called 1 square centimetre and written as 1cm2)
- consider using multiplication, as in 14 x 10 = 140cm2.
- Discuss the strategies students use. Animate slide 2 to show how an array of square centimetres might be visualised and the units counted. Alternatively draw a rectangle that is 14cm x 10cm and fill it with unit place value (Dienes MAB) blocks.
Use place value knowledge to work out that 14 x 10 = 140cm2. Draw attention to the meaning of the different numbers and symbols in the expression.
You might introduce relevant te reo Māori kupu such as roa (length), tapawhā hāngai (rectangle), and horahanga (area).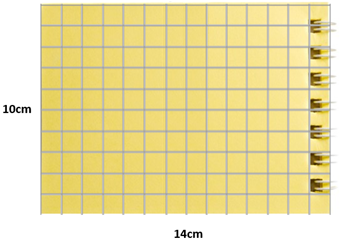
- Pose similar problems using the rectangles on slide 3. These could be photocopied for the students. Take care that the rectangles have whole numbers of centimetres as dimensions.
- Encourage students to measure the side lengths accurately. Look for them to begin measurements at zero and use whole numbers of centimetres when measuring. Allow the use of calculators if needed and encourage students to use multiplication to find the areas. Fill each rectangle with place value cubes or place a 1cm2 grid over each rectangle to check the calculations.
Next steps
- Pose problems where the students are given the side lengths in centimetres and asked to work out the areas. Choose several different sized books from the reading corner or library.
Get one student to measure the side lengths. Draw a picture of the problem by tracing around the book and recording the dimensions.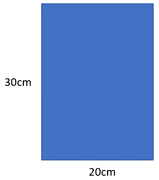
Look to see that students:- Interpret the rectangle as an array of unit squares, when asked. A good question is “can you draw a single square centimetre in the bottom right corner?”
- Use multiplication, with support from a calculator if needed, to find the area.
- Express the area using equations and measures, e.g., 30cm x 20cm = 600cm2.
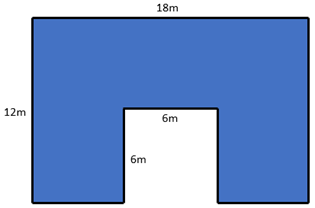
- Pose problems about finding the areas of shapes that can be partitioned into rectangles. For example, find the area of this U-shaped house.
Attachments
Add to plan
Level Three