Purpose
The purpose of this activity is to support students in measuring length with scales in situations where they must interpret the space between units.
Achievement Objectives
GM3-1: Use linear scales and whole numbers of metric units for length, area, volume and capacity, weight (mass), angle, temperature, and time.
Required Resource Materials
- Empty rulers (Copymaster One)
- Pencils or other suitable objects for measuring length.
- Rulers
Activity
Present simple scenarios in which students, working in pairs, need to interpret the space between marked measurements. Restrict the examples to centimetres at first, such as:
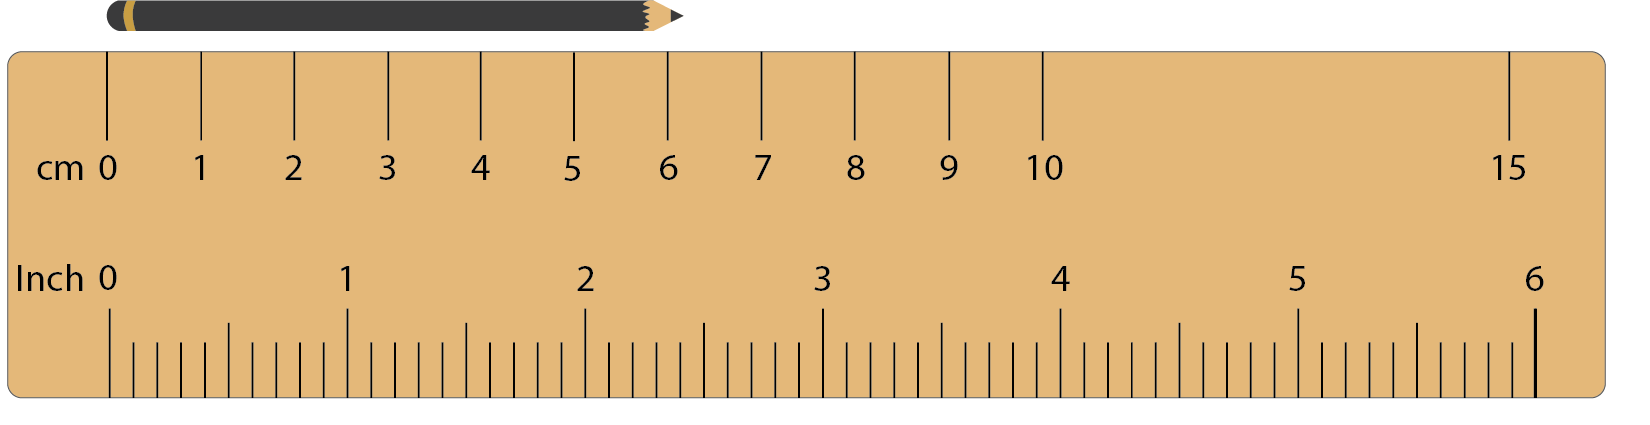
Present students with a ruler from Copymaster 1 that shows centimetres but not millimetres.
How long is the pencil in centimetres?
Discuss imagining marks on the scale to establish a measure.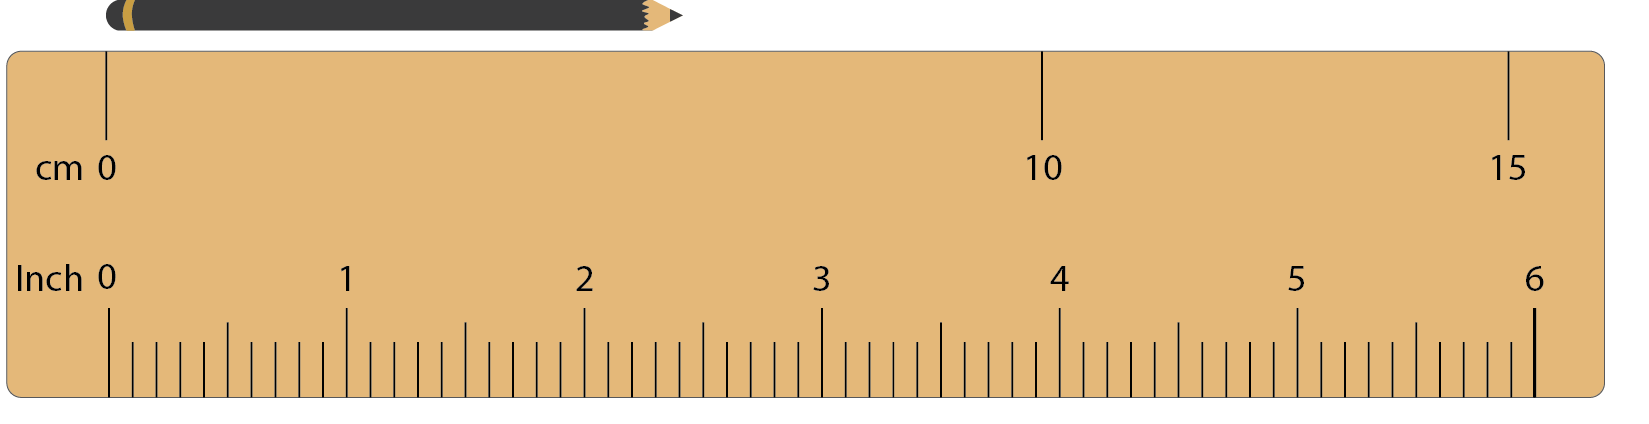
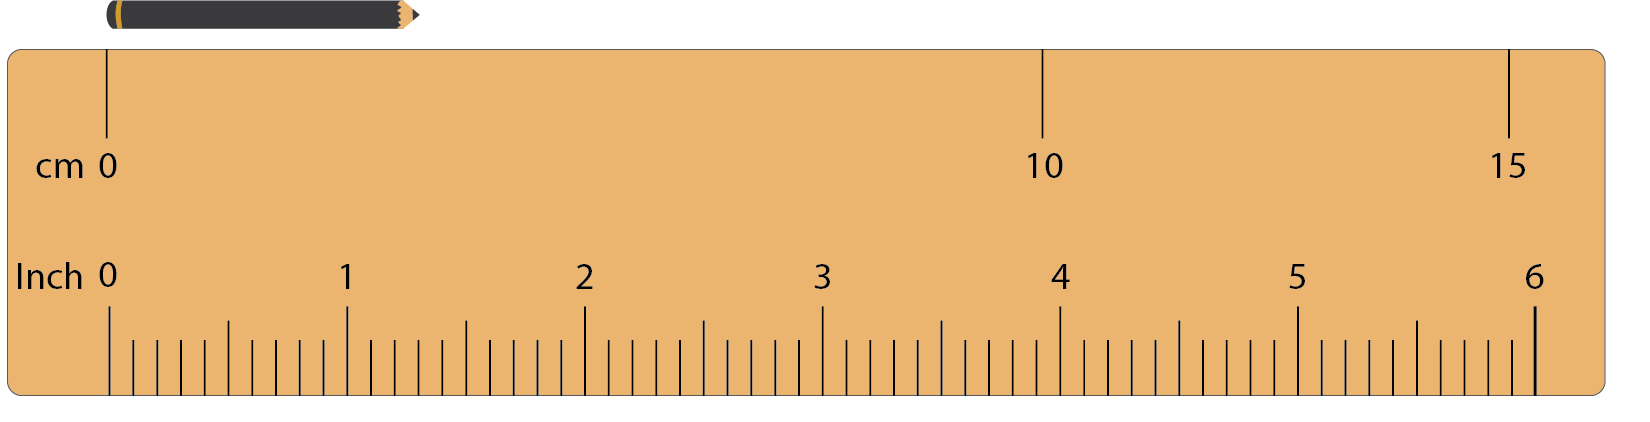
Two main methods are likely to be evidenced in this discussion:- Equal partitioning: In the example below, the space between zero and ten can be halved to create a mark for 5 cm. Equally partitioning the space between five and ten gives mark for 6 cm, 7 cm, 8 cm, and 9 cm. Therefore, the pencil is closest to 6 cm.
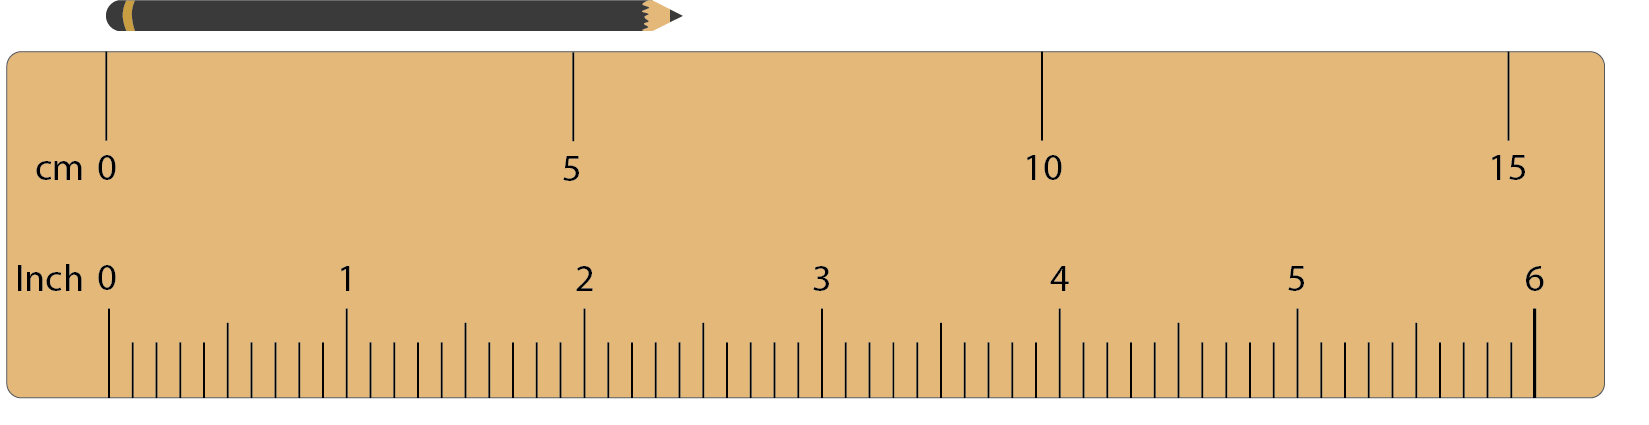
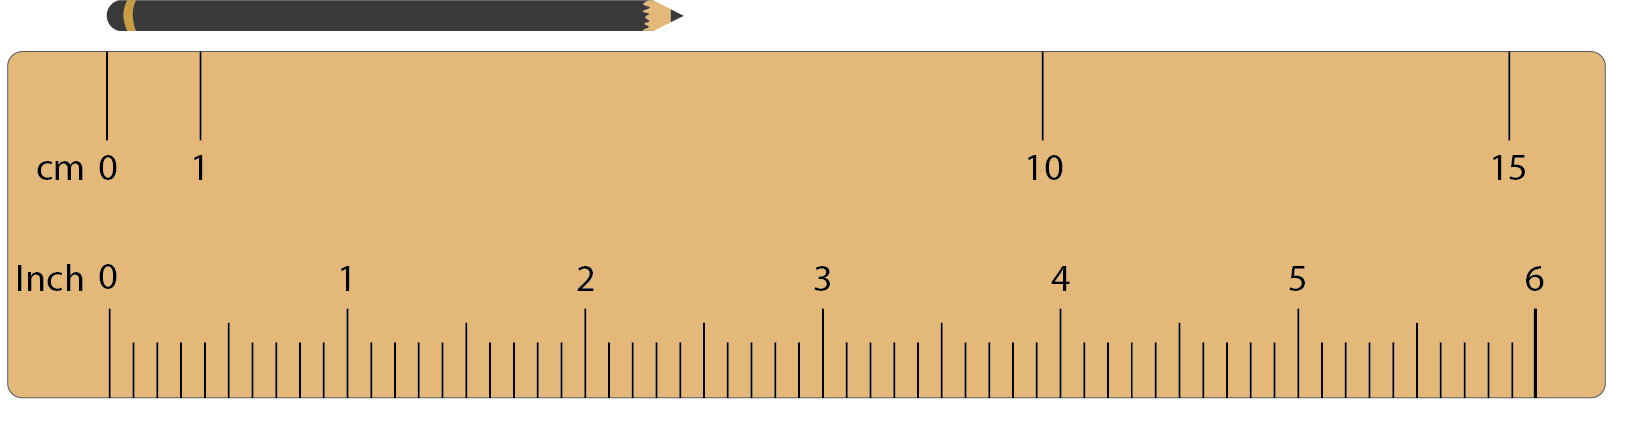
- Iterating a single unit repeatedly. In the example below, you might begin by estimating the length of 1 cm. Iterate this estimated length ten times to see if ten copies of it can fit equally between zero and ten.
- Equal partitioning: In the example below, the space between zero and ten can be halved to create a mark for 5 cm. Equally partitioning the space between five and ten gives mark for 6 cm, 7 cm, 8 cm, and 9 cm. Therefore, the pencil is closest to 6 cm.
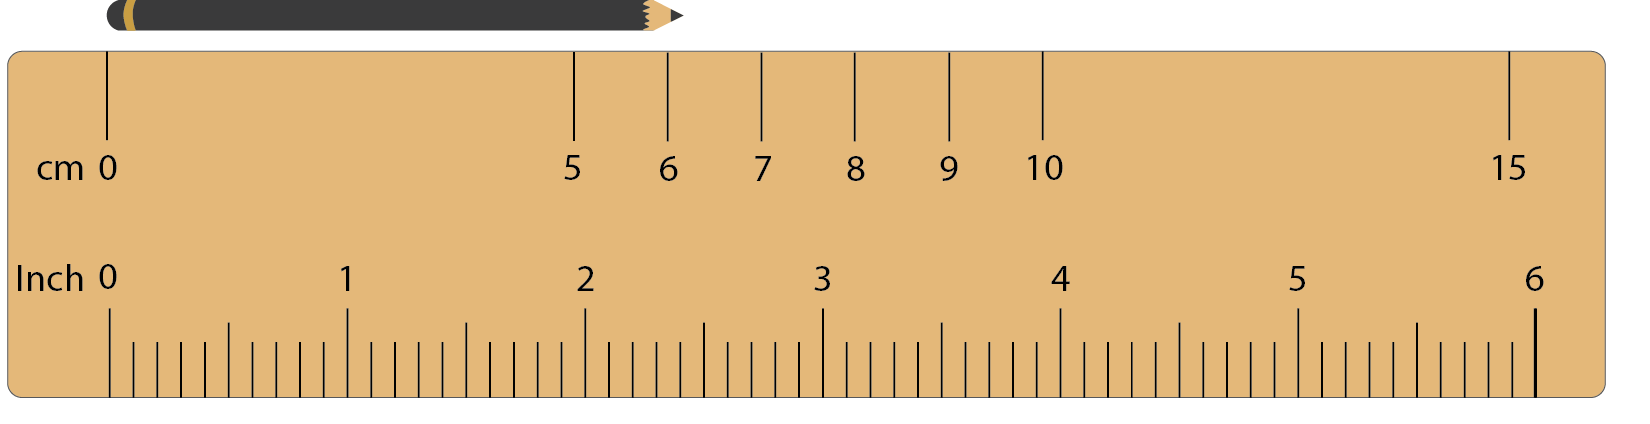
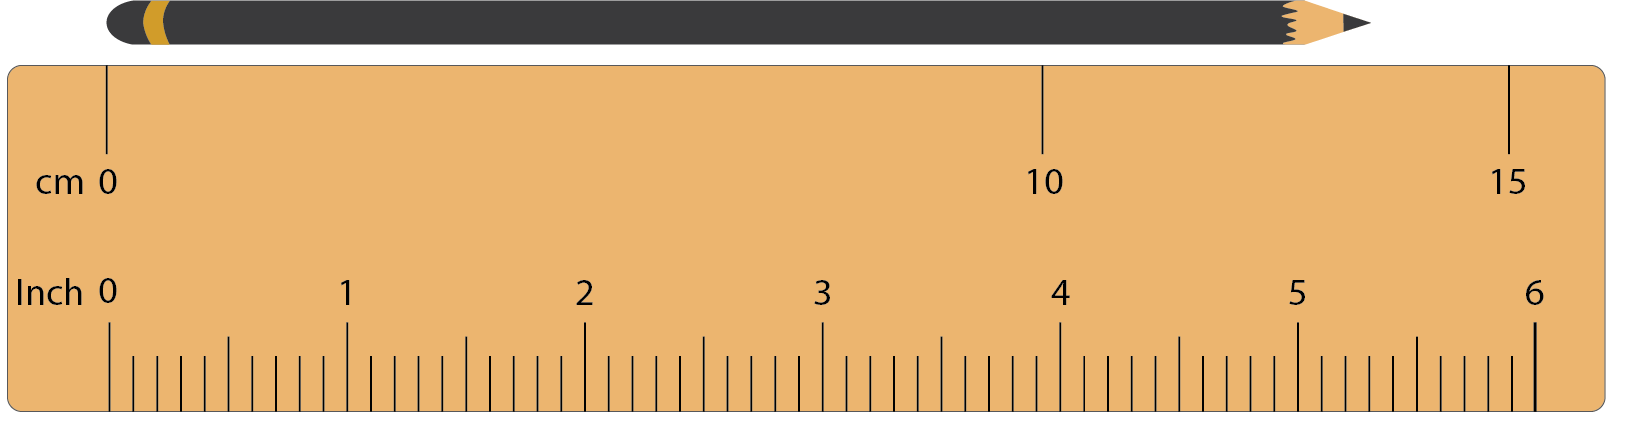
- Pose further, similar problems that require students to estimate the length of each pencil in centimetres. Consider what groupings will best scaffold and extend your students. Some might like to work independently, whilst others might benefit from further teacher support. Example questions are shown below.
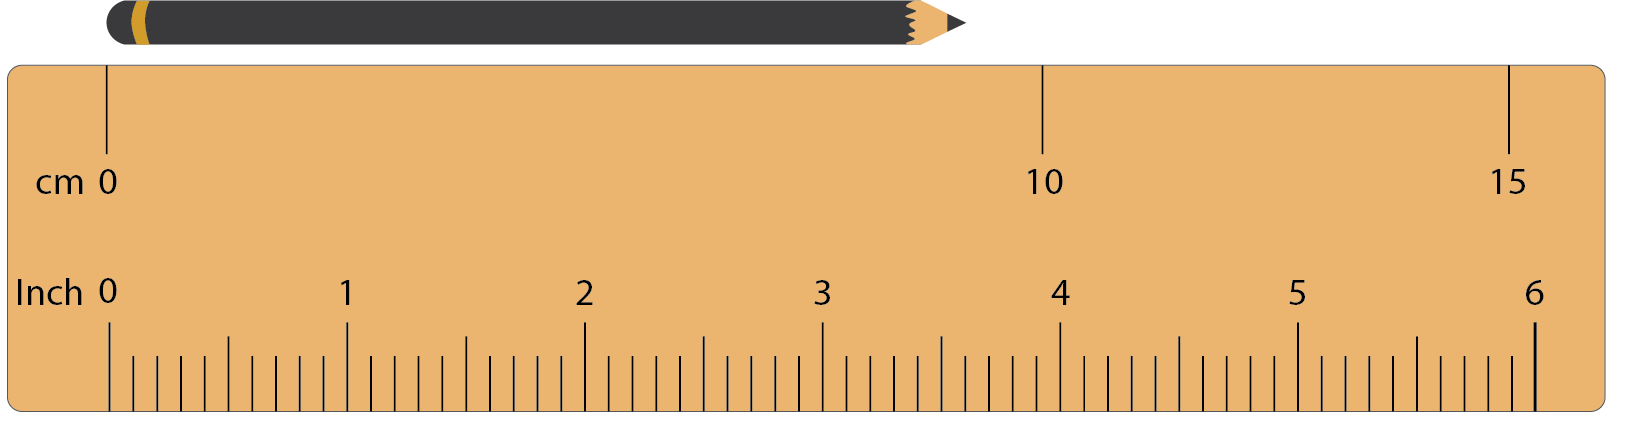
- Take the same examples and extend the difficulty of the task by requiring more precise measurements.
How long is each pencil in millimetres?
Look for students to partition units of 1 cm into ten units of 1 mm using the equal partitioning or iteration methods from above.
Students may need support converting the measurement to millimetres. Since ten millimetres equal one centimetre, 6 cm = 60 cm. Each small mark is a unit of 1mm. The pencil has a length of 62 mm.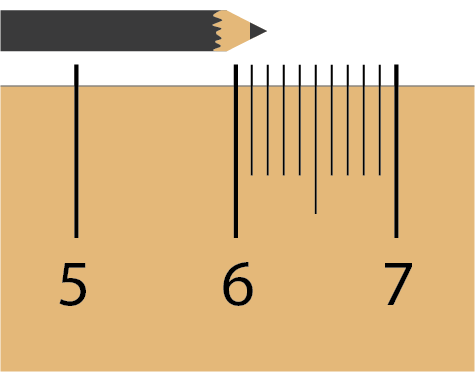
- Use the previous questions, which only required students to measure in centimetres, and ask students to use further partitioning and measure each pencil in millimetres.
Next steps
- Provide other rulers that only have some benchmark lengths showing (see Copymaster One). Ask students to use paper copies of the rulers to work out the length of their pencils or other objects in centimetres, and then in millimetres.

- Extend interpretation of spaces on scales to include lengths of up to one metre and beyond. For example, students might be shown a mark on a door frame 1 m off the ground and asked to work out their height, with reference to the 1 m mark. They might estimate the length of sports gear, like bats and rackets, given only the interval between zero and one metre.
Add to plan
Level Three