Purpose
In this unit students use the traditional tale of the gingerbread man as a context for ordering and comparing lengths. A “sessions” approach is used, with five related but not sequential activities.
Specific Learning Outcomes
- Compare the length of two objects directly.
- Order three or more objects by length.
- Select objects that are the same length as a given object.
Description of Mathematics
Early length experiences must develop an awareness of what length is, and a vocabulary that can be used to discuss length. Young students usually begin by describing the size of objects as big and small. They gradually learn to discriminate in what way an object is big or small and use more specific terms. The use of words such as long, short, wide, close, near, far, deep, shallow, high, low and close, focus attention on the attribute of length.
This unit focuses on students comparing lengths. Although comparing is at the early stages of the measurement learning framework adults will often measure things without using measurement units.
In mathematics, it is often useful to have an estimate of the size of an answer to ensure the accuracy of calculations that have been used. The comparisons of lengths in this unit lay the foundation for estimates in area and volume, and for estimates generally.
In comparing three lengths, students develop implicit knowledge of the transitive nature of length. Hence if gingerbread man A is taller than gingerbread man B and gingerbread man B is taller than gingerbread man C, then gingerbread man A is automatically taller than gingerbread man C. There is no need to check the heights of A and C. The difference in height follows from the first two comparisons. This ordering ability is a valuable property of numbers and has many uses throughout mathematics. When it is not present, it causes some difficulties.
Opportunities for Adaptation and Differentiation
The learning opportunities in this unit can be differentiated by providing or removing support to students and by varying the task requirements. Ways to support students include:
- beginning the unit by comparing the heights of a pair of students and asking the remaining students deciding who is the tallest. Choose pairs of clearly different heights
- working with individual students to confirm, that when comparing lengths, they know to line up the starting points of the objects being compared
- providing multiple opportunities throughout the school day to directly compare the length of objects (e.g. pencils, width of books, skipping ropes, sticks, poi).
- encouraging tuakana-teina by purposefully pairing and grouping students together.
While this unit is firmly focused on the story of the gingerbread man and a river crossing, it should be adapted to include other fictional characters that your students are familiar with, or are interested in. Māori myths and legends (pūrākau), Pasifika myths and legends, or those that reflect the cultural make-up of your students could offer a culturally relevant context for this learning. Students could also compare the heights of cut-outs of animals or native birds. The gingerbread cut-outs could also be adapted to reflect students’ whānau. This could be followed with discussions around who is the tallest and shortest in their whānau. Within this, you would have to be sensitive to the family/community relationships experienced by your students.
Te reo Māori vocabulary terms such as tāroaroa (tall - person), poto (short), tāroaroa (height of a person), teitei (height, tall), roa (long,length) could be introduced in this unit and used throughout other mathematical learning. Numbers in te reo Māori can be used alongside English throughout the unit.
Required Resource Materials
- Scissors, glue, crayons or similar, sellotape, glue, pencils
- Session One: copies of the gingerbread family (Copymaster 1), large sheets of black paper.
- Session Two: copies of the gingerbread man template and the recording sheet (Copymaster 2 and Copymaster 3) for each student.
- Session Three: large sheet of paper with river drawn or painted on, cardboard, small blocks to support bridges.
- Session Four: strips of paper of varying lengths.
- Session Five: one gingerbread man per student (Copymaster 2), variety of coloured paper for clothes (e.g. wrapping paper), wool for hair.
Activity
Begin this series of lessons by reading or recounting the story of the gingerbread man. It is a well known story which students enjoy. Continue to retell the story, or parts of the story, throughout the week to help maintain the focus for the activity sessions. Consider using different stories, that may better reflect the cultural diversity of your class (e.g. The legend of Matariki and the six sisters, the story of the stone that blocked the road round the Cape at Matauea, Safotu). The gingerbread templates could be adapted to reflect any characters.
As students work promote the use of language that makes comparisons between lengths, for example the same length, shorter than, longer than. Emphasise the importance of making sure both objects are lined up at one end when comparisons are being made. Model this by showing the difference in measurements when items are, and are not, lined up correctly.
Session One: Gingerbread Families
In this Session students order a family of gingerbread men from shortest to tallest, using a variety of measuring words.
Provide each student with a copy of the gingerbread family sheet (Copymaster 1).
- Discuss the family. Encourage students to visually estimate lengths before cutting out the gingerbread men.
Who is the tallest?
Who is the shortest?
If we were to put the gingerbread men in a line from tallest to shortest, who would be first?
Who would be second? Third? - Have the students cut out the gingerbread family and order them from tallest to shortest. Emphasise the importance of making sure their feet are all in line when comparing heights.
- Colour in the gingerbread family as desired and glue onto a black backing sheet.
Session Two: Something Taller, Something Shorter
In this Session students find classroom objects that are taller than a gingerbread man, shorter than a gingerbread man or the same size as a gingerbread man. Items from nature, or from other contexts for learning could also be used here (e.g. branches, trees, rulers, kete).
Session Three: Building Bridges
In this Session students build a model bridge to go over a local river drawn on a large sheet of paper.
- Provide each student with a gingerbread man template (Copymaster 2) and ask them to cut him out.
- Discuss the height of the man.
Who can think of something in our classroom that is longer than the gingerbread man?
Who can think of something that is shorter than the gingerbread man? - Provide each student with a recording sheet (Copymaster 3) and ask them to find and draw onto the sheet five things that are longer than the gingerbread man, five things that are shorter than the gingerbread man and five things that are the same length as the gingerbread man.
- Compare the objects that are found.
Did anybody find the same objects?
Did anyone find something unique? - Students can check the charts of others by re-measuring objects around the room to see whether they are longer, shorter or the same size as the gingerbread man.
- Show students a drawing/painting of a river and ask them about the story. How did the gingerbread man cross the river in the story?
What could we build to help him cross this river? 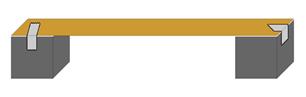 Provide the students with blocks, card and sellotape to make bridges. Leave the “river” at the table where they are working so they can directly compare the width of the river with the lengths of the bridges they are making.
- Once the bridges are complete, have the students place them over the river to see if they are long enough.
Could the gingerbread man go over this bridge? Is it long enough? - They can also compare the lengths of their bridges with the bridges of others. Who has the longest bridge?
Who has the shortest?
Whose bridge is longer / shorter than Paul’s?
Session Four: Gingerbread Men Chains
In this Session students make and decorate chains of gingerbread men (or other chosen characters, e.g. Matariki) then compare the lengths of their chains. This could be related to how many people in each student's whānau.
- Show the students how to make a chain of gingerbread men by folding a strip of paper, tracing around a template and cutting out the shape. Emphasise the importance of not cutting the “hands” off on the folds so the gingerbread chain remains joined.
- Students select a strip of paper, then make and decorate a chain of gingerbread men.
- Have students compare the lengths of the chains they have made
Who has the longest / shortest chain?
Which chains are longer / shorter than Andrew’s? - Ask students to join all the chains they have made together and estimate how far the chain will stretch.
- As a class, decide which chains are the longest and shortest. Write sentences to describe these (e.g. Tama’s chain is the longest. Mia’s chain is the shortest). Support students write sentences to display beside their character chains, that describe the length of their chain in comparison to the length of another student’s chain (e.g. my chain is longer than Mia’s, and shorter than Tim’s). Display these sentences beside the chains.
Session Five: Get Dressed Man!
In this Session students cut out clothes to fit a template of a gingerbread man.
- Provide students with a template of a gingerbread man (Copymaster 2) and a variety of coloured paper to use to make clothes.
- Discuss with students what the gingerbread man would like to wear.
How big will his clothes need to be?
How can we make sure the clothes we make will fit him?
If you have reframed the context of this lesson (e.g. around How Māui slowed the sun) you could make further links by investigating what early Māori and Pasifika people wore) - Ask the students to make some clothes for the gingerbread man, and demonstrate how they could trace around the man to make sure the clothes are big enough.
- Once the clothes are completed students can compare the sizes of the clothes they have made before they paste them onto the men.
Who has made the longest pair of trousers?
Whose trousers are shorter than Emily’s? - If desired students can complete their gingerbread man by drawing a face on him and glueing on wool for hair.
Home Link
Dear family and whānau,
At school this week we are looking at the story of the gingerbread man and using this story to compare heights. Ask your child to make comparisons with their toys. For example: can they line up all their soft toys from shortest to tallest? Or sort dinosaurs or plastic animals into short ones and tall ones? They can find items from nature such as leaves and twigs to sort, or line family members up in height order. If you speak a language other than English at home, then you might talk about the words you use to say “tallest”, “shortest”, “taller”, and “shorter”. Record these with your child, and we will share this knowledge with the class. They can draw pictures of their tallest and smallest toys to bring to class.

All about us
This unit provides you with a range of opportunities to assess the entry level of achievement of your students.
The learning opportunities in this unit can be differentiated by providing or removing support to students and by varying the task requirements. Ways to support students include:
The context for this unit can be adapted to suit the interests and experiences of your students. For example:
Prior Experience
It is expected that students will present a range of prior experience of working with numbers, geometric shapes, measurement, and data. Students are expected to be able to count a small set of objects by ones, at least.
Session One
In this first session students explore an activity called ‘Handfuls' which was first developed by Ann Gervasoni from Monash University, Melbourne. Handfuls could become a regular part of lessons during the year.
How can we check how many things there are?
Session Two
In this session, called “Our Favourites” students explore category data and how it might be displayed. The data comes from their responses, so the displays provide useful information about the class. You may wish to replace the images provided in Copymaster 1 with images of sports that you know are popular with your students.
If we want to find out the favourite sport, what could we do?
Could we arrange the squares, so it is easier to see which sport has the most and the least squares?
The students will now choose other ‘favourites’ to use as data. Copymaster 2 provides some strips of favourites including favourite fruit, fast food, pet, vegetable, way to travel to school, and after school pastime. You may wish to create your own strips using ‘favourites’ that are relevant to your group of students.
Session Three
In this session your students use the language of two-dimensional shapes to provide instructions to other students. The use of te reo Māori vocabulary for shapes could also be introduced and used within this session.
You need multiple sets of shapes. Ideally there is a set of shapes for each pair or trio of students. Attribute blocks are used below to illustrate the activity but other shape-based materials such as those below are equally effective.
“Make Me” is an activity that can be used throughout the year with different materials to develop your students’ fluency in using geometric language for shape and movement.
Where could I put the mirror, but it still looks like the whole shape?
Use two shapes positioned together to draw out the language of position. For example:
right side of the square.
Look to see whether your students:
Session Four
In this session students compare items by mass (weight).
How could we find out which thing is heavier?
Students usually suggest that the objects can be compared by hefting, that is holding one object in each hand.
What can we say about the weight of these two objects?
Look for statements like, “The book is heavier than the stapler,” or “The stapler is lighter than the book.”
Let’s put these objects in order of weight. Who thinks they could do that?
I want you to find five things from around the classroom and put them in order of weight. You can use hefting if you want but we have other balances you can use. You will need to record for us, so we know the order of the objects.
Look to see if your students can:
Session Five
In this session students look for repeating patterns and connect elements in the pattern with ordinal numbers.
Dear parents and caregivers,
For the first week of school our mathematics unit is about us. We will investigate efficient ways to count a set of objects, create graphs of data about ourselves, order objects by mass (weight), build models of shapes from instructions, and create our own sequential patterns.
Frogs in Ponds
In this unit students investigate the different number pairs that numbers can be broken into, using the context of frogs in ponds. They list all possible combinations for a given number, working with numbers up to 9.
This unit is all about how numbers are made up of other, smaller numbers, an essential concept underlying addition and subtraction. The unit helps develop two ideas:
Students need to investigate these relationships many times. Once students believe that 2 and 3 is always 5 they see a real reason to remember it.
Students working on this unit will be using the strategy of count all, or counting from one, to solve simple addition and subtraction problems. Students at this stage have a counting unit of one and given a joining or separating problem they represent all objects in both sets, then count all the objects to find an answer. Objects may be represented by materials, or later, in their mind as an image.
From this stage of counting all, students will move to counting on, a stage where they realise that a number can represent a completed count that can be built on.
The learning opportunities in this unit can be differentiated by providing or removing support to students and by varying the task requirements. As this is an early level 1 unit the numbers may need to be extended beyond 10 for some students. Have equipment available for students to use.
The frogs and pond context for this unit can be adapted to suit the interests and experiences of your students. For example: cars in/out of a parking building, eels hiding/swimming in a river, kererū flying/perched in a tree. You can use the names of New Zealand’s native frogs: Archey’s frog, Hochstetter’s frog and Hamilton’s frog. The name of a local lake or river could be used for this unit. Te reo Māori numbers could be used throughout this unit.
Getting Started
Introduce the problem by sharing a picture of a native frog:
5 frogs live in a pond.
If 2 of the frogs are sitting on the rock, how many are hiding in the pond?
How many different ways are there for the frogs to be, in and out of the water? (There are 6 ways for the frogs to be in and out of the water: none on rock and 5 in pond, 1 on rock and 4 in pond, 2 on rock and three in pond… etc.) Numbers spoken in Te reo Māori can be used also.
Encourage the students to tell you how they know the number of frogs hiding in the pond. Allow the students to describe their ideas and encourage explanations.
How did you know how many frogs were hiding?
Tell us about your thinking.
Could there be any other number of frogs hiding if 2 are on the rock?
How do you know?
Read the second part of the problem and let the students try to solve this, in pairs or on their own. (The frogs need to be treated as identical or there are multiple solutions for each number pairing.) Let the students experiment with the pairings of the digits. The following questions may help support their problem solving:
How do you know how many frogs are on the rock?
Does there always have to be a frog on the rock? Or hiding in the pond?
How are you keeping track of the ways that you find?
Exploring
Over the next two to three days, revisit the problem with the frogs in the pond, varying the number of frogs living in the pond and sitting on the rock. Explain that because the pond is such a nice place to live, more frogs keep moving in. When reading numbers, use both English and te reo Māori.
Three appropriate number combinations to use would be:
6 frogs live in the pond, begin with 3 on the rock.
8 frogs live in the pond, begin with 2 on the rock
9 frogs live in the pond, begin with 4 on the rock.
These problems are provided on the problem copymaster.
Each day follow a similar lesson structure to the introductory session, with students becoming more independent in their search for solutions as the week progresses. Conclude each session by having students share their solutions and compare their different ways of working.
Sharing
As a conclusion to the weeks work, have the class work together to make a wall chart illustrating the different combinations of frogs in and out of the water, when 7 frogs are living in the pond (8 possible combinations):
Seven frogs live in a pond.
They like to sit on the rock in the middle of the pond or hide in the water.
How many different ways are there for the frogs to be, in and out of the water?
How many frogs are there altogether?
How many are on the rock? How many are hiding?
How do you know?
How could you find out?
How are you keeping track of the ways that you find?
Tell me about your thinking.
Dear family and whānau,
At school this week we are completing a maths unit on native frogs in ponds. This unit is all about how numbers are made up of other, smaller numbers, an essential concept underlying addition and subtraction. The unit helps develop two ideas:
Children need to investigate these relationships many times. Once children believe that 2 and 3 is always 5 they see a real reason to remember it.
At home this week please help your child to solve the inside and outside the house problem below. Encourage them to record the numbers and draw pictures to show people inside and outside. Toys could be used to show these number relationships. Discuss these in your home language also if you wish to.
_____ people live in my house.
If there are 2 people inside my house then _____ people are outside.
If there are _____ inside my house then _____ people are outside.
If there are _____ inside my house then _____ people are outside.
If there are _____ inside my house then _____ people are outside.
Dino Cylinders
In this unit the students use a small plastic dinosaur as the unit with which to measure the capacity of containers. They apply their counting strategies and discover that a number of different shaped containers can contain the same number of dinosaurs.
Measurement provides a context for the further development and reinforcement of number skills. Students can measure without the use of numbers up to the stage of indirect comparison. However as soon as they repeatedly use a unit to measure an object they need numbers to keep track of the repetitions.
This unit is also designed to allow students to practice their one-to-one counting as they calculate the capacity of containers filled with plastic dinosaurs.
The learning opportunities in this unit can be differentiated by providing or removing support to students and by varying the task requirements. Ways to support students include:
The context for this unit can be adapted to suit the interests and experiences of your students. For example:
Session 1
In this session we measure the capacity of containers by counting the number of dinosaurs they hold.
How many dinosaurs do you think would fit in this container?
How can we check?
One, two, three, four...
How many dinosaurs does this container hold?
Which container holds the most dinosaurs?
How do you know? (This will reinforce the order and sequence of numbers.)
Do these containers hold the same number or dinosaurs? (check).
Are they the same?
Session 2
In the following sessions the students create cylinders to contain a given number of dinosaurs. The challenge is to create a cylinder that contains exactly the given number of dinosaurs. The activities give students the opportunity to practice counting objects in ones, and to order and compare numbers using objects. This is a good opportunity for your students to practice counting in te reo Māori.
How many dinosaurs do you think it would hold exactly? (Discuss that exactly means that no more dinosaurs could fit into the cylinder.)
Please count your dinosaurs to me.
Does your cylinder fit exactly 10 dinosaurs?
Can you fit any more dinosaurs in your cylinder?
Are cylinders a good container for dinosaurs? Why or why not?
Could you make a cylinder for 20 dinosaurs? What would it be like?
What do you notice about the cylinder?
Can you see any cylinders which are exactly the same?
What do you think that a cylinder for 20 dinosaurs would look like?
Sessions 3-4
In these sessions the students continue their exploration of the capacity of cylinders by constructing cylinders for a given number of dinosaurs. As the containers are created they are displayed in order of capacity. Many opportunities are provided for one-to-one counting and sequenceing of numbers in English and te reo Māori.
Where does your cylinder belong?
How do you know it comes after __?
Which cylinder will come after your one?
How many dinosaurs does this one hold?
Which one holds one (2, 3..) more? How do you know?
Which one holds one (2, 3..) less? How do you know?
Which cylinders look the biggest?
Do they hold the most dinosaurs?
Session 5
In today’s session each student makes a cylinder. We then use the cylinder to see how many objects (cubes, dinos, etc) can fit exactly into our cylinder.
Family and whānau,
In maths this week we have been practising counting objects up to 20 as part measuring how much a container can hold. As part of our experiences we have constructed cylinders to fit certain numbers of toy dinosaurs. Our home task this week is to make a paper or cardboard cylinder that fits 20 small objects (for example; pebbles, toothpicks or milk lids). Your child will need paper or light card (the side of an old cereal box would be good), scissors and tape and they will be keen to show you what to do.
The Gingerbread Man
In this unit students use the traditional tale of the gingerbread man as a context for ordering and comparing lengths. A “sessions” approach is used, with five related but not sequential activities.
Early length experiences must develop an awareness of what length is, and a vocabulary that can be used to discuss length. Young students usually begin by describing the size of objects as big and small. They gradually learn to discriminate in what way an object is big or small and use more specific terms. The use of words such as long, short, wide, close, near, far, deep, shallow, high, low and close, focus attention on the attribute of length.
This unit focuses on students comparing lengths. Although comparing is at the early stages of the measurement learning framework adults will often measure things without using measurement units.
In mathematics, it is often useful to have an estimate of the size of an answer to ensure the accuracy of calculations that have been used. The comparisons of lengths in this unit lay the foundation for estimates in area and volume, and for estimates generally.
In comparing three lengths, students develop implicit knowledge of the transitive nature of length. Hence if gingerbread man A is taller than gingerbread man B and gingerbread man B is taller than gingerbread man C, then gingerbread man A is automatically taller than gingerbread man C. There is no need to check the heights of A and C. The difference in height follows from the first two comparisons. This ordering ability is a valuable property of numbers and has many uses throughout mathematics. When it is not present, it causes some difficulties.
The learning opportunities in this unit can be differentiated by providing or removing support to students and by varying the task requirements. Ways to support students include:
While this unit is firmly focused on the story of the gingerbread man and a river crossing, it should be adapted to include other fictional characters that your students are familiar with, or are interested in. Māori myths and legends (pūrākau), Pasifika myths and legends, or those that reflect the cultural make-up of your students could offer a culturally relevant context for this learning. Students could also compare the heights of cut-outs of animals or native birds. The gingerbread cut-outs could also be adapted to reflect students’ whānau. This could be followed with discussions around who is the tallest and shortest in their whānau. Within this, you would have to be sensitive to the family/community relationships experienced by your students.
Te reo Māori vocabulary terms such as tāroaroa (tall - person), poto (short), tāroaroa (height of a person), teitei (height, tall), roa (long,length) could be introduced in this unit and used throughout other mathematical learning. Numbers in te reo Māori can be used alongside English throughout the unit.
Begin this series of lessons by reading or recounting the story of the gingerbread man. It is a well known story which students enjoy. Continue to retell the story, or parts of the story, throughout the week to help maintain the focus for the activity sessions. Consider using different stories, that may better reflect the cultural diversity of your class (e.g. The legend of Matariki and the six sisters, the story of the stone that blocked the road round the Cape at Matauea, Safotu). The gingerbread templates could be adapted to reflect any characters.
As students work promote the use of language that makes comparisons between lengths, for example the same length, shorter than, longer than. Emphasise the importance of making sure both objects are lined up at one end when comparisons are being made. Model this by showing the difference in measurements when items are, and are not, lined up correctly.
Session One: Gingerbread Families
In this Session students order a family of gingerbread men from shortest to tallest, using a variety of measuring words.
Provide each student with a copy of the gingerbread family sheet (Copymaster 1).
Who is the tallest?
Who is the shortest?
If we were to put the gingerbread men in a line from tallest to shortest, who would be first?
Who would be second? Third?
Session Two: Something Taller, Something Shorter
In this Session students find classroom objects that are taller than a gingerbread man, shorter than a gingerbread man or the same size as a gingerbread man. Items from nature, or from other contexts for learning could also be used here (e.g. branches, trees, rulers, kete).
Session Three: Building Bridges
In this Session students build a model bridge to go over a local river drawn on a large sheet of paper.
Who can think of something in our classroom that is longer than the gingerbread man?
Who can think of something that is shorter than the gingerbread man?
Did anybody find the same objects?
Did anyone find something unique?
What could we build to help him cross this river?
Could the gingerbread man go over this bridge? Is it long enough?
Who has the shortest?
Whose bridge is longer / shorter than Paul’s?
Session Four: Gingerbread Men Chains
In this Session students make and decorate chains of gingerbread men (or other chosen characters, e.g. Matariki) then compare the lengths of their chains. This could be related to how many people in each student's whānau.
Who has the longest / shortest chain?
Which chains are longer / shorter than Andrew’s?
Session Five: Get Dressed Man!
In this Session students cut out clothes to fit a template of a gingerbread man.
How big will his clothes need to be?
How can we make sure the clothes we make will fit him?
If you have reframed the context of this lesson (e.g. around How Māui slowed the sun) you could make further links by investigating what early Māori and Pasifika people wore)
Who has made the longest pair of trousers?
Whose trousers are shorter than Emily’s?
Dear family and whānau,
At school this week we are looking at the story of the gingerbread man and using this story to compare heights. Ask your child to make comparisons with their toys. For example: can they line up all their soft toys from shortest to tallest? Or sort dinosaurs or plastic animals into short ones and tall ones? They can find items from nature such as leaves and twigs to sort, or line family members up in height order. If you speak a language other than English at home, then you might talk about the words you use to say “tallest”, “shortest”, “taller”, and “shorter”. Record these with your child, and we will share this knowledge with the class. They can draw pictures of their tallest and smallest toys to bring to class.
Scatter Cat!
In this unit students explore movement and position using the popular Lynley Dodd character Hairy Maclary. Students explore the language of position in describing where an object is located and in giving and following sequences of movement instructions. They will move themselves and objects along paths and will describe the movement of others.
This unit is about building up students' vocabulary relating to position. Hence the emphasis on ‘in’, ‘on’, ‘under’ and so on, as well as various turns and left and right. This is an important step before more complex geometry is introduced. The words used in this lesson are as important in every day life as they are in the context of school.
The learning opportunities in this unit can be differentiated by providing or removing support to students and by varying the task requirements. Ways to support students include:
While the sessions in this unit are centred on the storyline of Scatter Cat the context for session 3 could be readily adapted to include two characters from a favourite story. The book "Little Kiwi's Matariki" by Nikki Slade-Robinson is a suitable book also. Images of Hairy Maclary and friends can be swapped to images of Kiwi and friends.
Session 4 could be adapted to take place outside in an area surrounded by “landmarks” that the students are familiar with (e.g. the school office, the playground, a memorial, a tree, a feature of the landscape).
Te reo Māori vocabulary terms such as roto (in), raro (on), iho (under), whakamua (forwards) whakamuri (backwards), whakamauī (to the left), whakamatau (to the right) could be introduced in this unit and used throughout other mathematical learning.
Session 1: Chasing Cats
In this session students use the story "Hairy Maclary, Scatter Cat" by Lynley Dodd, to provide a context in which to use the language of movement and position and to provide opportunities to move themselves as they act out parts of the story.
Can you describe where Butterball Brown is sitting?
Where is Hairy Maclary hiding?
Where does Slinky Malinky go when Hairy Maclary chases him?
Can you describe where Mushroom Magee went?
Where is Scarface Claw hiding?
Where is Hairy Maclary?
Where will Scarface Claw chase him to?
How will Hairy Maclary get there?
Session 2: Where is Hairy Maclary?
In this session we describe the position of ourselves and of objects. We follow and give instructions about where to place items in the classroom.
Talk about where we are sitting, trying to get students to be specific in the description they give.
I am sitting on a chair, next to the teaching station, at the front of the mat.
Where are you sitting?
Can you tell me who is behind and in front of you?
Are you near the front or the back of the mat?
Is anyone sitting beside you?
I am on a chair, at the art table, near the back of the room.
I am under a table, beside a chair, in the middle of the room.
You said Hairy Maclary is on a chair.
Is there anything next to the chair?
Is the chair at a table?
Session 3: Look at Me Go!
In this session the students explore movement sequences by both explaining a path taken and by giving and following instructions for paths in the classroom and in the playground. They further explore the ideas using cut outs of the Hairy Maclary characters.
Are you sitting in the same place on the mat as you were yesterday?
Who is sitting next to you?
Who could describe where one of their friends is sitting today?
I need someone to get me the Scatter Cat! book.
Choose a student to get it.
You will need to listen very carefully to the instructions I am going to give you to find it.
Give a sequence of instructions to get the book. For example,
Turn to face the back of the classroom.
Walk forwards until you get to a table.
Go underneath the table, the book is on the chair in front of you.
Session 4: Turning, Turning, Turning
In this session we explore half and quarter turns using points of reference in the classroom to indicate the direction for turning. Some students may already be familiar with left and right and they will be given the opportunity to explore this.
Where are you standing?
What can you see straight in front of you?
Slowly turn around until you can see the same as you can see now.
How far have you turned?
Where will you be facing if you turn half way?
Will you still be looking at me?
What part of you will I be able to see?
Get the students to turn half way.
When we turned a full turn or a half turn everyone ended up facing the same way.
Do you think that will happen if we turn sideways (make a quarter turn)?
Turn to one side. (Make a quarter turn.)
Some students will have turned one way and some the other. If this doesn’t happen and everyone is facing the same way then, as the teacher, model having turned the other way.
We need to be more specific about where we are turning.
What could we add to the instructions to make them easier to follow and to make sure we end up facing the same way around?
Gather students' suggestions, which may include:
Get the students to make quarter turns. This time include specific instructions about the direction in which they should turn. Include left and right in these instructions and take note of those who are able to move accordingly.
How far round did you turn?
Did your partner end up facing where you thought he would?
What other instructions do you need to give to make sure he does?
Start at the board facing the back of the classroom.
Walk forward until you get to the edge of the mat.
Turn to face the sink (or make a right turn).
Walk forward until you get to the sink.
Pick up a paintbrush.
Make a half turn.
Walk forward until you get to the mat.
Turn to face the easel board (or make a left turn).
Walk forward to give me the paintbrush.
Session 5: Keep on Moving
We wrap up the unit with independent exploration of the ideas presented. The students will work in pairs to role-play from the story and to give and follow instructions for paths around the classroom. The teacher will rove and question and encourage specific language and careful instructions.
In pairs or small groups, the students use the "Hairy Maclary, Scatter Cat!" book and cardboard cut out puppets to retell the story.
Provide students with plans of buildings to make with the classroom blocks. These can be drawn onto cards and could use about 5 blocks per building.
In pairs, one student holds a plan card and explains how to make the building, while the other student follows the instructions. (The second student should not be able to see the card.)
Cut outs of Hairy Maclary can then be placed in different positions on the buildings.
Students in pairs, play the game presented in Session 2.
In pairs, students play the game presented in Session 3.
Students read the big book, wall display or view the powerpoint made in Session 1.
In pairs, students give and follow instructions to move around the classroom as in Session 3. Encourage students to use turns and right and left if they are able to.
Students role-play from the story as in Session 1.
Dear family and whānau,
This week we have been learning about position and about following instructions. We know about words like ‘in front of’, ‘beside’ and so on. We also know about half and quarter turns, and left and right. Could you help your child to make up and write down, or record instructions of how to get from one place inside or outside the house to another using words like these. For instance, how can you get from your television to the kitchen sink? If you speak a language other than English at home you might talk about these direction words, and write them down for your child to bring to school We will share these in the classroom.