Using Materials
Put down four five-fly cards number side up.Ask, How many flies are on these cards altogether? (twenty)How many flies are on the back? (none)Record the operations as 4 × 5 = 20. Place more five-fly cards down to illustrate other times five facts. Focus on the relationships between fives and tens by grouping the cards in pairs:
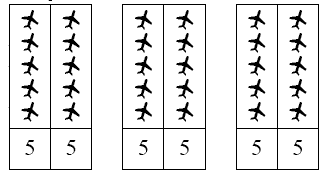
6 × 5 is the same as 3 × 10
Move to examples that show the relationships between multiples of five and other multiples through building on or taking off.
For example, place down six six-fly strips number side up. Ask, The cards show four times six but you can only see four times five. How many flies is that? (twenty). How many flies do you think will be on the back? How do you know? (four since there is one fly on the back of each card) How many flies is that altogether? (twenty and four,twenty-four)
.gif)
Record the relationship using symbols: 4 × 6 = (4 × 5) + (4 × 1)
Ask, pointing to the right-hand-side of the equation, What has happened to six on this side? Students should observe that six has been split into five and one, as in the arrangement on the Fly Flip cards.
Ask related questions by building onto the array of cards, like: 6 × 6, 8 × 6, 9 × 6, 7 × 6, 10 × 6
Pose similar problems using seven-fly and eight-fly cards. For example: 6 × 7, 4 × 7, 8 × 7, 7 × 7, 9 × 7, 4 × 8, 6 × 8, 9 × 8, 7 × 8, 8 × 8
Using Imaging
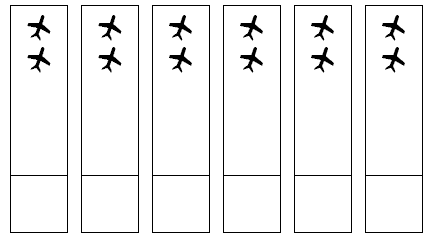
Shielding: Put out arrays using five, six, seven, or eight-fly cards placed number side down. For example:
Ask the students to write the multiplication equation for the array and work out the answer. Look for them to use part-whole reasoning and to explain their strategies. For example, “I knew that the cards were seven-fly cards because five and two is seven. There were six lots of five on the front, that’s thirty, and six twos on the back, that’s twelve. Thirty and twelve is forty-two.”
Using Number Properties
Providing the students with related problems involving larger numbers will help
them to generalise the relationships. Examples might be:
12 x 6, 20 x 6, 14 x 6, 12 x 7, 20 x 7, 11 x 8
Independent Activity
The students can play the game Fly Flip Multiplication (Material Master 6–4) to
consolidate fives groupings
Table Tricks
This is a level 3 number link activity from the Figure It Out series. It relates to Stage 6 of the Number Framework.
A PDF of the student activity is included.
Click on the image to enlarge it. Click again to close. Download PDF (208 KB)
investigate patterns in multiplication facts
FIO, Link, Number, Book Two, Table Tricks, pages 2-3
Bead frames (optional)
Each question in this activity encourages students to look within the array and partition it in such a way that they can easily find the answer. For example, 7 x 2 can be seen as the same as 5 x 2 plus 2 x 2, so a student who doesn’t already know the answer can use this idea to work it out. You might also need to explain to those students who already know that 7 x 2 = 14 that partitioning is an easy way to confirm an answer.
Each question contains a pair of related equations. This encourages the students to see a connection between the two parts of the question and to use this to find the answer. Some students may find this hard to do at first, but it’s a great way to improve their thinking skills. Many students are so used to treating each calculation
as a separate question that they may feel strange using one question to solve another. Keep encouraging them by asking them to look for the things that are the same and the things that are different in the pairs of equations. Ask them how they could use the sameness and differences to work out the answer. For example, in question 1, they will see that the difference is that the “2” rows have become “4”. The 2 has been doubled, so the answer must be doubled because everything else is the same.
The end result of using these patterns and connections is that students will develop an intuitive feel for the distributive property of multiplication and division as well as learning their facts.
Students who find the dot arrays too simple could use the same thinking to multiply larger numbers, for example, 15 x 8 = 120, so 15 x 16 = . The students could extend this thinking further by using it in related division problems. For example, 15 ÷ 5 = 3, so 30 ÷ 5 = or 120 ÷ 15 = 8, so 240 ÷ 15 = .
Answers to Activity
1. a. 2 x 7 = 14, so 4 x 7 = 28 (or double 14 to get 28)
b. 2 x 9 = 18, so 4 x 9 = 36. (18 + 18 = 36)
c. 2 x 6 = 12, so 4 x 6 = 24. (12 + 12 = 24)
d. 2 x 8 = 16, so 4 x 8 = 32. (16 + 16 = 32)
e. 2 x 5 = 10, so 4 x 5 = 20. (10 + 10 = 20)
f. 2 x 4 = 8, so 4 x 4 = 16. (8 + 8 = 16)
2. a. 2 x 6 = 12, so 3 x 6 = 18. (12 + 6 = 18)
b. 2 x 8 = 16, so 3 x 8 = 24. (16 + 8 = 24)
c. 2 x 9 = 18, so 3 x 9 = 27. (18 + 9 = 27)
d. 2 x 5 = 10, so 3 x 5 = 15. (10 + 5 = 15)
e. 2 x 7 = 14, so 3 x 7 = 21. (14 + 7 = 21)
f. 2 x 4 = 8, so 3 x 4 = 12. (8 + 4 = 12)
3. a. 3 x 5 = 15, so 6 x 5 = 30. (15 + 15 = 30)
b. 3 x 8 = 24, so 6 x 8 = 48. (24 + 24 = 48)
c. 3 x 9 = 27, so 6 x 9 = 54. (27 + 27 = 54)
d. 3 x 4 = 12, so 6 x 4 = 24. (12 + 12 = 24)
e. 3 x 7 = 21, so 6 x 7 = 42. (21 + 21 = 42)
f. 3 x 6 = 18, so 6 x 6 = 36. (18 + 18 = 36)
4. a. 10 x 7 = 70, so 9 x 7 = 63. (70 – 7 = 63)
b. 10 x 4 = 40, so 9 x 4 = 36. (40 – 4 = 36)
c. 10 x 8 = 80, so 9 x 8 = 72. (80 – 8 = 72)
d. 10 x 9 = 90, so 9 x 9 = 81. (90 – 9 = 81)
e. 10 x 3 = 30, so 9 x 3 = 27. (30 – 3 = 27)
f. 10 x 6 = 60, so 9 x 6 = 54. (60 – 6 = 54)
5. Answers may vary. The 7 times table is the
5 times table plus the 2 times table.
For example: 7 x 8 = (5 x 8) + (2 x 8)
= 40 + 16
= 56
The 8 times table is twice the 4 times table.
For example: 4 x 6 = 24, so 8 x 6 = 48
Fun with Fives
Derive multiplication facts from 2, 5 and 10 times tables.
Number Framework Stage 6
Using Materials
Put down four five-fly cards number side up.Ask, How many flies are on these cards altogether? (twenty)How many flies are on the back? (none)Record the operations as 4 × 5 = 20. Place more five-fly cards down to illustrate other times five facts. Focus on the relationships between fives and tens by grouping the cards in pairs:
6 × 5 is the same as 3 × 10
Move to examples that show the relationships between multiples of five and other multiples through building on or taking off.
For example, place down six six-fly strips number side up. Ask, The cards show four times six but you can only see four times five. How many flies is that? (twenty). How many flies do you think will be on the back? How do you know? (four since there is one fly on the back of each card) How many flies is that altogether? (twenty and four,twenty-four)
Record the relationship using symbols: 4 × 6 = (4 × 5) + (4 × 1)
Ask, pointing to the right-hand-side of the equation, What has happened to six on this side? Students should observe that six has been split into five and one, as in the arrangement on the Fly Flip cards.
Ask related questions by building onto the array of cards, like: 6 × 6, 8 × 6, 9 × 6, 7 × 6, 10 × 6
Pose similar problems using seven-fly and eight-fly cards. For example: 6 × 7, 4 × 7, 8 × 7, 7 × 7, 9 × 7, 4 × 8, 6 × 8, 9 × 8, 7 × 8, 8 × 8
Using Imaging
Shielding: Put out arrays using five, six, seven, or eight-fly cards placed number side down. For example:
Ask the students to write the multiplication equation for the array and work out the answer. Look for them to use part-whole reasoning and to explain their strategies. For example, “I knew that the cards were seven-fly cards because five and two is seven. There were six lots of five on the front, that’s thirty, and six twos on the back, that’s twelve. Thirty and twelve is forty-two.”
Using Number Properties
Providing the students with related problems involving larger numbers will help
them to generalise the relationships. Examples might be:
12 x 6, 20 x 6, 14 x 6, 12 x 7, 20 x 7, 11 x 8
Independent Activity
The students can play the game Fly Flip Multiplication (Material Master 6–4) to
consolidate fives groupings
A Little Bit More/ A Little Bit Less
Derive multiplication facts from 2, 5 and 10 times tables.
Number Framework Stage 6
Beans collected in film canisters holding ten
Plastic icecream containers.
Using Equipment
Show the students stacks of five unifix cubes and ask them to confirm the number of cubes in each stack. Show six stacks of five and ask the students to tell you how many cubes there are in total. Discuss their strategies. These should include gathering pairs of five to make tens.
Record the operation as an equation, 6 × 5 = 30.
Problem: What would I have to do to change this into six fours? (take one cube from each stack) How many cubes would I have altogether then? (thirty less six is twentyfour)
This can easily be modelled with the stacks of cubes
Pose similar problems using groupings of five to derive answers to the four and six times tables. For example: 4 × 5 = 20 so what is 4 × 6? 8 × 5 = 40 so what is 8 × 4? Use the canisters of beans to show connections between groupings with ten and nine and eleven.
Pose similar problems using groupings of fi ve to derive answers to the four and six
times tables. For example:
4 x 5 = 20, so what is 4 x 6? (20 add on 4 is 24) 8 x 5 = 40, so what is 8 x 4?
(40 take off 8 is 32)
Use cubes in groups of 10 to show the connections between groupings with 10 and 9
and 11.
Show six stacks of 10 cubes. Ask “How many cubes have I got altogether?” (60)
“How could I write this operation?” (6 x 10 = 60) “What would I do to change this
to six times nine?” (take one cube from each stack) “How many cubes would I have
then?” (60 take off 6 is 54)
Pose similar problems, such as:
4 x 10 = 40, so what is 4 x 9? 7 x 10 = 70, so what is 7 x 9?
9 x 10 = 90, so what is 9 x 9? 5 x 10 = 50, so what is 5 x 9?
Derive elevens answers from tens answers.
Model the problems with rows of cubes. For example:
Using Imaging
Shielding: Require the students to image the problems by masking the cubes with
large plastic containers. Label each container with the number involved, using
stickies.
For example:
Record each operation using multiplication equations.
Appropriate examples might be:
7 x 10 = 70 so what is 7 x 11?
8 x 5 = 40 so what is 8 x 4?
9 x 10 = 90 so what is 9 x 11?
Using Number Properties
Increase the number size so that the students need to address the number properties
rather than relying on images of the materials. Pose the problems as equations, for
example:
5 x 20 = 100 so what are 5 x 19 and 5 x 21?
4 x 30 = 120 so what are 4 x 28 and 4 x 31?
6 x 50 = 300 so what are 6 x 49 and 6 x 52?
7 x 200 = 1 400 so what are 7 x 198 and 7 x 202?
Te whānau taparau - the polygon family
This unit examines the properties of polygons and how these are related. It introduces the names in both te reo Māori and English.
This unit allows students to develop an understanding of the geometrical features of polygons and how classes of polygons are defined. It also aims to develop aspects of symmetry (reflective and rotational) through a problem solving approach.
A polygon is a planar (flat) shape that is bounded by straight sides. The relationships between sides and angles are used to create classes (groups) of shapes. In this unit students form quadrilaterals and triangles. Each class of shapes contains sub-classes. For example, a quadrilateral might have pairs of opposite parallel sides. If a quadrilateral has only one pair of parallel sides, it is called a trapezium. If it has two pairs of parallel sides, it is called parallelogram. Some parallelograms have internal angles that are right angles. That class of shapes is called rectangles. Definition, and reasoning with those definitions, is an important feature of geometric thinking.
The learning opportunities in this unit can be differentiated by providing or removing support to students, or by varying the task requirements. Ways to support students include:
Tasks can be varied in many ways including:
In this unit, mathematical language is also explored particularly in terms of te reo Māori. It is envisaged that such an exploration will give rise to descriptions that can incorporate both languages, to support students to make sense of defining properties of 2-dimensional and 3-dimensional shapes.
The unit begins with string geometry to set the scene for investigating shapes and their properties using folding and possible turning techniques. This progresses to an examination of regular polygons where te reo Māori terms are introduced. The concept of whānau or family is used to reinforce the fact that polygons are linked in a range of ways.
Te reo Māori language is embedded throughout this unit:
porowhita = circle
whānau = family
taparau = polygons
tapatoru = triangle
tapawhā = square
tapawhā whakarara = parallelogram
whitianga = diameter
pūtoro = radius
paenga = circumference
tapatoru rite = equilateral triangle
puku = tummy
e toru, nga tapatoru rite = made from 3 smaller equilateral triangles
tapawhā whakarara rite = a rhombus
taparara = trapezium
tapawhā rite = square
tapawhā hāngai = an oblong
koeko tapatoru = a triangular pyramid
ahu-3 = 3 dimensions
tapaono rite = regular hexagon
e ono, tapatoru rite = 6 equilateral triangles
Getting Started
In this session we use loops of string or elastic to form shapes according to given requirements. We then convince others that our shape meets the requirements.
Use the members of your group and the loop of string to make a shape that has four equal sides.
How did you find each of the equal length sides?
Using the string, how might you show any lines of reflective (line) symmetry?
How might you show whether the corners are right angles (without using a protractor)?
Convince another team member that your shape is correct.
What is the mathematical name for your shape?
Most groups will create squares, but some groups may create rhombi (rhombuses).
What properties must a shape have to be a square? (Four equal sides, four right angles, two pairs of parallel sides)
Are there other shapes that have four equal sides?
What are those shapes called? (Rhombi)
What are the properties of a rhombus? (“Four equal sides” is the only defining property. Note: Opposite angles are equal so there are two pairs of equal angles.)
Is a square a kind of rhombus? (Yes. It has four equal sides).
Turn various shapes so they appear differently, and ask:
Is this still a square/rhombus? Why? (Orientation does not effect the properties of the shape.)
Use the members of your group and the loop of string to make a shape that has four sides, two of which are parallel.
You may need to define parallel first before groups start work. Look up a definition online. Railway tracks are a good metaphor.
Note: In the US, a trapezium refers to a quadrilateral with no parallel sides, and some definitions of trapezium refer to at least one pair of parallel sides, therefore including parallelograms.
Is a trapezium also a type of parallelogram? (A trapezium has only one pair of parallel sides, so it is not a parallelogram).
What is true about the interior angles of an equilateral triangle? (Equal angles)
Can a triangle have one right angle? (Yes) Make a triangle like that.
Can a triangle have two right angles? (No)
Session 2
Over the next few sessions, students create Te Whānau Taparau (The Polygon Family) by transforming a circle. You could introduce the key ideas in this session using the book The Greedy Triangle, by Marilyn Burns. This session introduces a significant amount of te reo māori vocabulary. Always accompany these terms by their English translations and pictures/materials to support students’ understanding of the new terms.
The Circle
What makes a circle different from polygonal shapes, for example the triangle (tapatoru), square (tapawhā) or the parallelogram (whakarara)?
What are some names that are used to describe parts of a circle?
Use your rope and chalk to create a perfect circle.
The relationship between pae and rangiwhitu is an extension or extra investigation, usually reserved for later levels. Pi (3.14…) is the ratio of circumference to diameter, that is the circumference equals the diameter multiplied by pi.
Find the centre of your paper circle. What methods can you find?
The circle becomes an equilateral triangle
We now continue the activity to transform the circle:
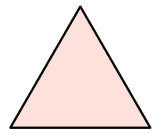
Porowhita looked in the mirror one day and decided he was getting bored of being a circle. Porowhita decided that he wanted to look just like tapatoru rite. He needs your help.
Using the circles (provided or made), fold Porowhita to make the biggest possible tapatoru rite (equilateral triangle). You may need to experiment with different ways of folding to get the largest one possible.
Focus the follow-up discussion on the rotational and reflective symmetry of the triangle.
How many lines of reflective symmetry does the triangle have?
Where are the lines located?
Does the triangle have rotational (turn) symmetry?
Why must the internal angles be equal for the shape to have rotational symmetry?
What happens if you do not fold into the centre of the circle?
Is a right-angled triangle possible? (One side to the triangle must be the diameter)
Session 3
Triangle to trapezium
As a possible way of introducing students to a trapezium, have them explore attributes of various trapezoidal shapes. Have them compare these with non-trapezoidal shapes including quadrilaterals that are parallelograms, rectangles, squares and others that are ‘nearly’ trapezoidal in shape. One approach is illustrated as follows:
Here is Hannah's work. She has sorted some quadrilateral shapes into two different categories: trapezia and not trapezia.
Hannah states that her sorting procedure is based on the relationship between one pair of sides. If just one pair of sides is parallel, then it’s a trapezium. The other pair of sides cannot be parallel.
Do the parallel sides have to be different lengths? Why? (If the side lengths are equal then the other pair of sides will be parallel. The quadrilateral will be a parallelogram not a trapezium)
Ask questions that encourage the students to focus on quadrilaterals that have one pair of parallel sides. Some students might observe that a trapezium often looks like a triangle with the top cut off leaving an edge that is parallel to the side opposite.
Explore how you might fold Tapatoru rite (equilateral triangle) to make a taparara (trapezium).
The trapezium will contain three equilateral triangles within it, that are the same size.
Let students work on the challenge in pairs.
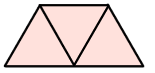
The following diagram illustrates the change to a trapezium.
Using the taparara (trapezium) that you have made:
Trapezium to rhombus
Of course, Taparara changes his identity and name and becomes known as Whakarara rite (rhombus). Some of his friends call him Rhombus.
Write two sentences that describe Whakarara rite’s appearance.
What fraction of the original tapatoru rite (equilateral triangle) is Whakarara rite? (One half)
Session 4
Rhombus to a triangular pyramid
Note that an oblong is a rectangle that is not a square. It has two pairs of parallel sides of different lengths, and four right angles.
Koeko tapatoru is not a taparau (polygon) because he is no longer flat. He is three dimensional (ahu-toru).
You might introduce some simple language of polyhedra, such as faces (flat surfaces), edges, and vertices (corners).
Triangular prism to hexagon
Find a way of folding to make a tapaono rite that is made out of six equilateral triangles (e ono, tapa toru rite).
Are all the sides equal? How do you know?
Are all the angles equal? How do you know?
What rotational and reflection symmetry does a tapaono rite have? (Six lines of reflective symmetry and rotational symmetry of order six)
Session 5
In the final session we reflect on the shapes that we have explored during the week.
Name the different shapes of the faces of your frustum.
Make some statements about some of the attributes of the shapes that go to make up the frustum.
If Tapaono rite (regular hexagon) had sides of length two, how long were the sides of the open top and the base of the frustum?
Teaching notes:
The following diagram illustrates how to change a hexagon into the frustum of a triangular pyramid.
Fold B to O, then A to O, then C to O to make a triangle shape. Lift the flaps so D and E touch, F and G touch and H and I touch.
The open top has sides of length two because these sides are the same as Tapaono rite’s sides. The base sides are of length three. You can find this by measuring. (If you are clever you can use right angled triangles to work it out without measuring.)
Dear family and whānau,
This week our class has been working on polygons. We’ve talked about them in both Māori and English. If you speak another language at home, please send in the names of different shapes (e.g. triangle, quadrilateral, hexagon, rhombus, trapezium) in your home language. We can share these in class. Ask your child to describe a porowhita, a parallelogram, a tapawhā and a taparara to you.
Problems to work on
Note: A frustum of any solid shape is made by making a cut parallel to the base and removing the top of the solid (see cone example).
Figure It Out Links
Points of View
This is a Level 3 Geometry activity from the Figure It Out Series.
A PDF of the student activity is included.
Click on the image to enlarge it. Click again to close. Download PDF (292 KB)
draw views of three dimensional shapes
FIO, Level 2-3, Geometry, Points of View, page 11
Sqaure grid paper
A classmate
Activity One
Students will need to make Zac’s building through a process of trial and improvement until their model matches the top, front, and right-side views as shown:
In more difficult problems of this type, the top view can be used to organise the data from the other views. For example, with Zac’s building, the maximum heights of each column and row of the top view are:
A further challenge to students is to be given three views of a cube building and to make an isometric drawing of it (as on page 10). For example:
Answers to Activity
Activity One
1. Answers will vary.
2.

3.