This is a level (2+ to 3+) mathematics in science contexts activity from the Figure It Out series.
A PDF of the student activity is included.
Click on the image to enlarge it. Click again to close. Download PDF (1024 KB)
Students will:
- gather data about gears
- identify and represent patterns using gear ratios
- predict the force required to turn a set of gears.
Students should discover that:
- a large cog meshed with a small cog is hard to turn but makes the small cog rotate many times
- a small cog meshed with a large cog is easy to turn but doesn’t rotate the large cog much.
a computer spreadsheet/graphing program (optional)
a pinboard and pins
different-sized plastic cogs
the recording tables (see copymaster)
a classmate
FIO, Forces, Levels 2+-3+, Gearing Up, pages 22 - 24
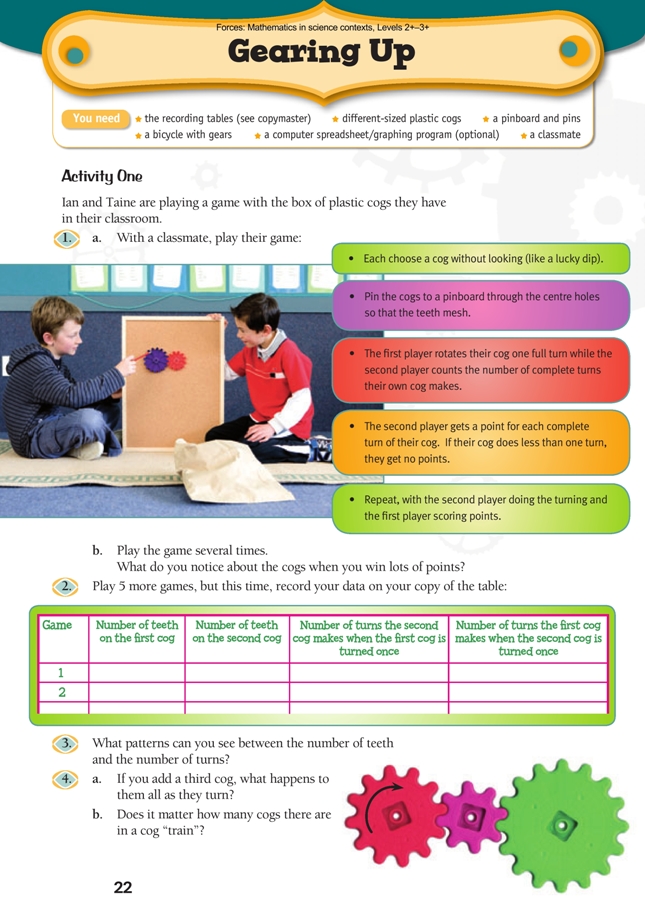
Activity One
Preparation and points to note
While ratio* is at the core of these two activities, the emphasis here is totally on building on students’ intuitive understandings (which are based on prior experience) through practical activities. You could introduce ratio notation, but only as a convenient means of labelling a particular combination of cogs or sprockets. The students are not required to use ratios in calculations.
These activities require students to interact, share ideas, and work effectively with others, so the key
competency relating to others is a suitable focus for development.
Points of entry
There is no need to introduce the game in Activity One – the students will very quickly realise what is going on. They will probably then actively feel for the smallest available cog, so any randomness will go out of the selecting. To circumvent this, you could randomly assign a number to each cog and have the students blindly select one of the numbered pieces of paper.
Ask the students to explain what they have learned from this simple game. Most importantly, they should realise that it is not the absolute size of the cogs that matters (the cog that wins one round may lose the next) but which of the two is bigger or smaller, and by how much. Some will realise that the number of teeth is a convenient way of measuring and comparing the cogs. From here, it is a short leap to the realisation that, if two cogs are meshed and one has double the teeth of the other, for every time the large cog turns, the small cog turns twice.
Answers
Activity One
1. a.–b. Practical activity. You should notice that you win lots of points if your cog is much smaller than the other player’s cog.
2. Practical activity. Your table will vary, depending on which cogs you pick. Here are some possibilities:
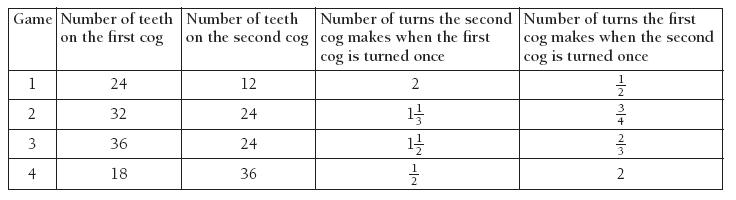
3. The number of turns is related to the number of teeth. If the first cog has twice as many teeth as the second cog, the second cog turns twice as many times as the first cog.
4. a. Adding a third cog will reverse the direction because every alternate cog turns the opposite way.
b. The number of cogs does not affect the ratio, which depends only on the first and last cog in a train.
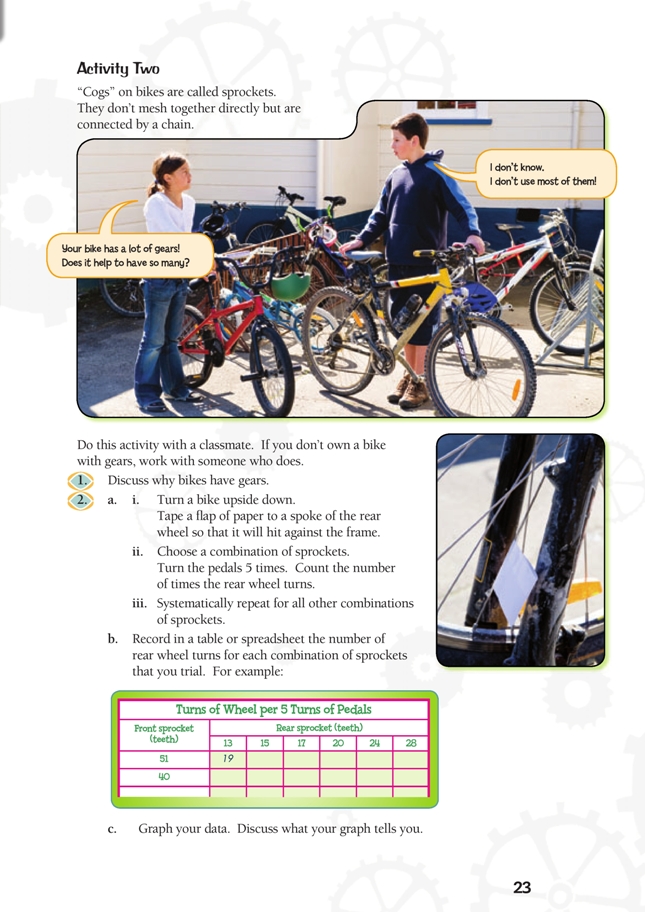
Activity Two
Preparation and points to note
This activity needs to be done in pairs. If it’s done as a whole-class activity, you will need to plan ahead to ensure that on the day there is at least one bike (with gears) for every two students. Establish protocols for the use of the bikes. These should cover safety considerations. They should also cover the conditions (including permission and care taken) on which non-owners may use others’ bikes.
Refer also to the relevant notes for Activity One.
Points of entry: Mathematics
Question 1 is designed to build on the students’ prior experience. Many will own or have ridden bikes with gears and will understand the practical benefits of gears. Some will also understand the function of the gearbox in a car, particularly if the family has a car with a manual gearbox. They are likely to know the terms first, second, third … gear and low/high gear.
Question 2 is a practical investigation. It requires students to check out all possible gear combinations on a particular bike. Depending on the bike, there may be between 10 and 27 of these. To succeed with the task, the students will need to be systematic and consistent. They have to count the number of times the rear wheel turns, so they also need to decide what to do with part turns. (Counting to the nearest complete turn is fine.)
The following example is for a bike with 2 sprockets at the front and 6 at the rear.
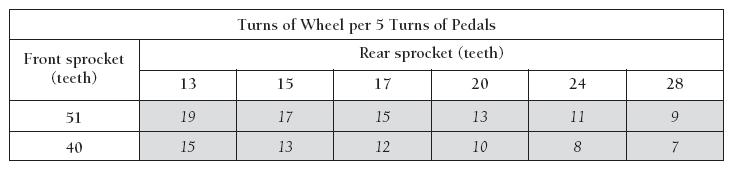
The data in the table can be graphed like this (the connecting lines are not needed but they help make the trends clearer):
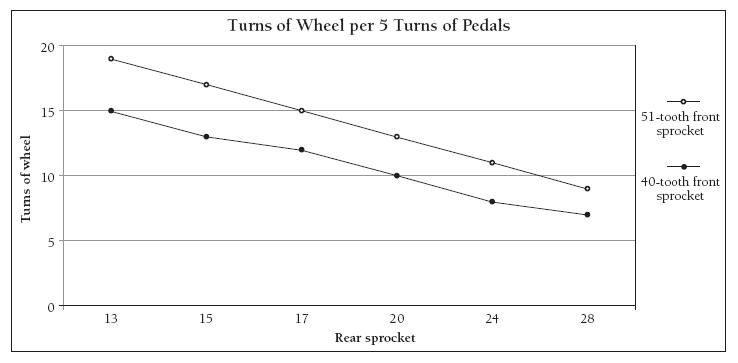
Important note: The horizontal scale is not linear (equal increments). Instead, it represents a typical cluster of gears.
Graphs will vary considerably, depending on the particular bike. But they should enable students to easily identify which gears are higher and which are lower. The above graph makes it clear that, in this example, the two highest gears use the 51-tooth front sprocket and the two lowest use the 40-tooth sprocket. Two of the gears in each series are identical or almost identical (those that turn the wheel 13 and 15 times).
Points of entry: Science
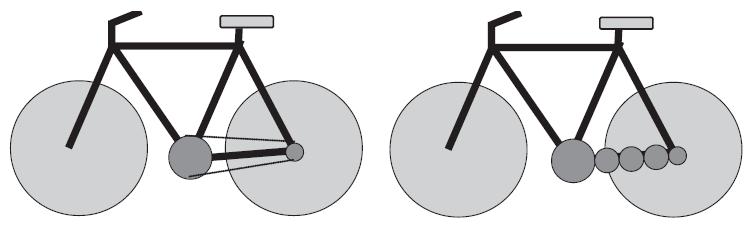
The introductory note on sprockets is an opportunity to discuss energy transfer. The chain on the bike allows the pedals and wheel to be spaced far apart without having to put extra gears in the middle. The chain does not change the gear ratio; rather, it transfers energy from the front gear to the rear. The reason we use a chain and sprocket (left-hand diagram) as opposed to cogs is that the chain removes the need for lots of cogs (righthand diagram). The gear ratios of each bike are the same (the cogs in the middle of the right-hand bike do not affect the ratio).
When you ride a bike, you do the work. Make explicit the idea of “work” in the scientific sense of force x distance. When a rider is pedalling uphill, they are working against gravity as well as against air and road friction. On a 10 metre hill, for example, it doesn’t matter which gear is used: the amount of work will be the same. Using a lower gear spreads out the work over a longer time.
Making Better Sense of the Physical World explains the advantage of gears for bikes very clearly:
When cycling uphill, it helps to have gears. Like levers, gears give a mechanical advantage and make pedalling easier. It is important that students realise that gears give no more power – they just spread the effort over a greater distance, making the wheels turn less for each turn of the pedals. Gears can also operate the other way. When you cycle in high gear along the flat, you are concentrating the effort into a short distance and moving the load further. In this case, the wheel turns more for each turn of the pedals. This means that pedalling takes more effort but the wheels carry you further and faster.
Making Better Sense of the Physical World, p. 115
Bikes with 21 and 18 gears usually have the same bottom and top gear, but the 21-gear bike has a greater number of combinations in between, which gives the rider more options when it comes to fi nding an “ideal” gear in any circumstances. Competitive cyclists can customise the sprocket combinations on their bikes.
Answers
Activity Two
1. Answers will vary. Gears make it easier to cope with different conditions or terrain, such as riding uphill or long distances.
2. a.–c. Practical activity. Results and graphs will vary. Compare your graph with those of other classmates and discuss what overall patterns they show.
Your graph should show that lower gear ratios turn the rear wheel less and higher ratios turn the wheel more. Your graph should slope up and to the right because as you increase the ratio, you increase the number of times the wheel goes around for 5 turns of the pedals.
3. a. Practical activity
b. i.–ii. Practical activity. The easiest gear should be 1st gear, with the smallest sprocket at the front and the largest sprocket at the back. The hardest gear should be top gear, with the largest sprocket at the front and the smallest in the back.
iii. Higher gears require more force than lower gears because in a high gear, you are moving the wheel further for each turn of the pedal. In other words, the rear wheel is doing more work, so you
need to apply more force!
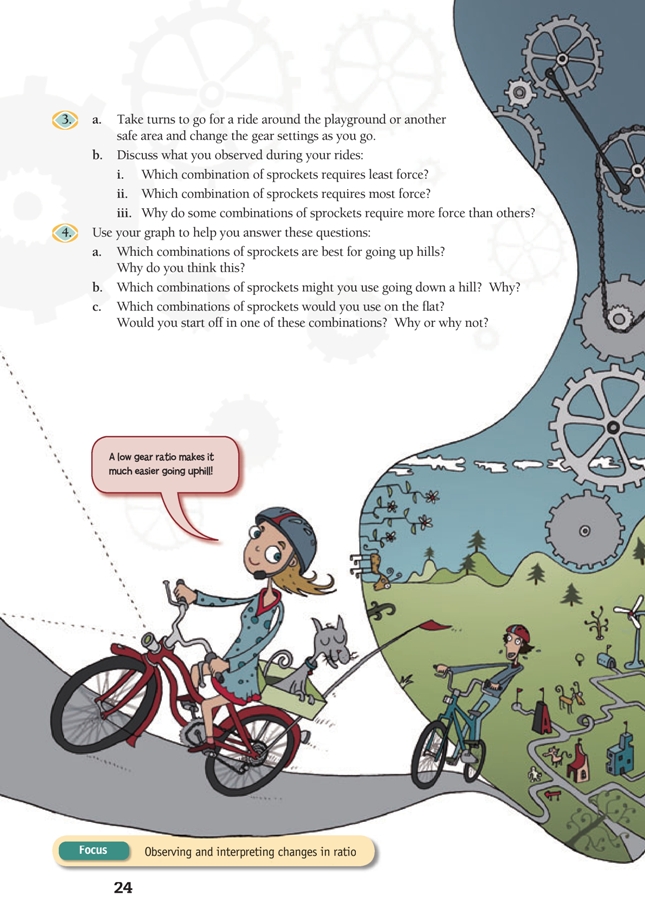
4. a. A cyclist going up a hill uses a low gear ratio because the effort required to pedal is greatly reduced. The trade-off is that there is less forward speed, so it takes longer to get from point A to point B.
b. If in gear when going down a hill, you would use a high gear ratio. Normally, you would “freewheel” downhill, using your brakes to slow down when necessary.
c. Discussion will vary, especially if you do some practical experiments. How hard you want to work will be a factor. In general, you would start off in an intermediate gear so that it’s easy to get the bike moving and then shift up to go faster. Starting in a high gear requires a lot of force on the rider’s part. Starting in a low gear means that the rider pedals very fast but travels very slowly.