This is a level (2+ to 3+) mathematics in science contexts activity from the Figure It Out series.
A PDF of the student activity is included.
Click on the image to enlarge it. Click again to close. Download PDF (1554 KB)
Students will:
- multiply and divide to find quantities of bricks for given lengths, heights, and areas.
Students should discover that:
- area is the product of length by width; volume is the product of length by width by height.
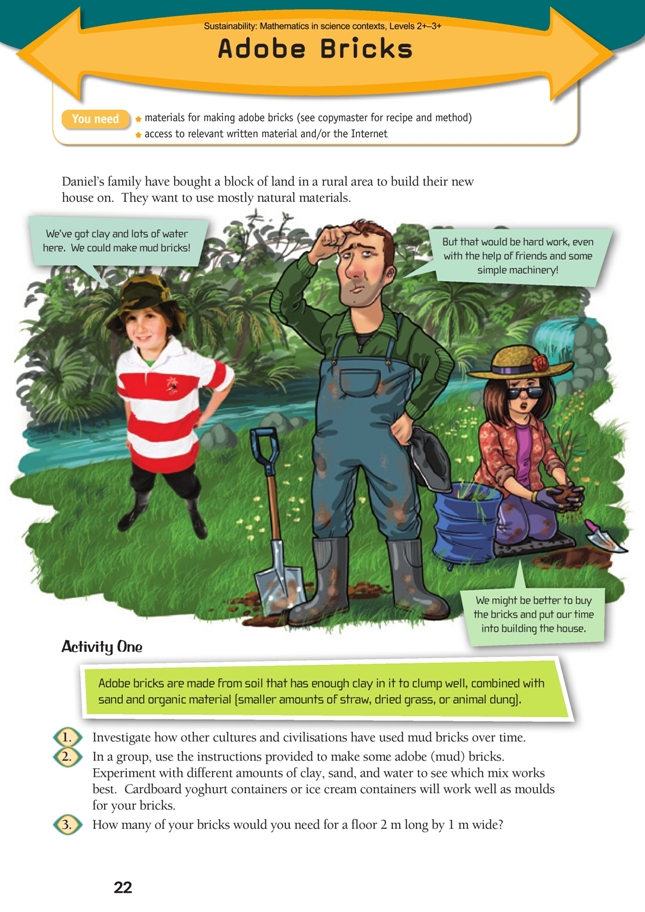
FIO, Sustainability, Levels 2+-3+, Adobe Bricks, pages 22 - 23
materials for making adobe bricks (see copymaster for recipe and method)
Preparation and points to note
Before the students start this activity, you may want to experiment yourself to find the best mix of ingredients.
Making the bricks requires the students to work together on a practical project that may throw up unexpected challenges and problems. To progress, they will need to share their ideas. The solutions will not necessarily come from the student who is a natural leader or the most talkative! The key competency participating and contributing is suggested as a suitable focus.
Points of entry: Mathematics
The various tasks in these activities involve “how many …?” questions. There are two complications to be aware of: the units of measurement are not all the same, and the numbers don’t always go into each other exactly.
The flooring question lends itself to a tiling approach. It may help to measure or mark off an area of floor or asphalt that is 2 m by 1 m. One or more mud bricks or brick-sized cardboard rectangles will help students who need the support of materials. If necessary, encourage them to move from a 1-brick-at-a-time additive strategy to a multiplicative strategy and to generalise their method. They could apply their generalised method to bricks of different dimensions.
The students need to work with both centimetres and metres. In this case, it is probably easier to use
centimetres as the working unit. Understanding how common metric units relate to each other is crucial when it comes to making sense of most tasks that involve measurement and estimation. A metre ruler is the single most useful benchmark; if students can clearly visualise its size and its divisions into centimetres, this will help them in countless mathematical and real-life situations.
What if a length is not a tidy multiple of the corresponding brick dimension? In such situations, the students need to get into the habit of going back to the practicalities of the context: is 1 under or 1 over the best choice? Clearly, in this case, Daniel and his dad don’t want a gap at the end of every other row where a whole brick won’t fi t, so wherever they need a part-brick, they will have to use a whole brick and chip the required length off it. In contrast, in most packing-type problems, “1 under” is the correct decision because it is not usual to cut items to fi t them in a box and you can’t fi t more items into a box than the box will hold.
The estimation exercise involves making a number of assumptions, including what allowance to make for breakage. The students could end up with quite different estimates. Some estimates are likely to be better than others; what matters most is that the students can provide a rationale for their estimate and that they can articulate this rationale to another student or group.
Relate the brick dimensions to area and volume. Ask: Does the orientation of the bricks matter? What assumptions did you or Daniel’s dad make about the orientation of the bricks in the wall?
Points of entry: Science
The students should try to compare the properties of bricks made with different proportions of ingredients and in different sizes. Ask: What are the important properties of bricks? Why should bricks all be the same size? Why not make bigger bricks?
Making good mud bricks is not as simple as it might seem. The students should discover that not all “mud” (clay) has suitable qualities. Excess water is likely to cause cracks. Air temperatures and drying speed are important factors. These variables can be investigated scientifi cally. For example, to fi nd out how long it takes for bricks to dry right through, a brick could be “sacrifi ced” (split in two) each week. Data should be kept of any investigation. This could be used as part of a class or school display.
Possible further investigations include: Why are mud bricks often regarded as eco-friendly? Are mud bricks a real option for New Zealand, or are they unsuitable in an environment that receives a lot of rain?
Answers
Activity One
1. Investigations will vary. Cultures that used mud bricks include ancient Egypt, Rome, Sumeria, and Native Americans (especially Peruvian pyramid builders). Mud bricks are still an important building material in many parts of the world.
2. Bricks and recipes will vary.
3. The number of bricks needed will depend on their size.
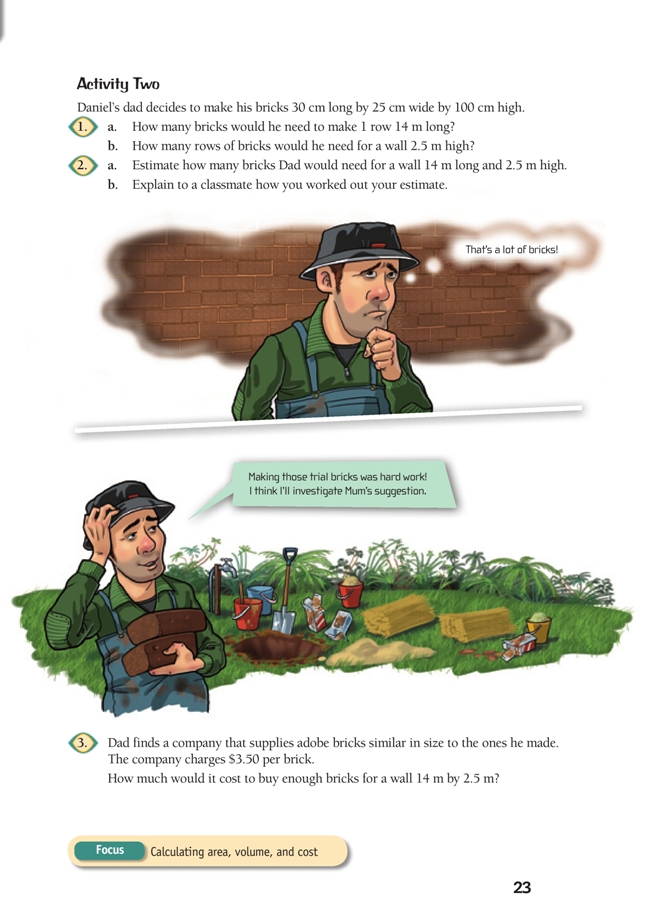
Activity Two
1. a. If the bricks are laid lengthwise, 47 will be needed (1 400 ÷ 30 = 46.67).
b. 25 rows. (250 ÷ 10 = 25)
2. a. One suitable estimate would be 50 x 25 = 1 250. (50 is the nearest tidy number to 47. 4 x 25 = 100, so 40 x 25 = 1 000; 10 x 25 = 250, so 50 x 25 = 1 000 + 250 = 1 250. Estimating 50 bricks per row leaves 3 “spares” per row, which allows for breakages. This may not be enough if the bricks break easily.)
b. Your estimate and method may be different from that provided. Make sure that you can explain how you used your answers to question 1 to come up with your estimate.
3. At $3.50 per brick, 1 250 bricks would cost $4,375.