All about us
This unit provides you with a range of opportunities to assess the entry level of achievement of your students.
- Use groupings to efficiently count the number of objects in a set.
- Create picture graphs about category data and discuss patterns in the data.
- Create and follow instructions to make a model made with shapes.
- Order a set of objects by mass (weight).
- Create a sequential pattern and predict further members of the pattern.
The learning opportunities in this unit can be differentiated by providing or removing support to students and by varying the task requirements. Ways to support students include:
- having a range of different sized objects in containers for session 1. Use larger objects for students who are beginning to count one-to-one and smaller objects for those who are more confident
- reducing the number of activities covered in a session so that more time can be spent on the earlier ideas. For example in session 5, ensure students are confident about identifying the next element in the pattern before connecting the pattern to ordinal positions
- using a class recording book instead of the individual records that are suggested as part of each session.
The context for this unit can be adapted to suit the interests and experiences of your students. For example:
- In session 1 use counting objects that can be found locally (shells, pebbles, acorns, leaves).
- In session 2 use activities/sports that students in your class engage in.
- In session 3, te reo Māori vocabulary terms such as porowhita (circle), tapawhā rite (square), and tapatoru (triangle) could be introduced and used in this unit and used throughout other mathematical learning.
- In session 5 create patterns using pictures of native birds such as Tuī and Kererū or natural materials found locally (shells, pebbles, acorns, leaves).
- camera to record students’ work.
- Session One – Countable objects, e.g. counters, cubes, toy animals, natural resources (shells, pebbles, leaves, acrons), post it notes or small pieces of paper.
- Session Two – Scissors, glue sticks, plastic containers (2L icecream if possible), large sheets of paper, copies of Copymaster 1 and Copymaster 2.
- Session Three – sets of geometric shapes (pattern or logic blocks), pieces of card for labels.
- Session Four – balance scales (if available) or make balances from coathangers, string and pegs (to hold items), kitchen scales, preferably that are sensitive to about 500g (optional).
- Session Five – images and objects to form patterns, (images of native birds, natural resources (shells, pebbles, leaves, acorns), copies of Copymaster 3 to make pattern strips.
Prior Experience
It is expected that students will present a range of prior experience of working with numbers, geometric shapes, measurement, and data. Students are expected to be able to count a small set of objects by ones, at least.
Session One
In this first session students explore an activity called ‘Handfuls' which was first developed by Ann Gervasoni from Monash University, Melbourne. Handfuls could become a regular part of lessons during the year.
- Ignite the students' prior knowledge by asking them what they already know about mathematics. Discuss the purpose of the unit, which is to find out some information about the class and use it to help them with their maths learning.
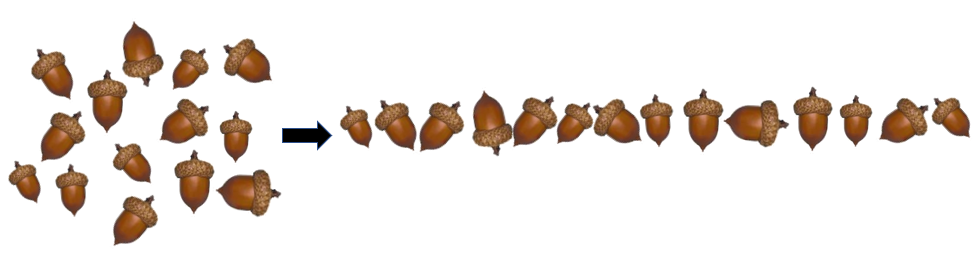
- Begin the 'Handfuls' activity by modeling taking a handful of objects from a container. Place the collection on the mat in a disorganised arrangement.
- Estimate how many things you got in your handful (You may need to explain that an estimate is an educated guess).
- Ask your students to write the number on a small piece of paper and show it to you. This is a way to see who can write numbers, avoids calling out, and buys time for students to think.
How can we check how many things there are?
- An obvious first approach is to count by ones. Organising the objects in a line then touching each one as it is counted is a supportive approach.
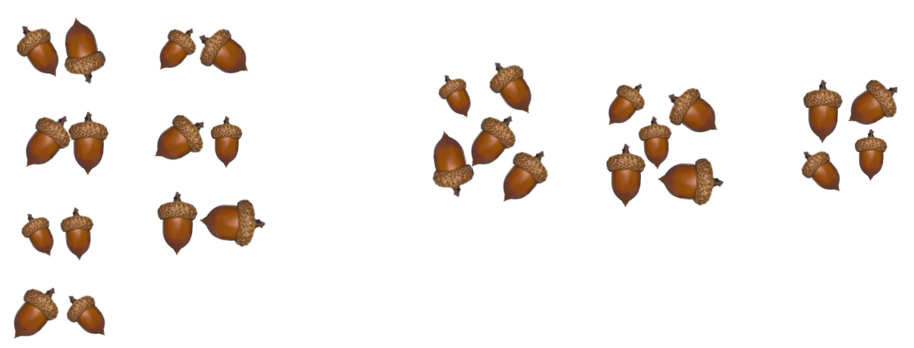
- Look for students to suggest other ways, such as counting in twos or fives. Students can find skip counting difficult in several ways; not realising that counting in composites gives the same result as counting in ones, not knowing the skip counting sequence, and dealing with the ‘leftovers’. What to do with leftovers is an interesting discussion topic.
- Tell the students that you want them next to take their own handfuls. Ask the students to record on paper how they counted their collection, particularly what groupings they used. Tell them to count their handfuls in at least two different ways. Try to take photographs of the handfuls for use in the group discussion.
- Observe as you wander around to see if students can:
- Reliably organise their collections and count in ones
- Use composites like twos, fives and tens to skip count collections
- Use tens and ones groupings to count the collections, using place value.
- After all the students have taken handfuls and recorded their counting methods, use one of these two methods to extend the task:
- Let students travel to the handful collections of other students, estimate or count how many things are in the collection, then compare their methods with that of the original student. The recording of the original student can be turned over then revealed after the visitor has estimated and counted.
- Share the recording strategies students created as a class. Use photographs to drive discussion about the best counting strategies for given collections.
- Apply the counting strategies to two questions:
- Can you get more in a handful with your preferred hand than your other hand?
- Can you get more in a handful when the things are bigger or smaller?
- Discuss what their ‘preferred hand’ is, that is, are they right or left handed? You might act out taking a handful with your other hand and comparing the number of objects you got with your preferred hand. You might also demonstrate getting a handful or small things, then a handful of larger things. Ask students to predict what will happen, then go off to explore the two questions. Suggest recording on the same pieces of paper so they can compare other handfuls to the original attempt.
- After a suitable time, ask the students to re-gather as a class with their recording sheets. Discuss possible answers to the questions. Interesting questions might be:
- What side are our preferred hands?
- Do we always get the same number in a handful if we use the same hand?
- How big are objects that are too hard to gather in a handful?
- You might make a display of the recording sheets for other students to look at. Other variations of the handfuls task might be:
- Students try different ways to increase the number of objects they can gather in one handful.
- Exploring one more or less than a given handful.
- Using tens frames or dice patterns to support counting the objects in a handful.
- Gather multiple handfuls and counting.
- Sharing a handful into equal groups
Session Two
In this session, called “Our Favourites” students explore category data and how it might be displayed. The data comes from their responses, so the displays provide useful information about the class. You may wish to replace the images provided in Copymaster 1 with images of sports that you know are popular with your students.
- Begin by asking the students to choose which of the sports shown on Copymaster 1 they like to play the most. Provide the students with copies of the strips to cut out the square of their choice. It is important that each student makes a single choice, cuts out the square and not the picture, and places it in the container in the centre.
- Once all of the data is in, tip the contents of the container on the mat.
If we want to find out the favourite sport, what could we do?
- Students usually suggest sorting the squares into category piles. A set display like that is a legitimate way to present the data.
Could we arrange the squares, so it is easier to see which sport has the most and the least squares?
- Students might suggest putting the squares in line with a common baseline (starting point). They might suggest a ‘ruler’ alongside, so it is not necessary to count the squares in each category. They might suggest arranging the categories in ascending or descending order of frequency and adding a title and axis labels.
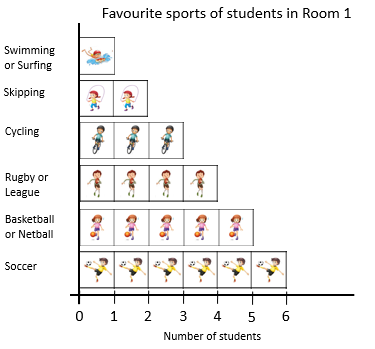
- Create the picture graph on a large piece of paper by gluing the squares in place. Display the graph in a prominent place.
The students will now choose other ‘favourites’ to use as data. Copymaster 2 provides some strips of favourites including favourite fruit, fast food, pet, vegetable, way to travel to school, and after school pastime. You may wish to create your own strips using ‘favourites’ that are relevant to your group of students.
- If using prepare copies of Copymaster 2, cut the copies into strips and put each set of strips with a container and several pairs of scissors. Spread the containers out throughout the room. The students visit each ‘station’ and make a choice by cutting out a square and putting the square into the container. You may need to discuss what each strip is about before students do this.
- Once the data gathering is complete put the students into small groups with a set of data to work on. Remind them to create a display that tells someone else about which category is the most and least favourite. Watch to see if your students can:
- sort the data into categories
- display the data using a common baseline and possibly a scale
- label each category and provide a title for the graph
- After a suitable period, bring the class together to discuss what the data displays show. Can your students make statements about…?
- highest and lowest frequencies
- equal frequencies
- patterns in the distribution, such as the way it is shaped
- inferences about why the patterns might be, e.g. It is summer so people might like vegetables like tomatoes.
Session Three
In this session your students use the language of two-dimensional shapes to provide instructions to other students. The use of te reo Māori vocabulary for shapes could also be introduced and used within this session.
You need multiple sets of shapes. Ideally there is a set of shapes for each pair or trio of students. Attribute blocks are used below to illustrate the activity but other shape-based materials such as those below are equally effective.
“Make Me” is an activity that can be used throughout the year with different materials to develop your students’ fluency in using geometric language for shape and movement.
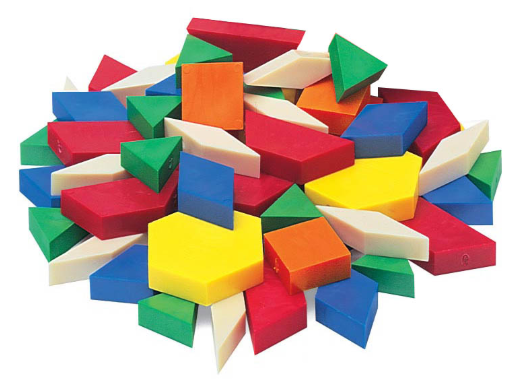 | 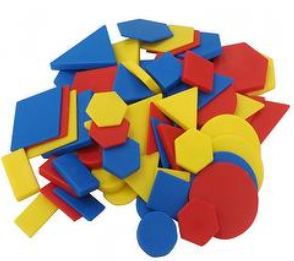 | 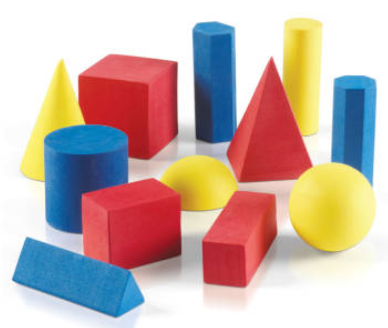 |
| Pattern Blocks | Logic (Attribute) Blocks | Geometric Solids |
- Begin by discussing the shapes in a set. Ask questions like:
- What shape is this? How do you know?
- What is the te reo Māori name for this shape?
- What features does the shape have to have to be called a …?
- Draw students’ attention to features like sides and corners. You might also venture into symmetry if you have a mirror available.
Where could I put the mirror, but it still looks like the whole shape?
Use two shapes positioned together to draw out the language of position. For example:
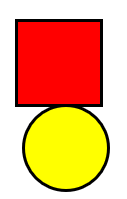
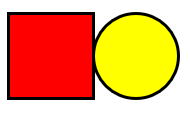
The porowhita/circle is below the tapawhā rite/square. The porowhita is in front of the tapawhā rite. The circle is on the
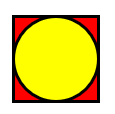
right side of the square.- Show students how to play the “Make Me” game. Create an arrangement of four shapes. Here is an example:
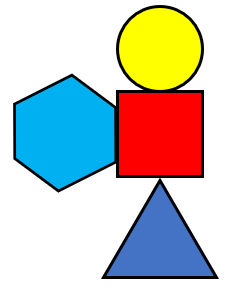
- Ask students to give you instructions so you can make this arrangement using your set of shapes. Respond to what students tell you very literally. For example, if they say “The circle is on top of the square” you might put the circle in front of the square. An important point is that the person giving instructions cannot point or touch the blocks. Encourage the students to use the te reo Māori words for the shapes.
- Next, ask a student to arrange three or four blocks in a place that nobody else can see. Send a different student to look at the arrangement and come back to tell you how to make it. The instruction giver may need to make return trips to the arrangement to remember exactly how it looks. At the end, check to see that what you make matches the original arrangement.
- Students then work in pairs or threes, each with a set of shapes. You go to a place they cannot see and arrange a set of shapes. Be mindful of drawing out the need for students to use language about features of shapes (side, corner) and position (right, left, above, below, etc.). One student from each team is the instruction giver, the other students are the makers. The instruction giver views the arrangement and returns to the group as many times as they need. The makers act on the instructions. When they feel the arrangement is correct the whole team can check with the original. Make sure each student has an opportunity to be the instruction giver.
Look to see whether your students:- give precise instructions using correct names for shapes, features and position
- act appropriately to instructions for action with shapes.
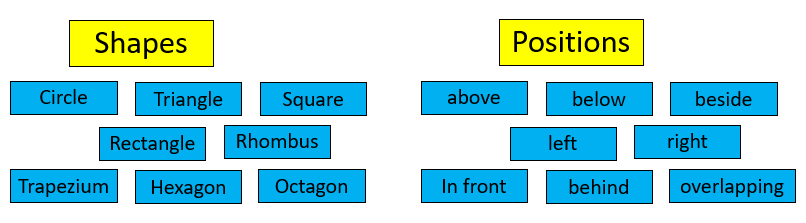
- Students can independently make their own arrangements of shapes. Take photographs of the arrangements. Use one or two images to help students to reflect on the intentions of the session. Create a list of important words for display including the te reo Māori words (not all may be relevant to your set of shapes):
- Students could write a set of instructions to build an arrangement from a photograph. This might also be done as a class if the literacy demands are too high.
Session Four
In this session students compare items by mass (weight).
- Begin by asking students what the words light and heavy mean. Ask a couple of students to find a light object in the classroom and identify a heavy object. Young students frequently identify heavy as immovable so expect them to point out bookshelves and other objects they cannot personally move.
- Get two objects from around the room that are similar but not equal in mass.
How could we find out which thing is heavier?
Students usually suggest that the objects can be compared by hefting, that is holding one object in each hand.
- You might have several students heft the objects to see if there is a consistent judgment.
What can we say about the weight of these two objects?
Look for statements like, “The book is heavier than the stapler,” or “The stapler is lighter than the book.”
- Create two cards with the words “lighter” and “heavier” and set them a distance apart on the mat.
- Next, get a collection of five objects of different weights and appearances.
Let’s put these objects in order of weight. Who thinks they could do that?
- Let students come up and heft the objects and place them somewhere on the lighter to heavier continuum. Be aware of these issues:
- Students may have trouble controlling the order relations. Ordering five objects by twos involves complex logic.
- Objects of equal weight (or indiscernible difference in weight) occupy the same spot on the continuum.
- Size, as in volume, is not a good indicator of weight. Small objects, such as rocks, can be heavier than big objects, such as empty plastic containers.
- After the five objects are placed on a continuum, give the students a personal task.
I want you to find five things from around the classroom and put them in order of weight. You can use hefting if you want but we have other balances you can use. You will need to record for us, so we know the order of the objects.
- Let the students order their five chosen items and record their findings.
Look to see if your students can:- Recognise which of two items is heavier by hefting or using a balance.
- Co-ordinate the pairs of objects to get all five objects in order.
- After a suitable time, gather the class to compare their findings and discuss issues that arose. Frequently, students are surprised that similar looking items do not have the same weight. Crayons, glue sticks and books are good items to illustrate the point that the same kind of objects does not mean equal weight.
Session Five
In this session students look for repeating patterns and connect elements in the pattern with ordinal numbers.
- Demonstrate creating four different repeating patterns using geometric shapes, images of native birds, natural materials, etc. At the end of each pattern progression ask questions like:
- What do you notice about the pattern? (You are looking for students to see the element of repeat)
- What comes next?
- What object will be at … number 10? … number 15?... etc. (You are looking for students to apply generalisation about the element of repeat, e.g. All even numbers have a red square.)
- Ensure that patterns 3 and 4 have two variables and the sequence is different for those variables. For example, in pattern 3 geometric shapes could be used to show shape and colour variable (e.g. a yellow, red, yellow, red… colour sequence while shape could have a circle, hexagon, rectangle, circle, hexagon, rectangle, … sequence) and in pattern 4 images of native birds could be used to show animal and orientation variables (e.g. Kiwi, Tuī, Kererū, Takahe, … sequence while orientation could be a right, left, right, left, … sequence).
- Provide students with a range of materials to form sequential patterns with. The items might include milk lids, blocks, toy plastic animals, locally sourced natural resources, images of native birds, geometric shapes, etc. Give them a copy of the strip that can be made from Copymaster 3 after it is enlarged onto A3 size (x 1.41).
- Let students create their own patterns. Look for students to:
- create and extend an element of repeat
- use one or more variables in their pattern
- predict ahead what objects will be for given ordinal numbers, e.g. The 16th object.
- Take photographs of the patterns to create a book, and ask students to pose problems about their patterns. Students can record the answers to their problem on the back of the page.
- Discuss as a class how to predict further members of a pattern. Strategies might include:
- Create a word sequence for each variable, e.g. blue, yellow, red, blue, yellow, red...
- Use skip counting sequences to predict further members, e.g. If the colour sequence is blue, yellow, blue, yellow,… then every block in the ordinal sequence 2, 4, 6, … etc. is yellow.
Dear parents and caregivers,
For the first week of school our mathematics unit is about us. We will investigate efficient ways to count a set of objects, create graphs of data about ourselves, order objects by mass (weight), build models of shapes from instructions, and create our own sequential patterns.